
How do I manage onboarding, probation and exits in Tazk Payroll?
Open HRMS → Employee Lifecycle. Onboarding adds or invites new hires and tracks probation, with a Confirm button when it ends. Lifecycle Events records confirmations, promotions, transfers, increments, separations and rehires. Separation & FnF settles Full & Final once a separation is approved, Relieved Employees keeps the record of everyone who has left, and Timeline shows any employee's full history.
What tabs does Employee Lifecycle have?
Dashboard · Onboarding · Lifecycle Events · Separation & FnF · Relieved Employees · Timeline · Checklist Config.
What does the lifecycle dashboard show?

Lifecycle Overview ("Hiring to exit across every tab — click any tile, stage or card to open the details") for the last 6, 12 or 24 months:
- Cards — Active Headcount (with net change), Joiners, Leavers, Attrition (leavers ÷ average headcount), Probation Review (overdue and due in 15 days), Active Separations (in notice / exit), Pending FnF (settlements open) and Movements this month.
- Employee journey — where everyone is right now: Invited (self-onboarding), Onboarding (checklist open), Probation, Active, Separating, FnF (to settle) and Relieved (with average tenure).
- Workforce movement — Talent flow (joined above the line, left below, the line is net change) and Employment mix by employment type, followed by onboarding, event, separation and exit charts.
Click any card or stage to open the matching tab. The refresh button reloads the figures.
How do I onboard a new employee?
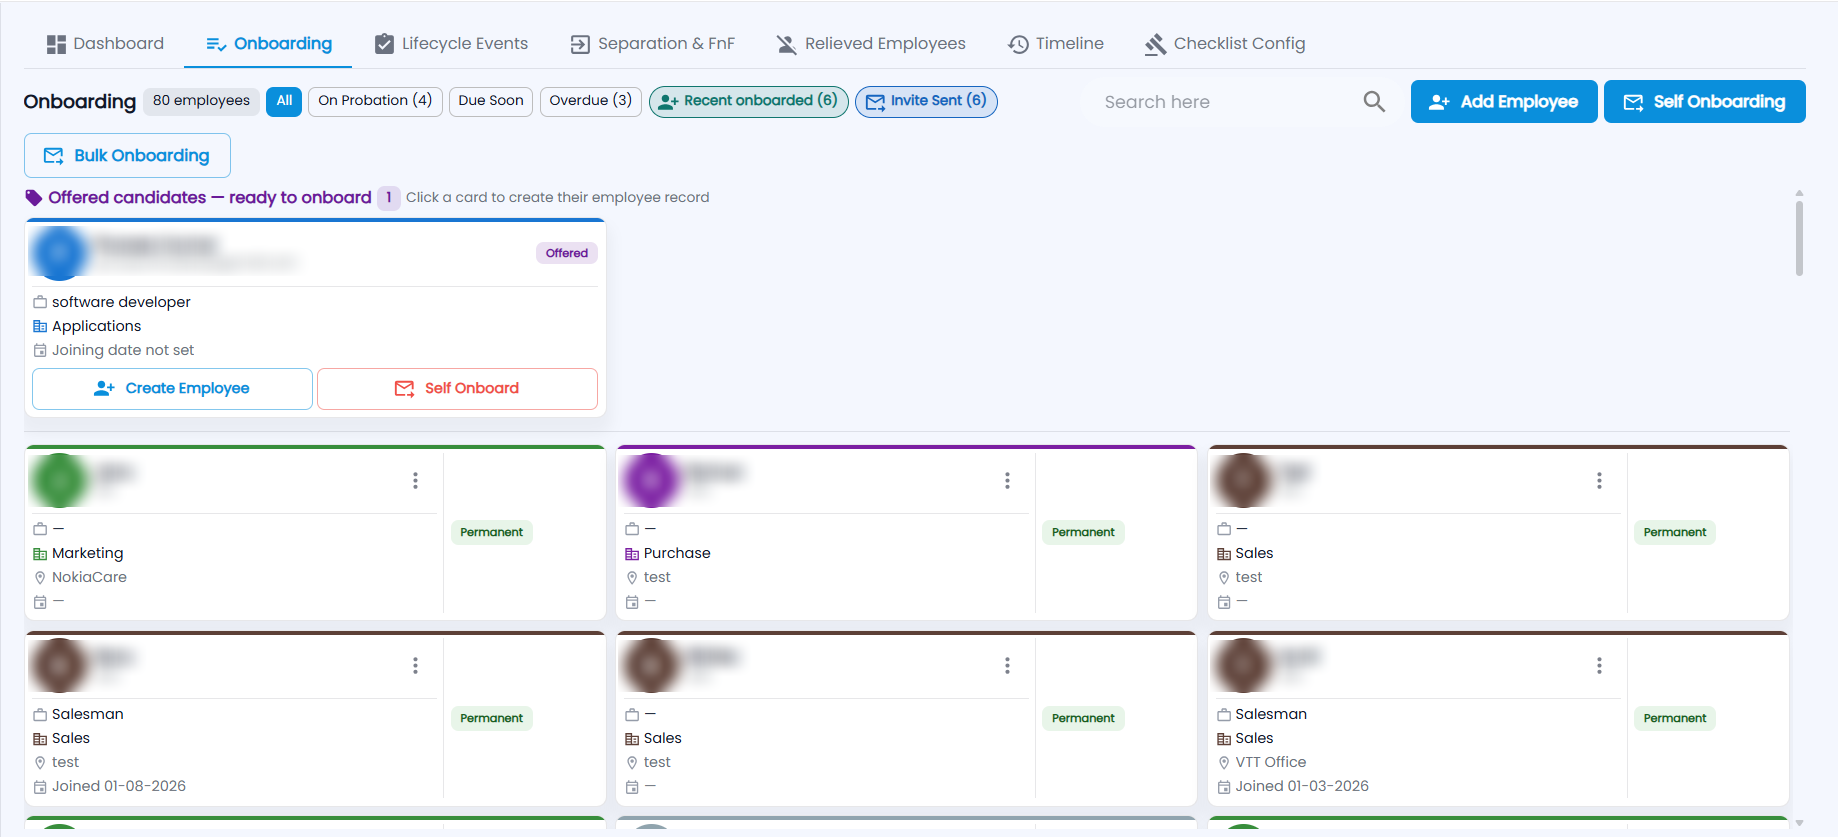
The Onboarding tab shows every employee as a card with their designation, department, location, joining date and employment type. Filter with All, On Probation, Due Soon, Overdue, Recent onboarded and Invite Sent, or search. Then choose:
- Add Employee — opens the full New Employee form.
- Self Onboarding — invites one person to fill in their own details (see below).
- Bulk Onboarding — invites a batch of hires in three steps: batch details, the hires, result.
Accepted Recruitment candidates appear under Offered candidates — ready to onboard; click Create Employee or Self Onboard on the card. Each employee card's ⋮ menu has View Profile, Checklist and Invite to self-onboard.
How do I invite an employee to self-onboard?
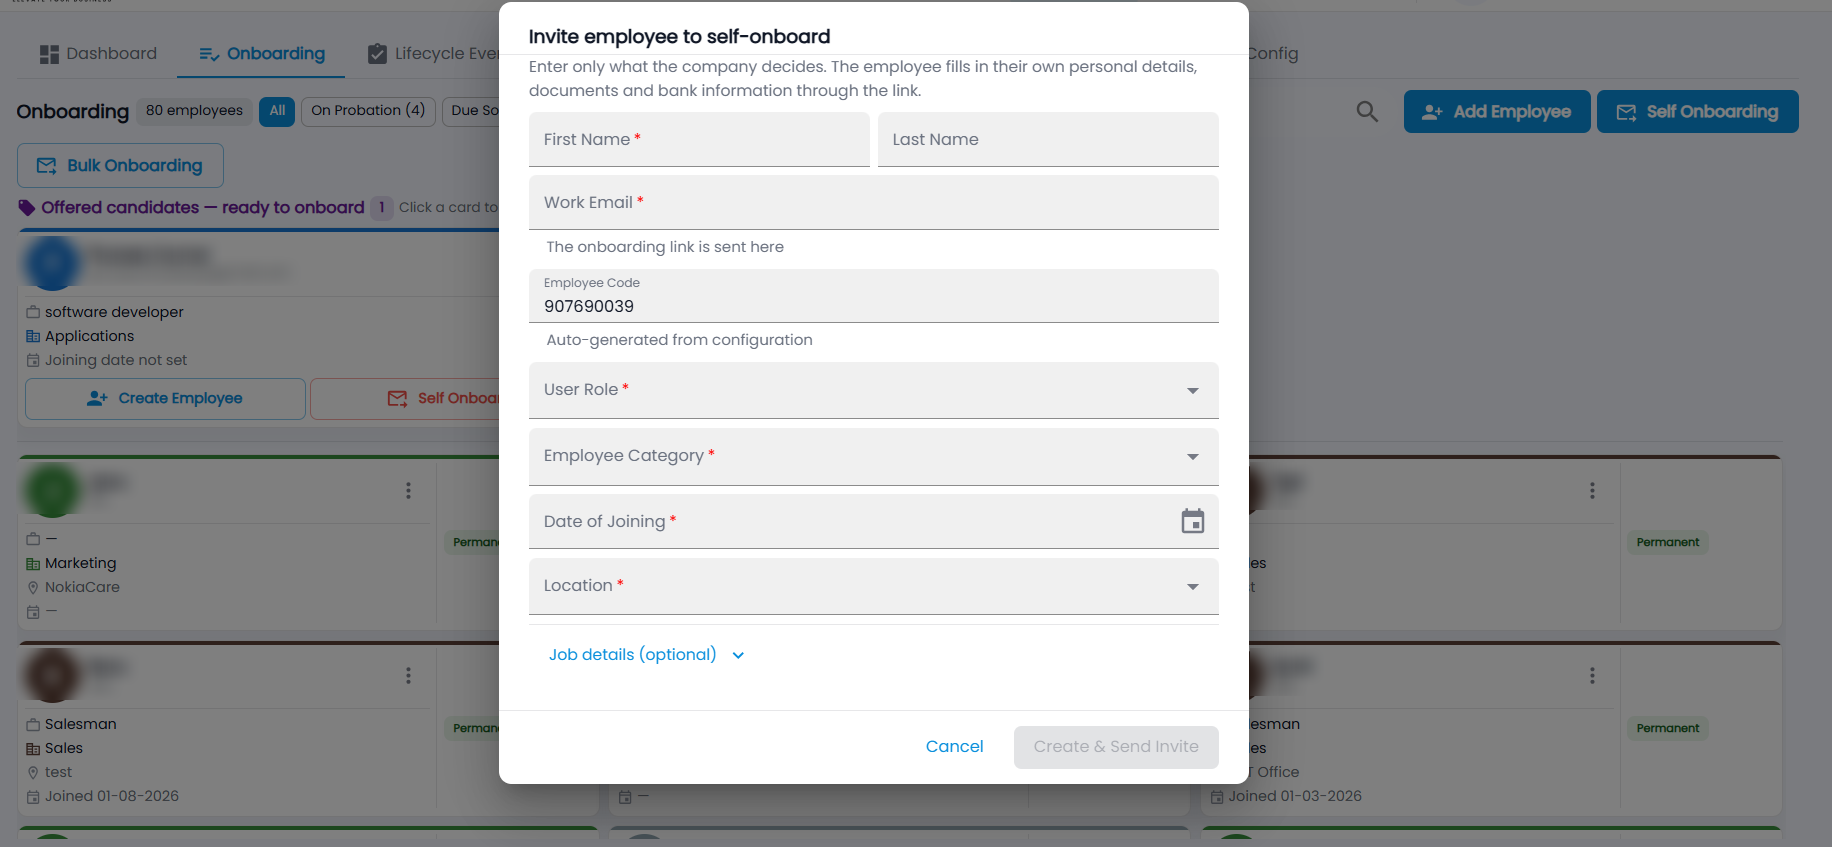
- Click Self Onboarding. Enter only what the company decides — the employee fills in their own personal details, documents and bank information through the link.
- Enter the First Name (and last name) and the Work Email — the onboarding link is sent there.
- Check the Employee Code (auto-generated from configuration).
- Choose the User Role, Employee Category, Date of Joining and Location. Open Job details (optional) for department and designation.
- Click Create & Send Invite. The card shows under Invite Sent until the employee completes it.
How do I confirm an employee after probation?
- On Onboarding, filter On Probation, Due Soon or Overdue and find the card.
- Click Confirm, set the confirmation date and the category to move them to, and optionally a new designation.
- To change pay at the same time, tick Assign a new salary structure and pick the structure and effective date.
- Click Confirm (or Confirm & Assign).
How do I record a promotion, transfer or increment?
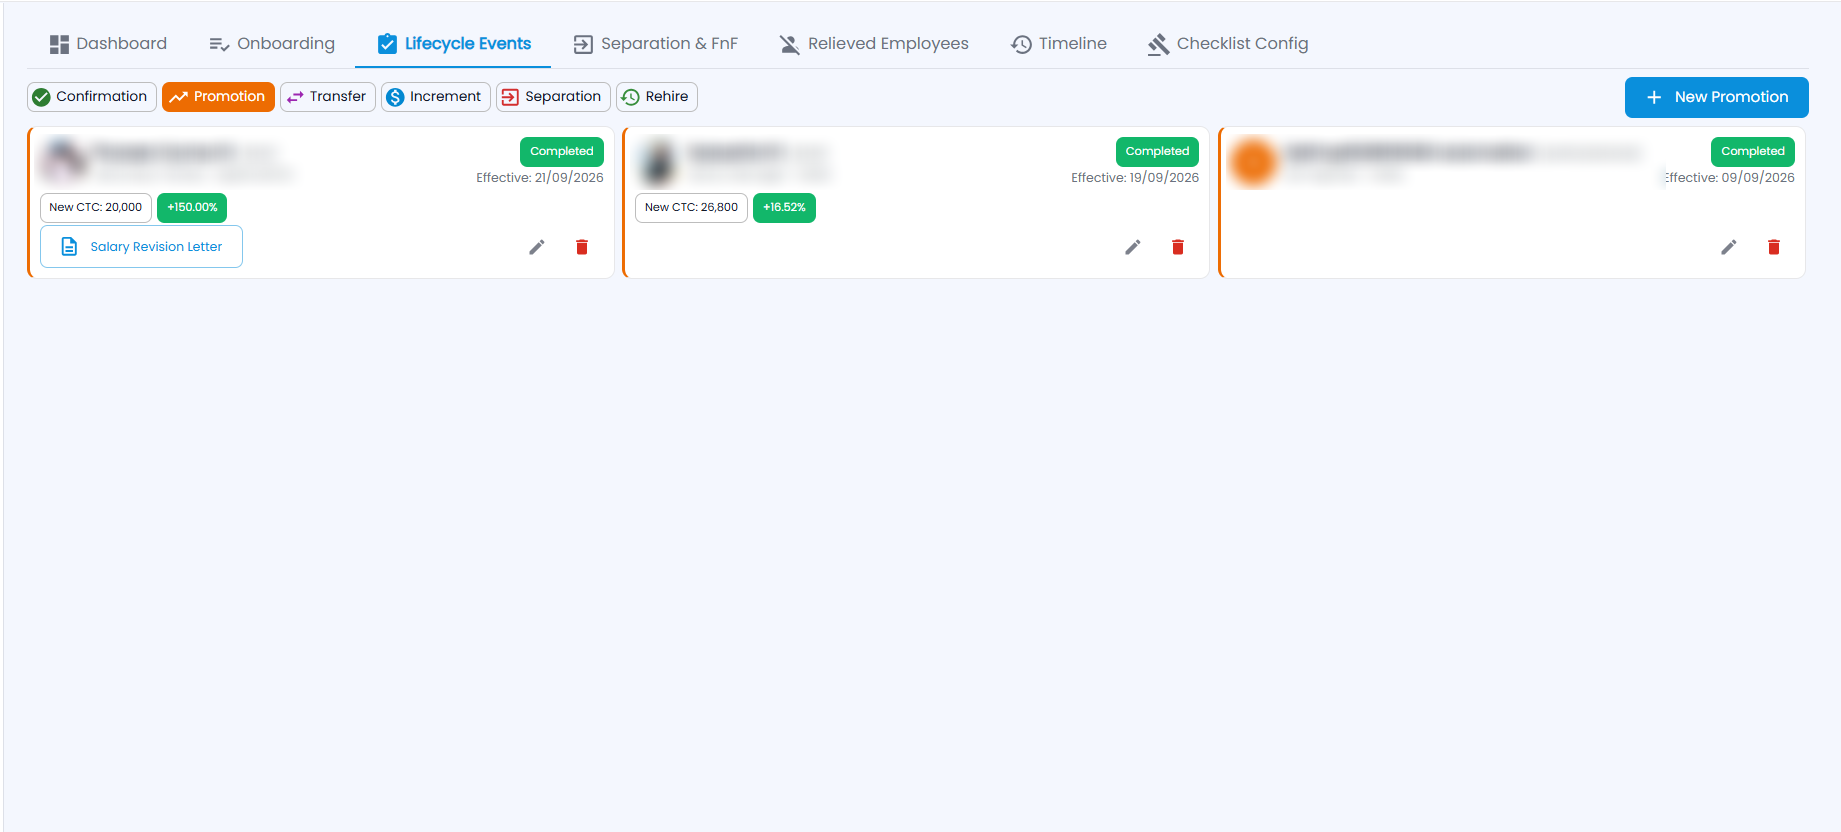
Pick the event type — Confirmation, Promotion, Transfer, Increment, Separation or Rehire. Each event card shows the employee, status, effective date and, for pay changes, the new CTC and % change, with edit and delete.
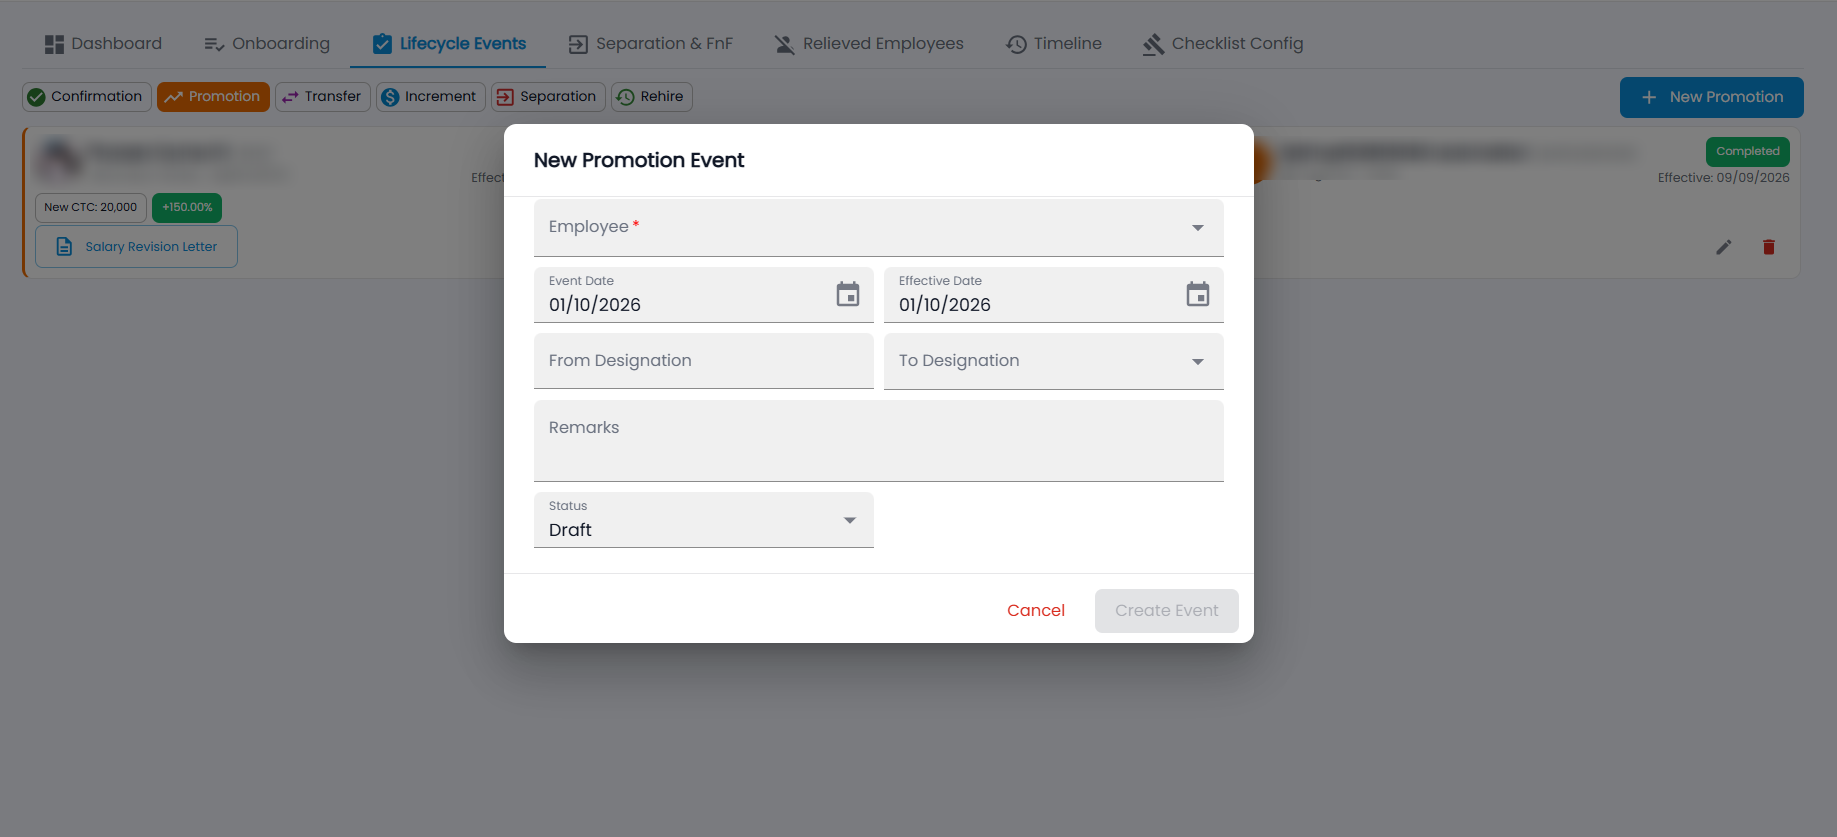
- Click New … (for example New Promotion).
- Choose the Employee, the Event Date and Effective Date, and the from / to designation (or department, location for a transfer). An increment asks for the increment %.
- Add remarks, leave the Status as Draft or set it, and click Create Event.
- Move it on with Submit for Approval → Approve → Mark Completed.
A completed increment or promotion with a salary structure has a Salary Revision Letter button — Preview, Download PDF or Send Email. It uses the salary revision letter template in Document Templates.
How do I process a separation and Full & Final?
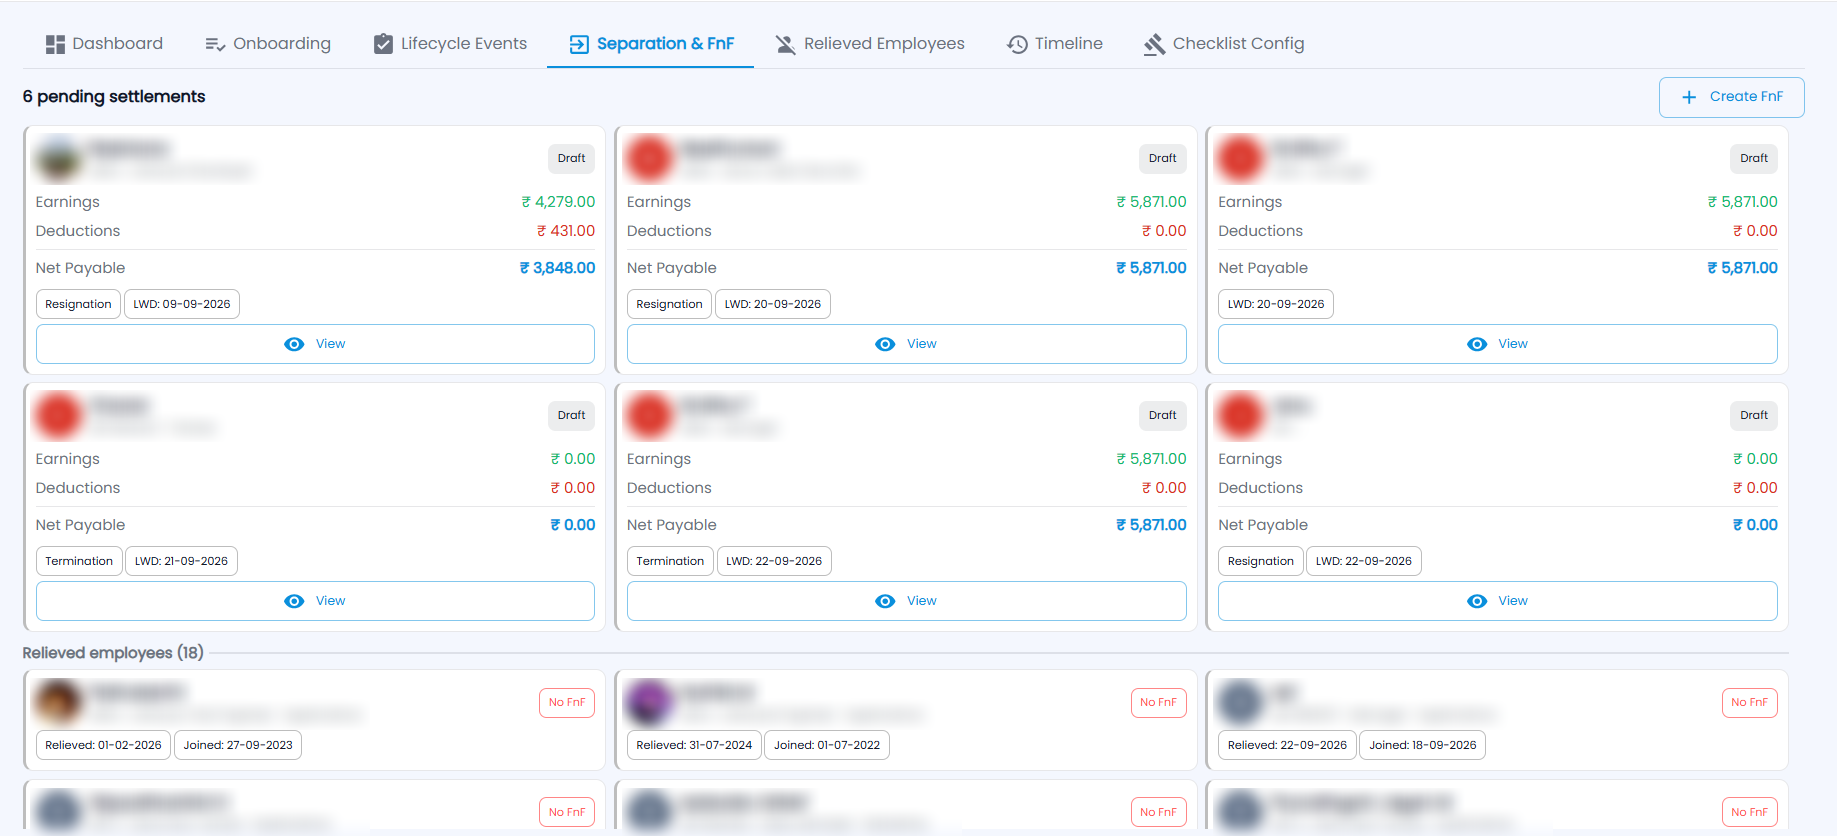
Record a Separation event with the type (resignation, termination, retirement, absconding or contract end) and the last working date. Once it is approved, a settlement appears on Separation & FnF ("N pending settlements") with its earnings, deductions, net payable, separation type and LWD. Relieved employees without a settlement are listed underneath as No FnF.
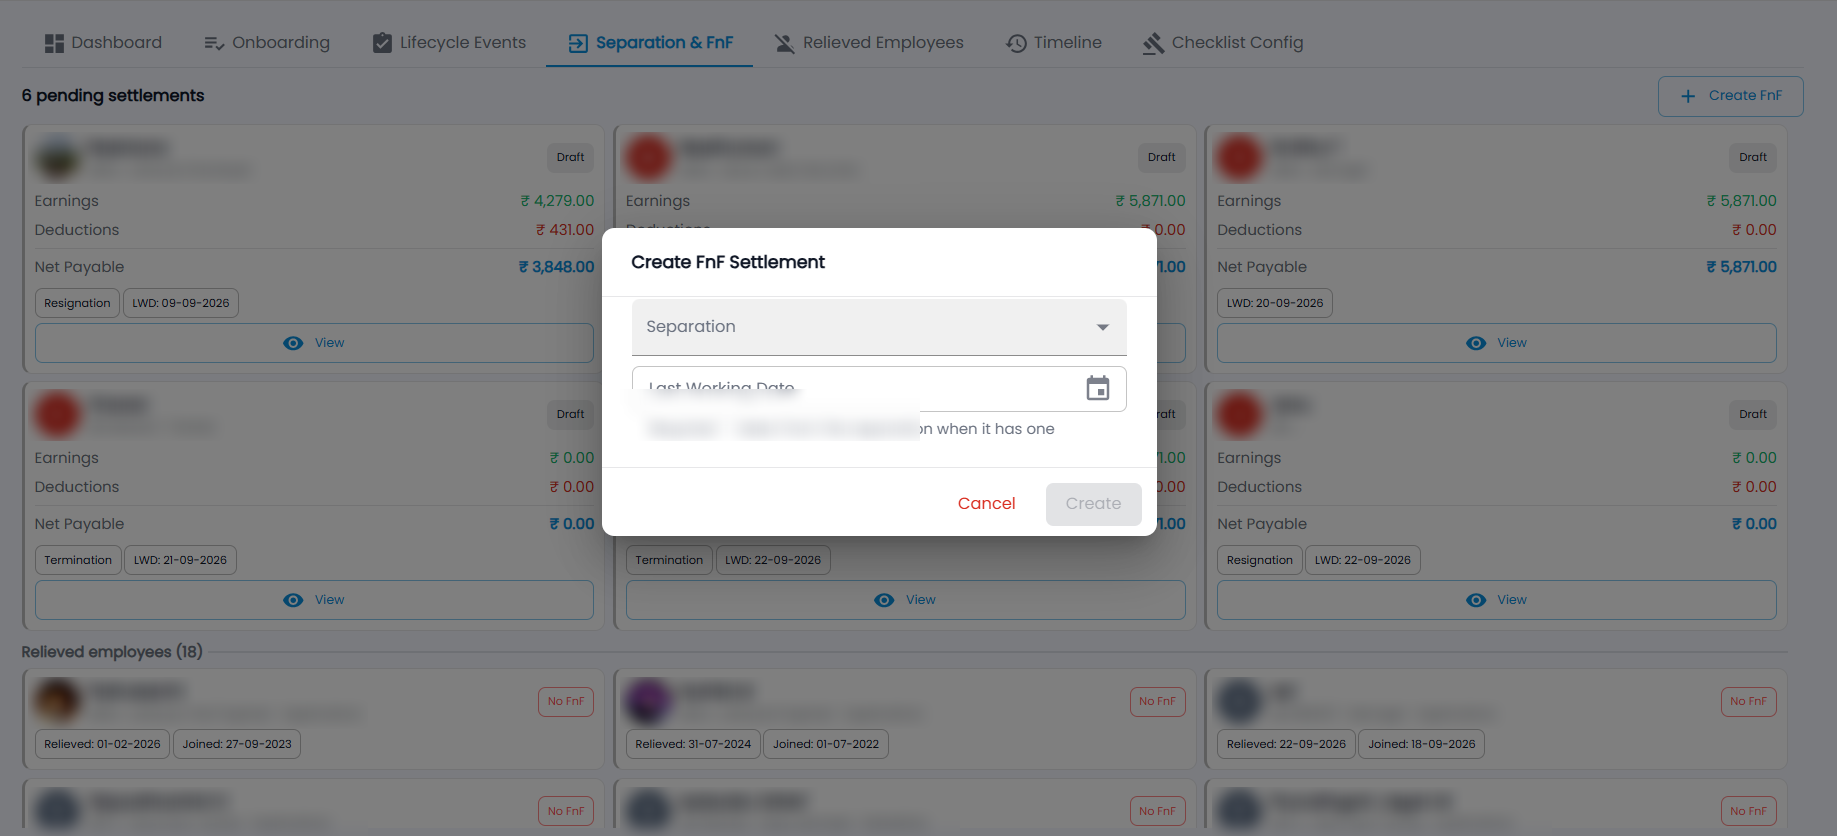
- To start one yourself, click Create FnF, choose the Separation and the Last Working Date (taken from the separation when it has one), and click Create.
- Click View on the card and fill in earnings (pending salary, leave encashment, bonus, gratuity) and deductions (notice period, loan, advance and asset recovery).
- Approve, then Mark Paid with the payment date and reference.
Where can I see employees who have left?
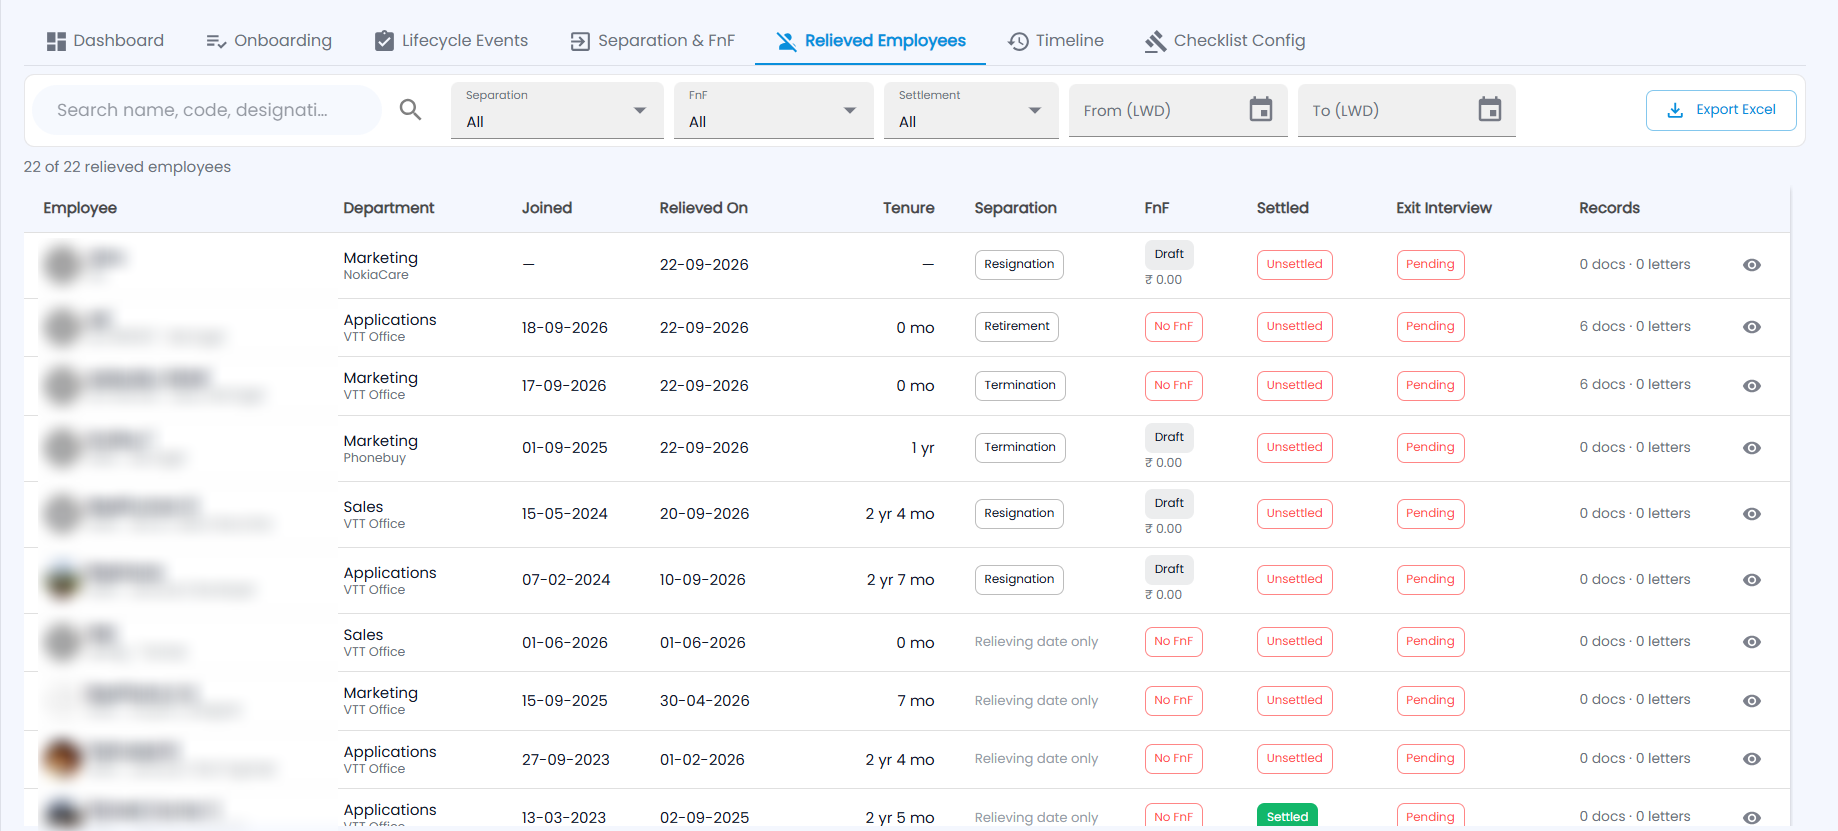
Relieved Employees lists everyone who has left, with department, joined and relieved dates, tenure, separation type, FnF status, Settled / Unsettled, exit interview status and how many documents and letters they have. Search by name, code or designation, filter by Separation, FnF, Settlement and last working date range, and click Export Excel. Click the eye icon for their timeline, documents, letters and FnF.
How do I see an employee's full history?
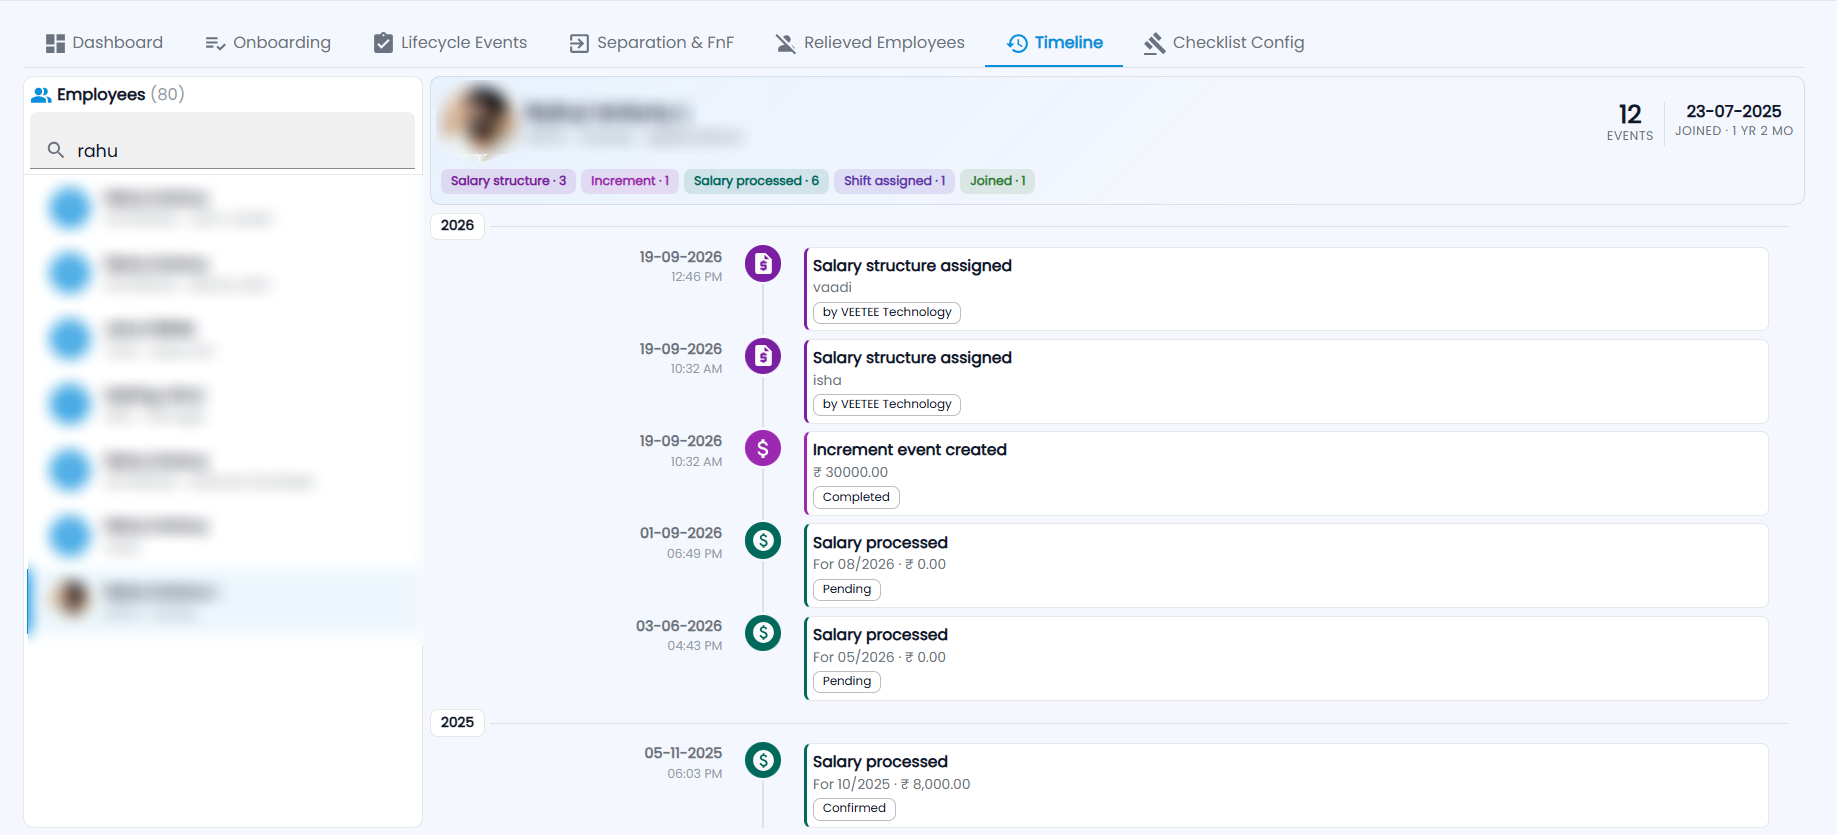
Open Timeline, search for the employee on the left and click them. The header shows the number of events and the joining date and tenure, with chips per event type (for example Salary structure, Increment, Salary processed, Shift assigned, Joined). Below, every event is listed by year — date and time, what happened, details and who did it.
How do I set up the onboarding checklist?
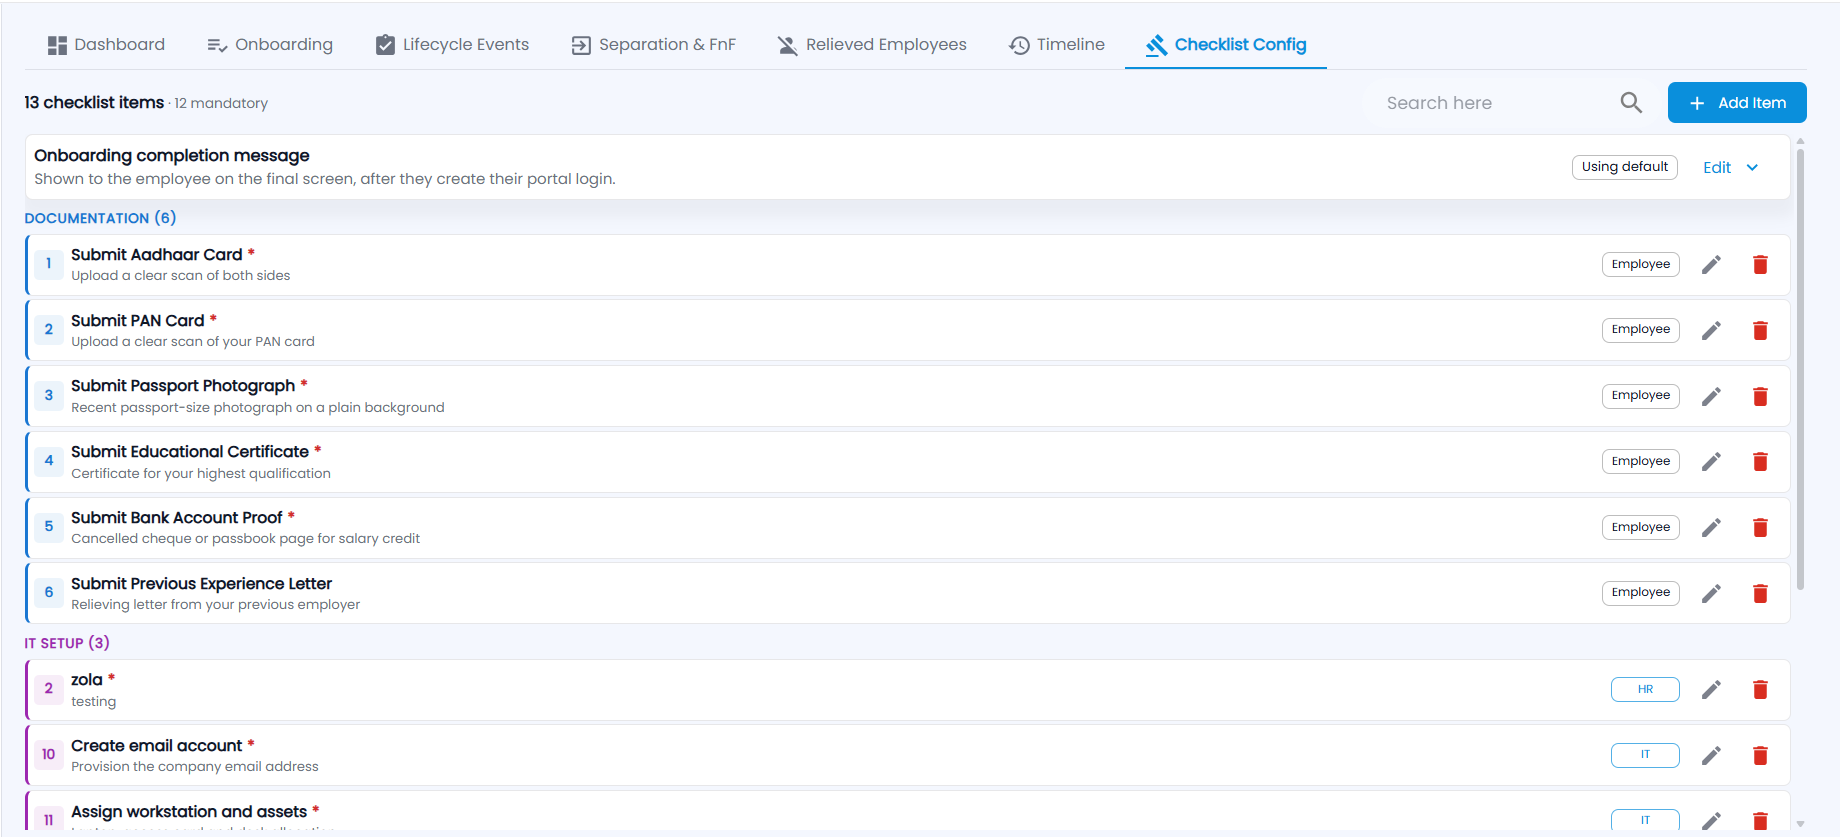
Checklist Config lists the checklist items ("13 checklist items · 12 mandatory") by category — Documentation, IT Setup, HR Formalities and so on — each with its responsible party (Employee, HR, IT, Manager) and edit and delete. Mandatory items are marked *. Onboarding completion message is shown to the employee on the final screen after they create their portal login — click Edit to change it.
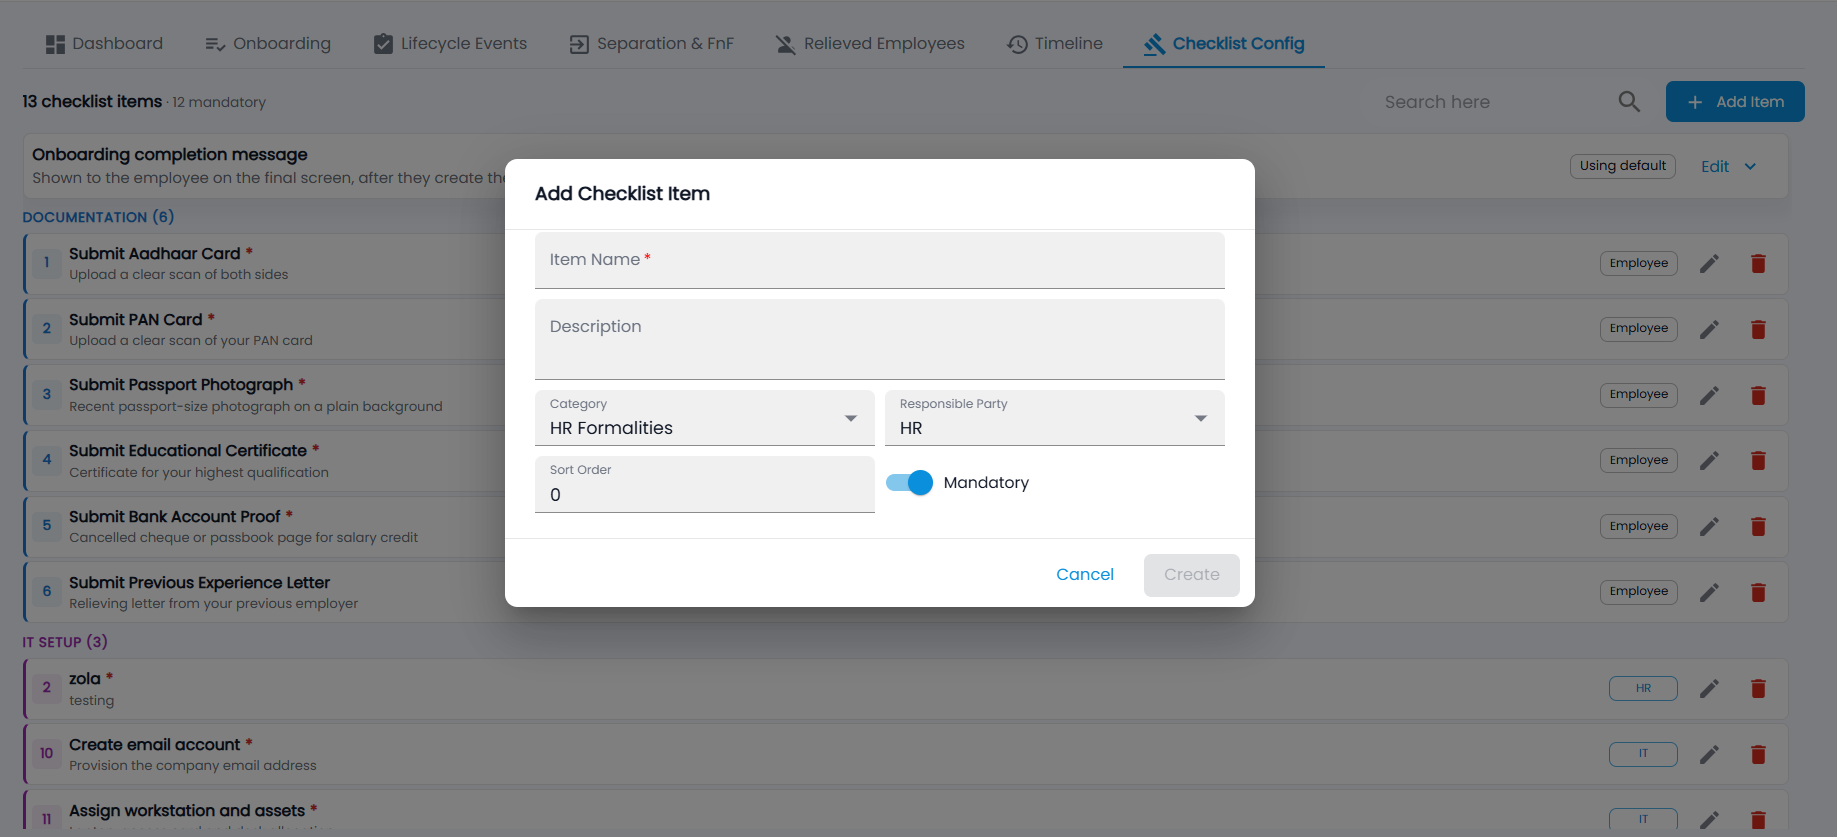
- Click Add Item.
- Enter the Item Name and a description, choose the Category and the Responsible Party, set the Sort Order, and turn Mandatory on or off.
- Click Create.
On an employee's card, open the menu → Checklist to see and tick off their items.