
How do I add a user in Tazk POS?
Open Settings → Users and click +. The New User form has three steps: Personal Info (name, gender, phone, work email and personal and contact details), Application Info (user name, password, role and location) and Payroll Info. Click Continue after each step and save at the end. The user can then sign in with that user name.
What does the Users list show?
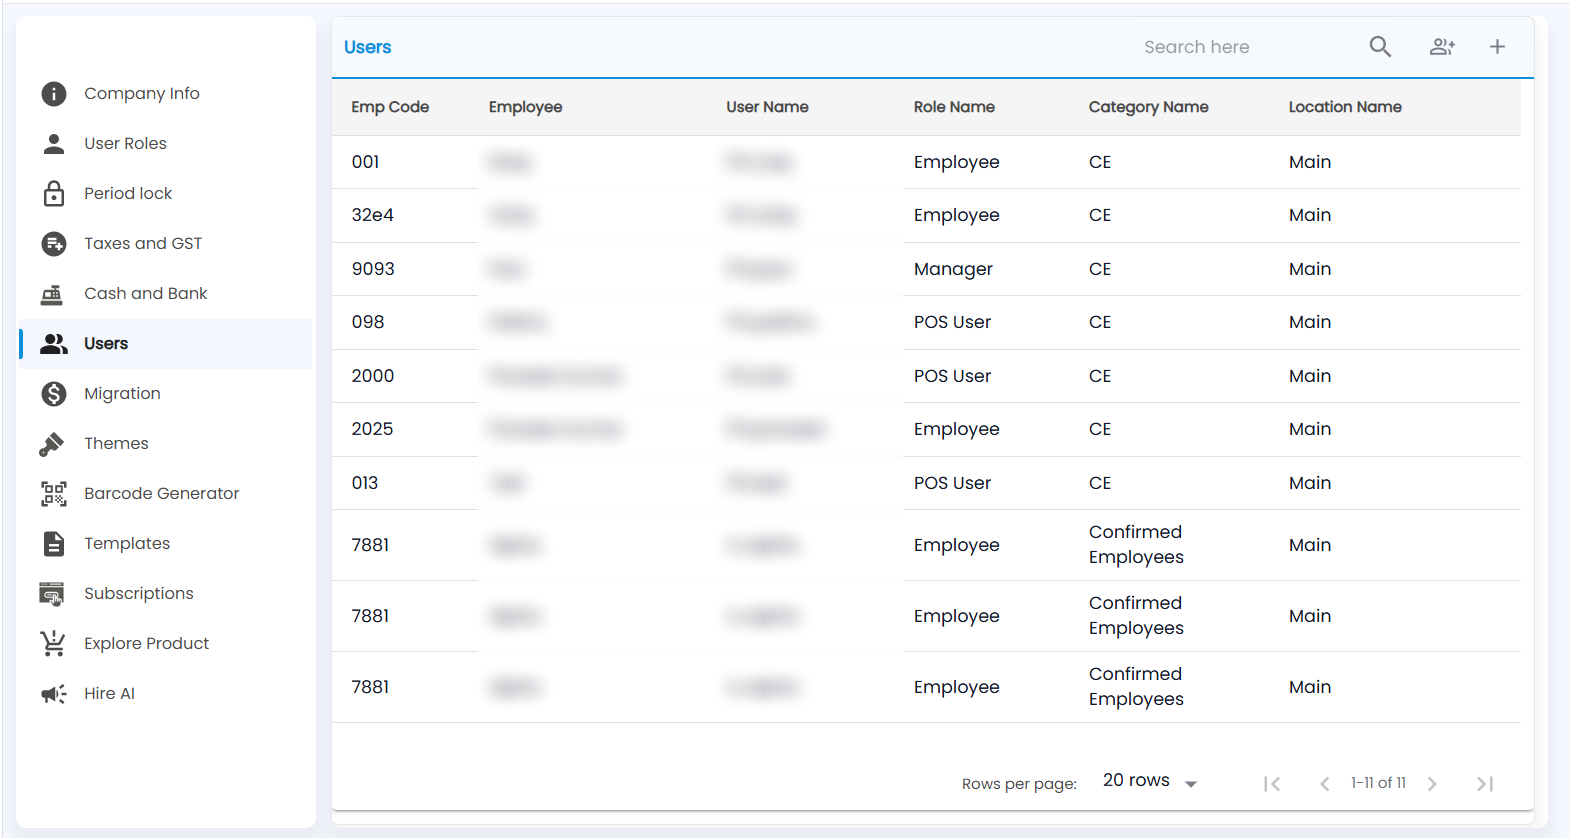
Open Settings → Users. The list has Emp Code, Employee, User Name, Role Name (for example Employee, Manager or POS User), Category Name and Location Name, 20 rows per page. The title band has Search here, the person-with-plus icon (Bulk Access, to give the same access to many employees at once) and + to add a user.
How do I add a user?
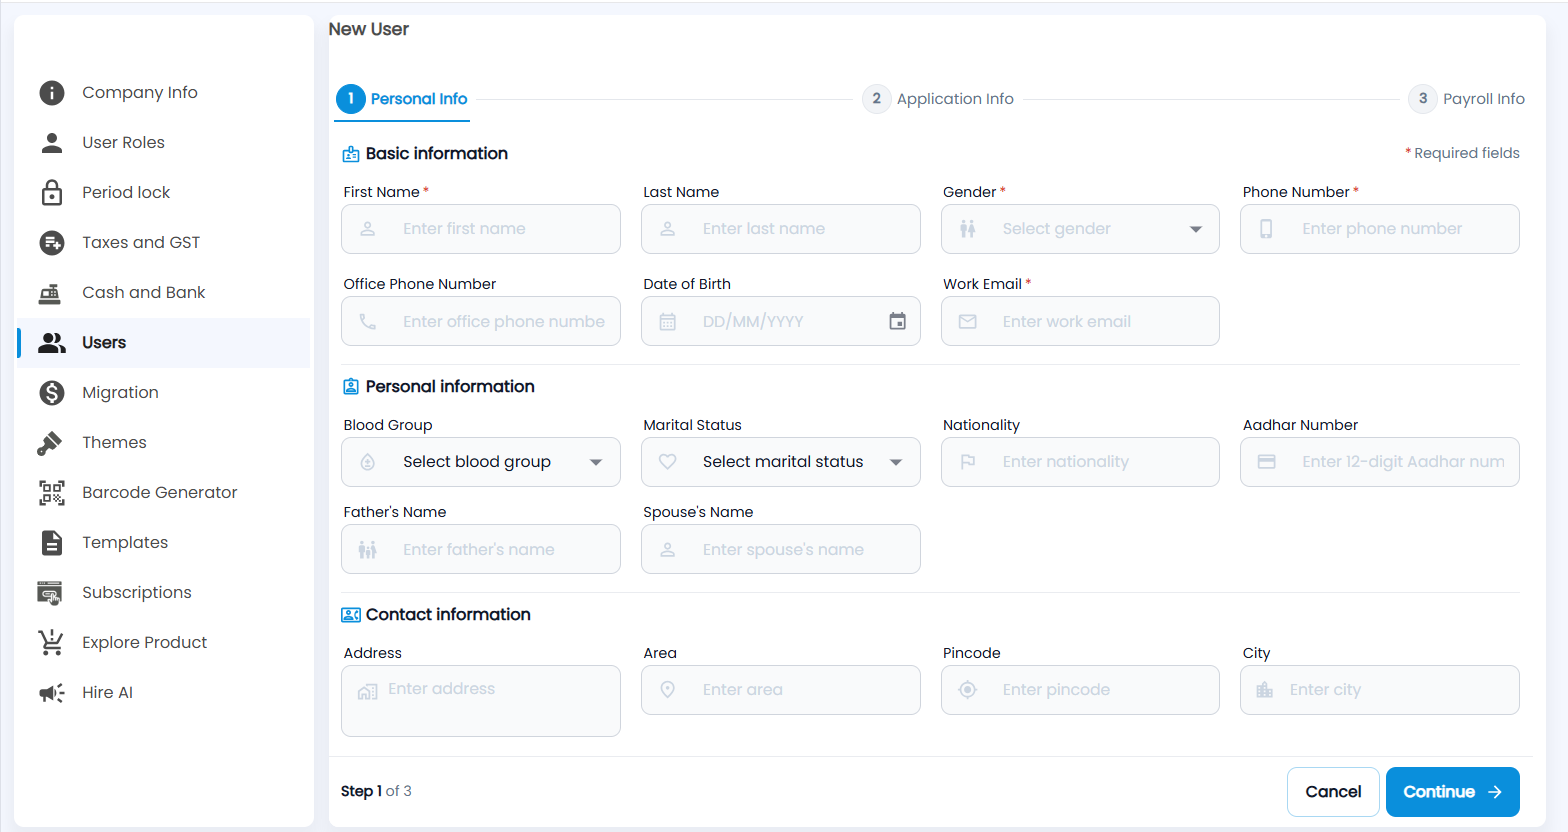
- Click +. New User opens on step 1, Personal Info.
- Under Basic information, enter the First Name, Gender, Phone Number and Work Email (required), and optionally the Last Name, Office Phone Number and Date of Birth.
- Under Personal information, optionally add the Blood Group, Marital Status, Nationality, 12-digit Aadhar Number, Father's Name and Spouse's Name.
- Under Contact information, add the Address, Area, Pincode and City. Click Continue.
- On Application Info, set the User Name, Password and User Role, the location and reporting manager, and the app and web access. Click Continue.
- On Payroll Info, add the pay details if you use them, and save.
What a role can see and do is set in User Roles. The same people appear in Employee Contacts.