
How do I add an employee in Tazk POS?
Go to Contacts → Employee and click Create Contact. The New Employee form has three steps: Personal Info (name, gender, phone number and work email are required), Application Info (the User Role, User Name, Password, Location and Primary Location they will sign in with) and Payroll Info (Employee Code and Employee Category are required). Click Continue after each step and Submit on the last one.
What does the Employee Directory show?
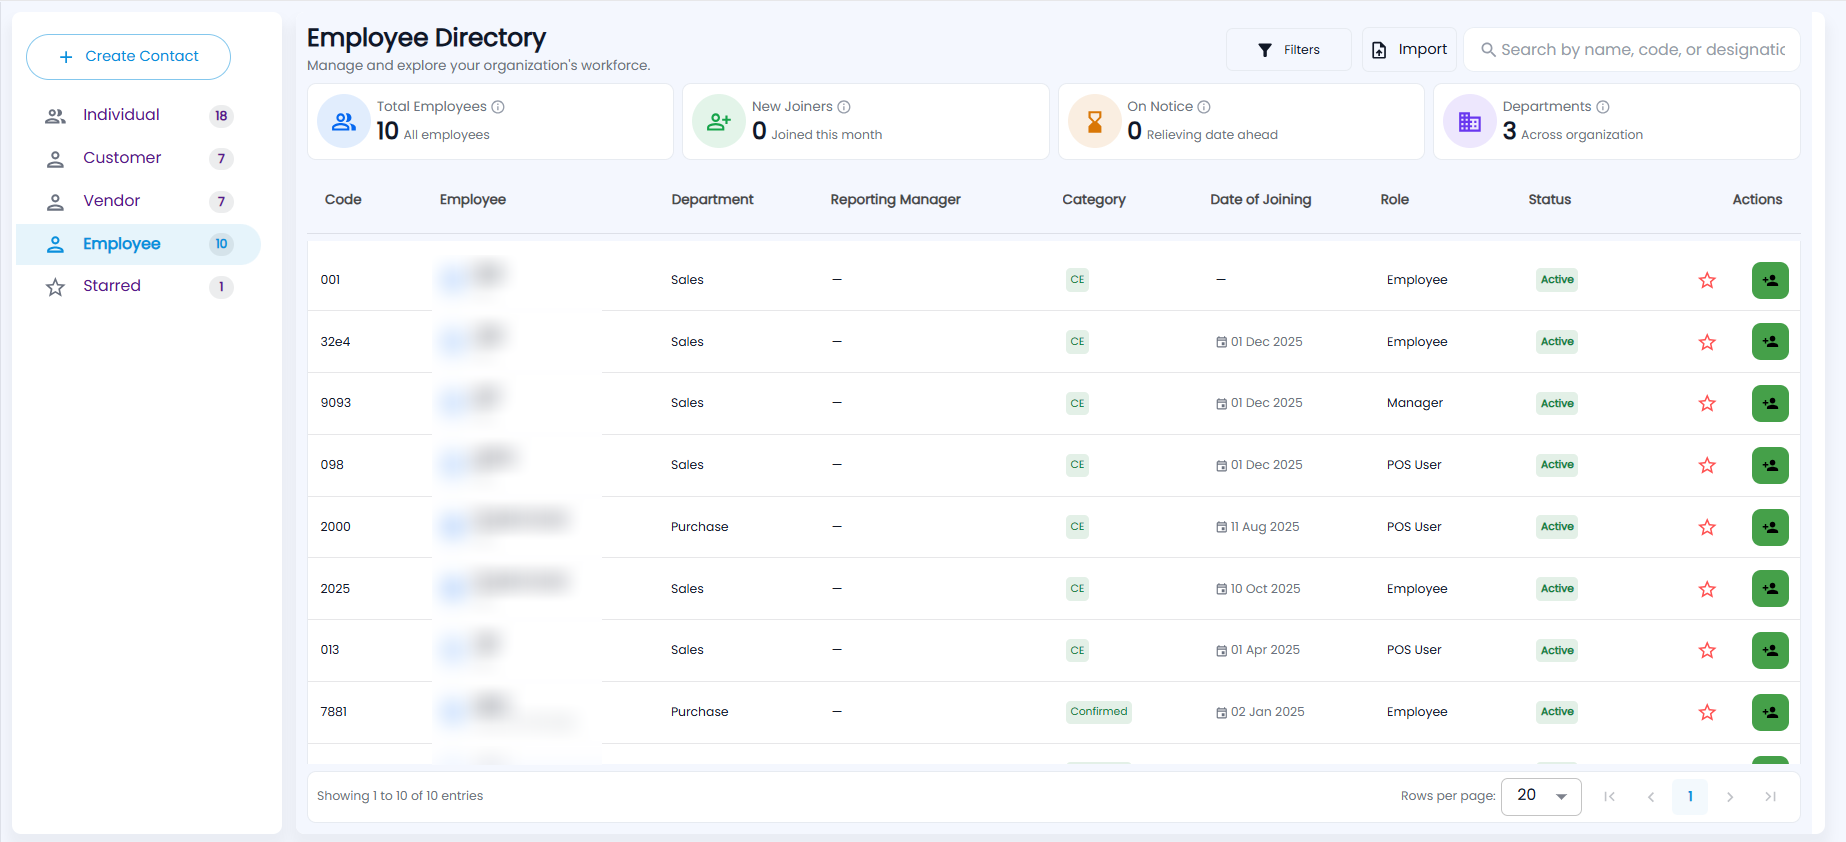
Click Contacts and choose Employee. The Employee Directory has four cards at the top:
| Card | What it shows |
|---|---|
| Total Employees | All employees |
| New Joiners | Employees who joined this month — click it to list only them |
| On Notice | Employees with a relieving date ahead — click it to list only them |
| Departments | How many departments your staff are in |
The list shows each employee’s Code, Employee (name and designation), Department, Reporting Manager, Category, Date of Joining, Role (their user role, for example Employee, Manager or POS User) and Status (Active, Probation, On Notice or Relieved). Under Actions are the star (see Starred Contacts) and a follow button.
Use Search by name, code, or designation, or click Filters to narrow the list by location, department, role or category. Import adds many employees from a file. Choose 20, 50 or 100 rows per page. Click an employee to open their profile.
How do I add an employee?
With the Employee folder open, click Create Contact. The New Employee form has three steps; fields marked * are required.
Step 1 — Personal Info
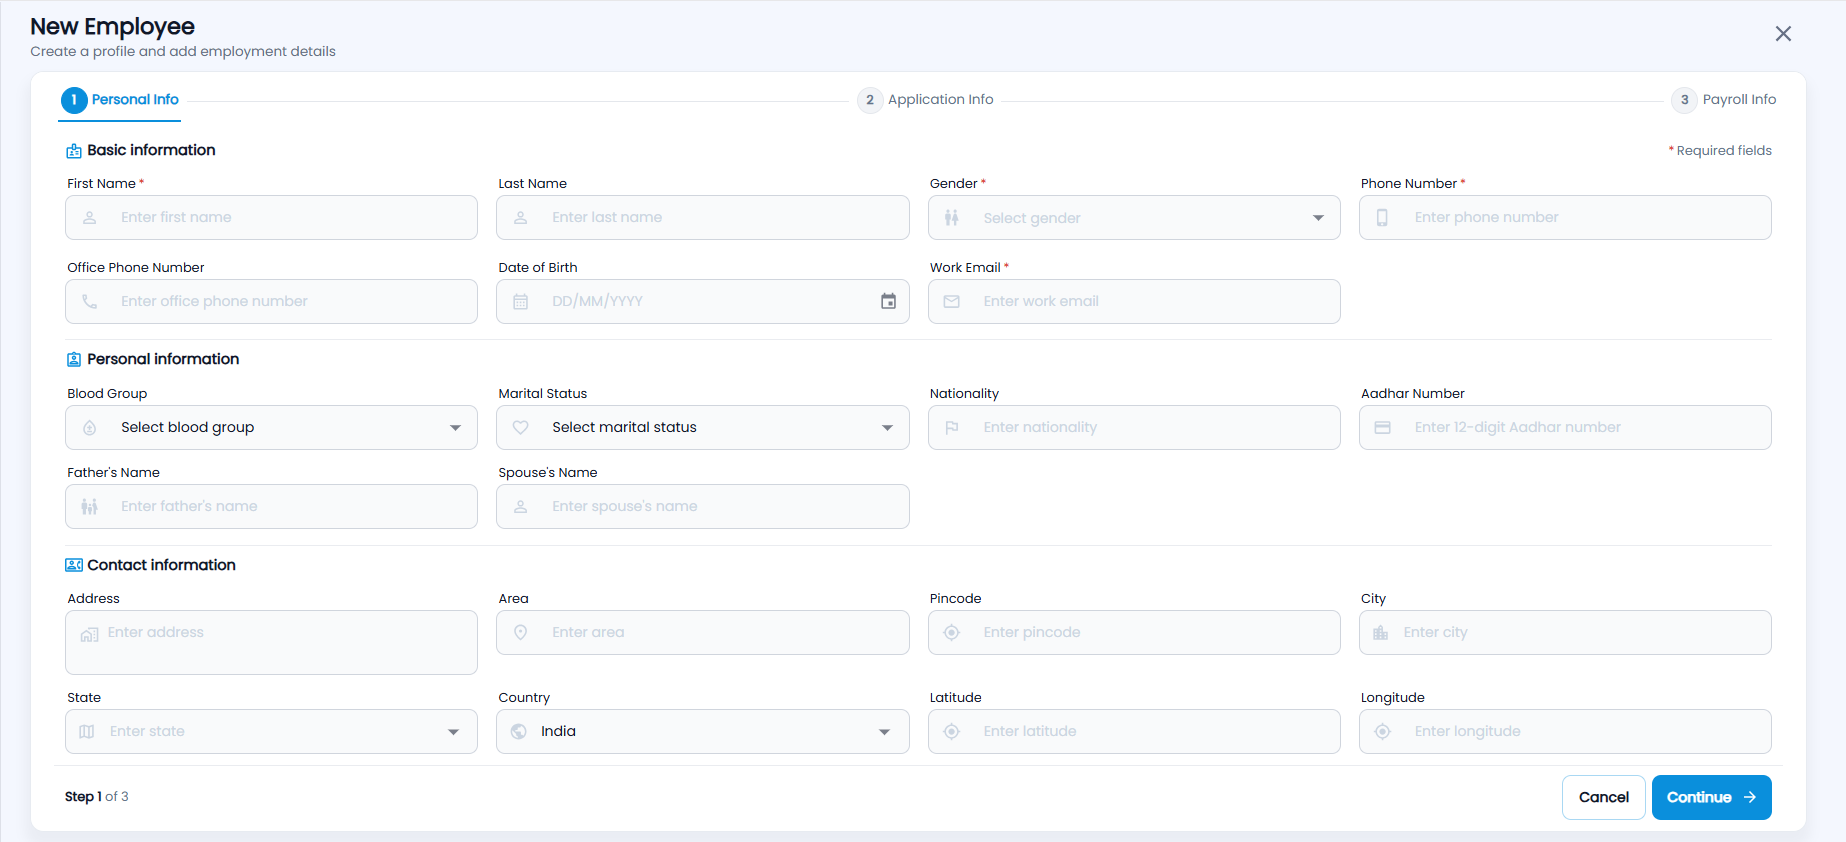
- Basic information — First Name*, Last Name, Gender*, Phone Number*, Office Phone Number, Date of Birth and Work Email*.
- Personal information — Blood Group, Marital Status, Nationality, Aadhar Number (12 digits), Father’s Name and Spouse’s Name.
- Contact information — Address, Area, Pincode, City, State, Country (India by default), Latitude and Longitude.
Click Continue.
Step 2 — Application Info
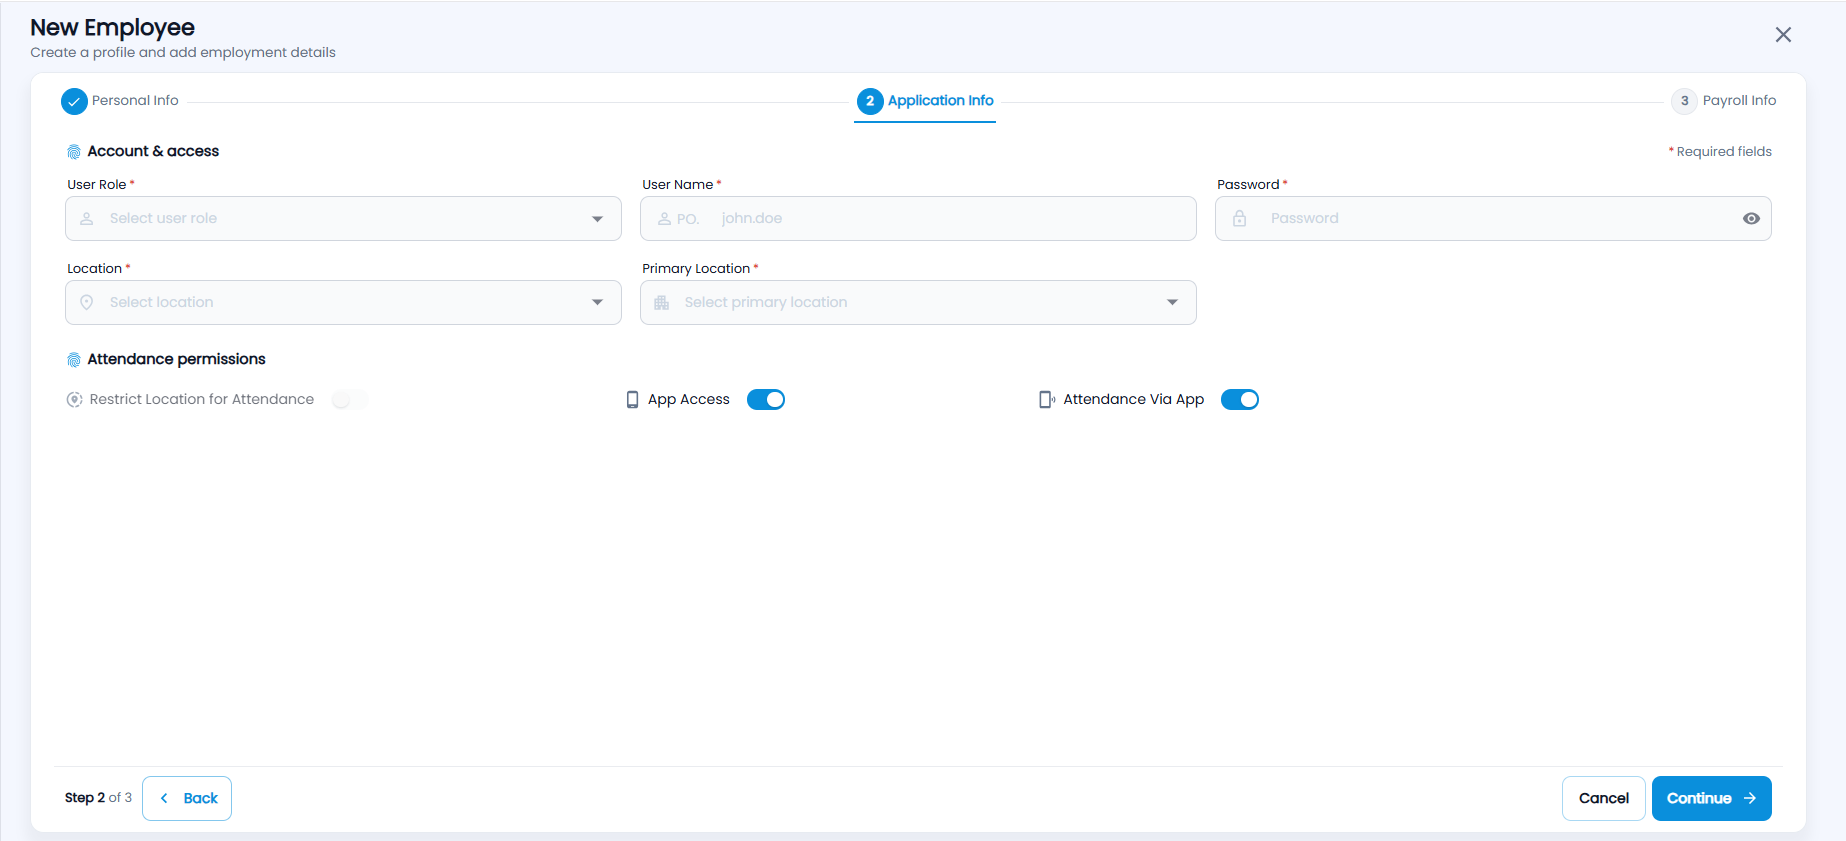
- Account & access — the User Role* (it decides which menus and actions the employee gets), the User Name* and Password* they sign in with (the user name starts with your company’s prefix), the Location* or locations they work at, and their Primary Location*.
- Attendance permissions — Restrict Location for Attendance, App Access (lets them use the mobile app) and Attendance Via App.
Click Continue, or Back to change step 1.
Step 3 — Payroll Info
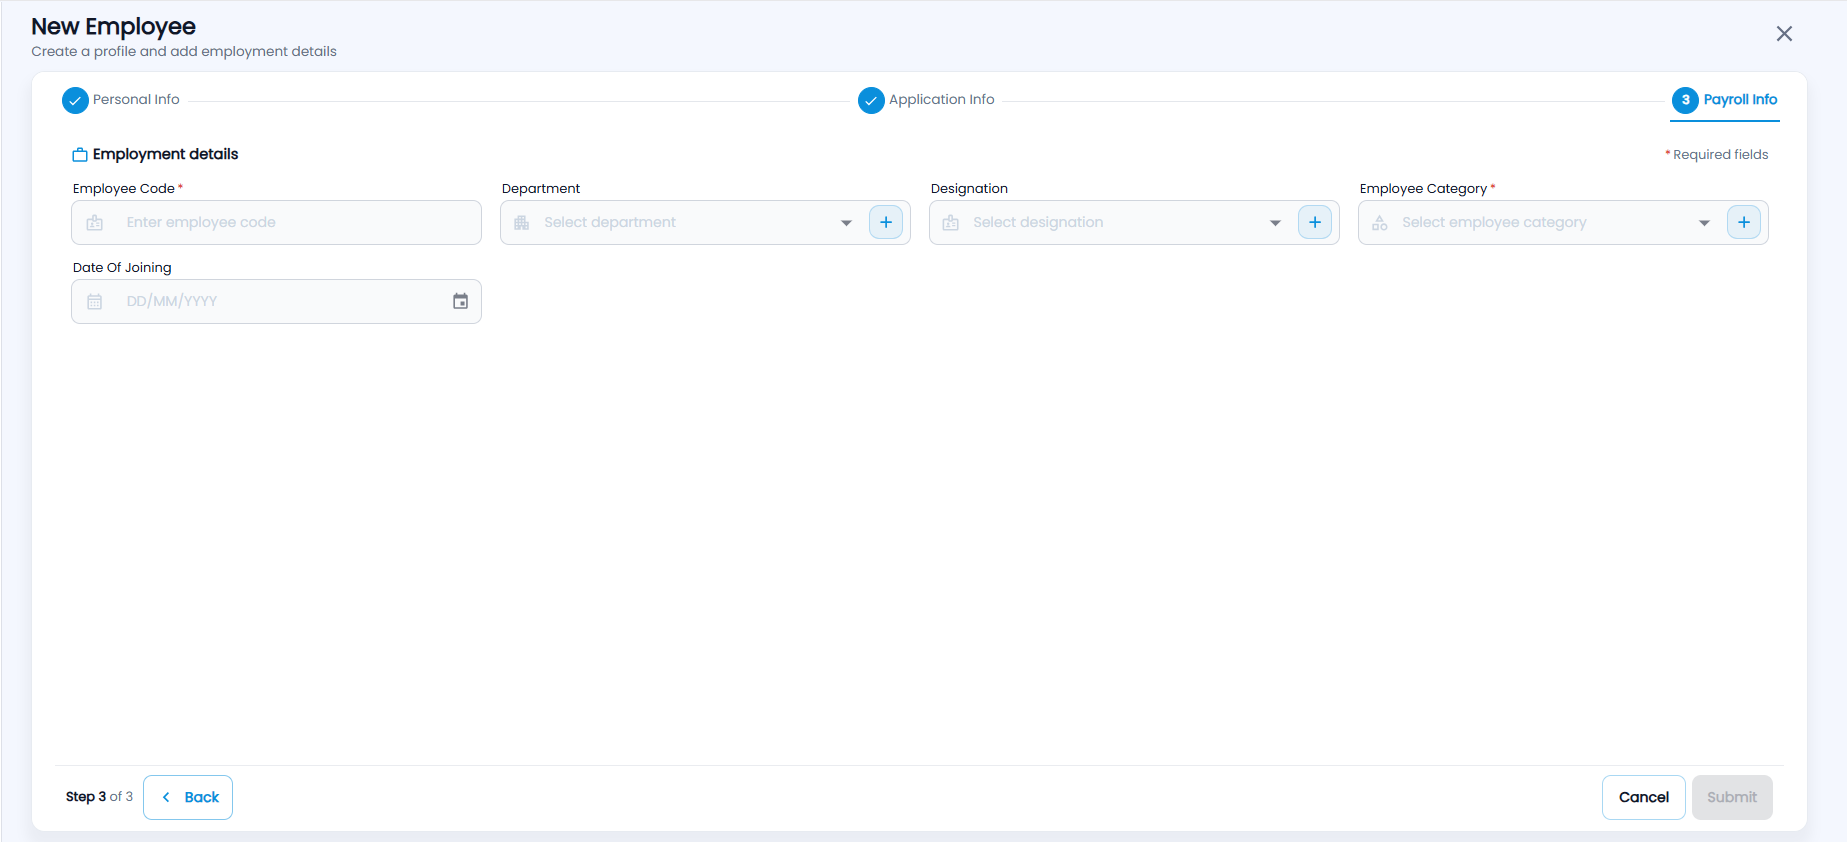
- Employment details — Employee Code*, Department, Designation, Employee Category* and Date Of Joining. The + beside Department, Designation and Employee Category adds a new one without leaving the form.
Click Submit. The employee can now sign in with the user name and password you set, and appears in the directory. You can add employees only up to the number of users in your plan.
What is on an employee’s profile?
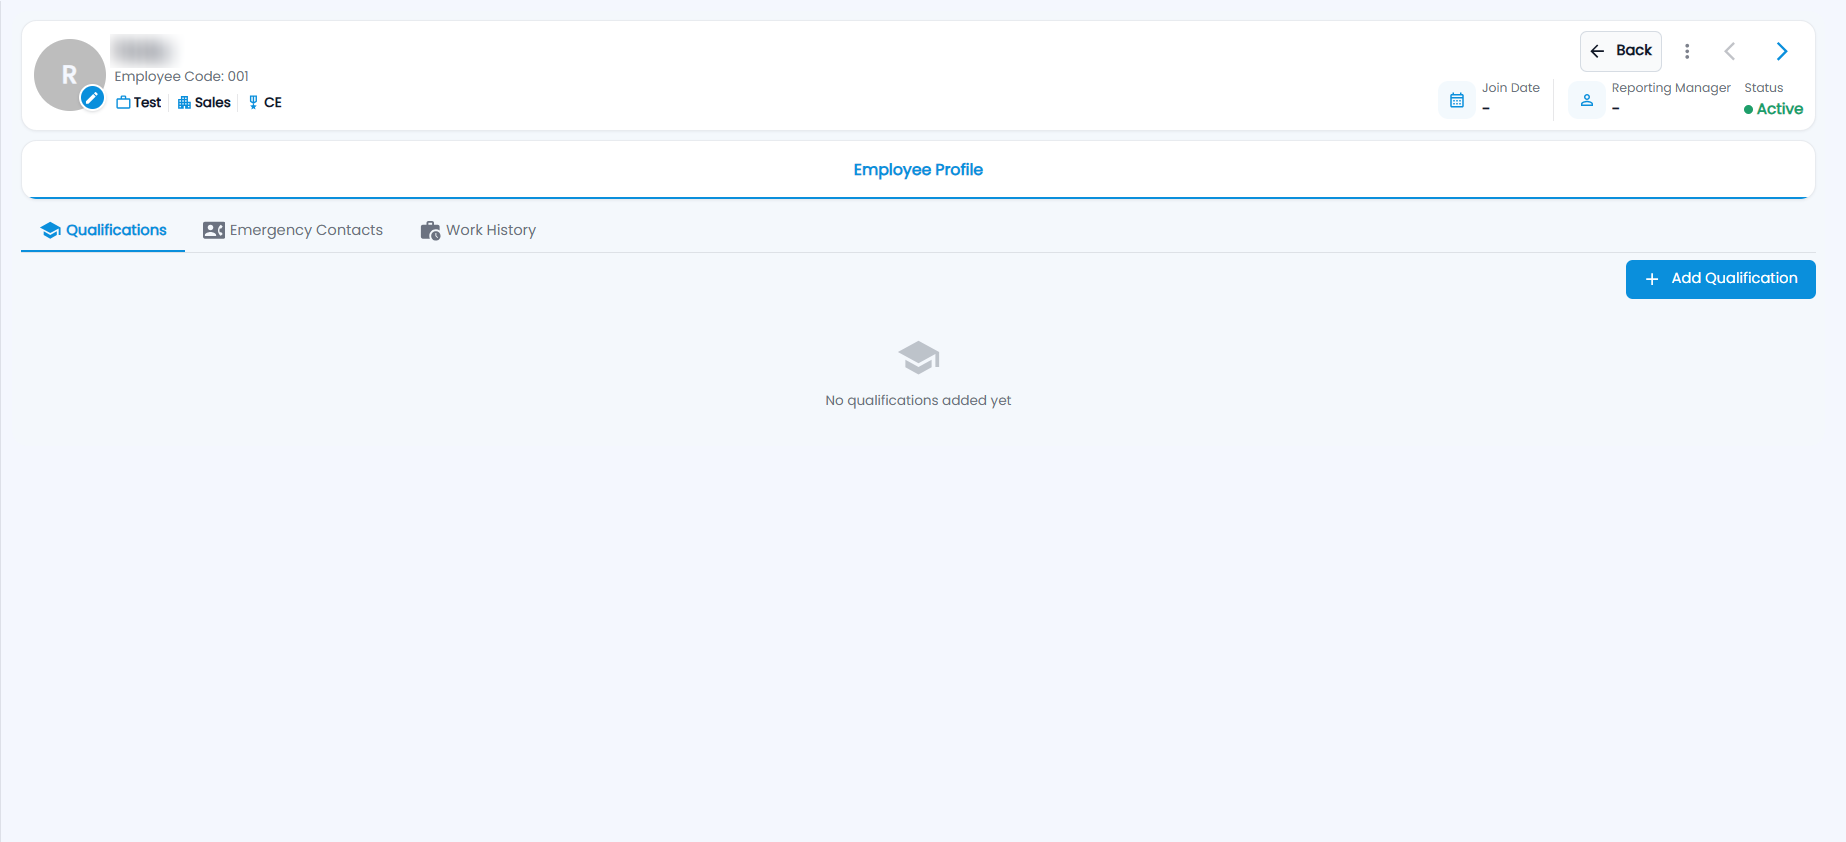
The header shows the employee’s photo (click the pencil on it to change the photo), name, Employee Code, designation, department and category, with their Join Date, Reporting Manager and Status on the right. Back, the previous / next arrows and the three-dot menu are at the top right; the menu has EDIT, DELETE and RELIEVE (to record that the person is leaving).
The Employee Profile tab has three sections:
- Qualifications — the employee’s education and certificates. Click Add Qualification to add one.
- Emergency Contacts — who to call in an emergency.
- Work History — their previous jobs.
Which tabs and actions you see depends on your role.