
How do I set up a journey in Tazk CRM?
Open Marketing › Journeys and click + New journey, or Start from Template. Name the journey, choose what puts a lead on it under Start when, add the steps each lead goes through — send a message, wait or branch — and click Create journey. Steps only send while the drip engine is switched on for your server.
What is on the Journeys screen?
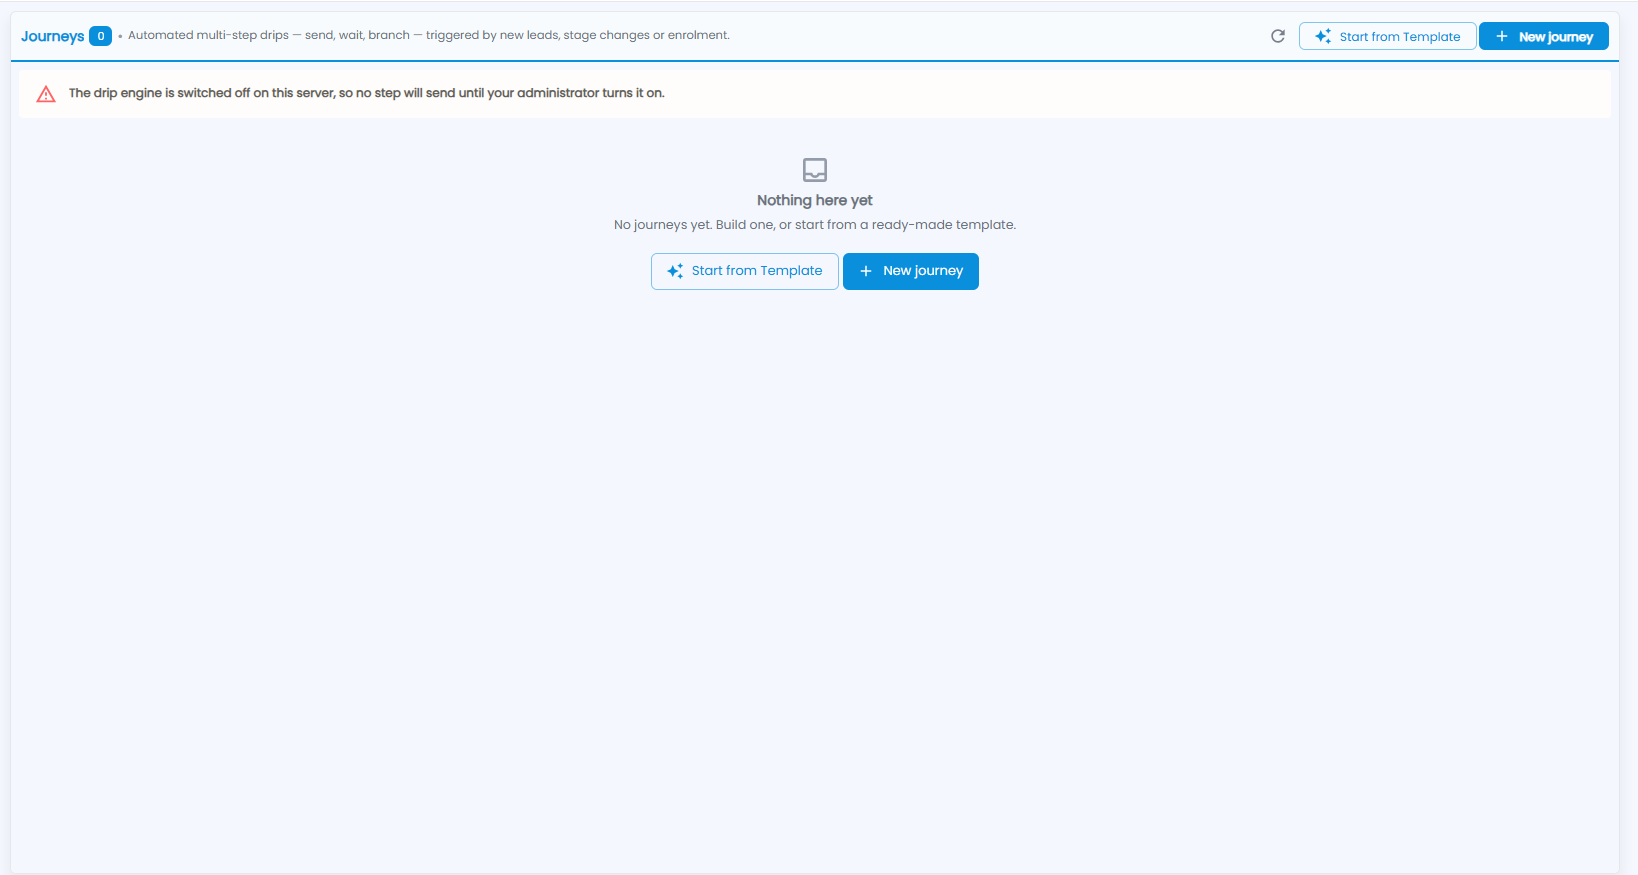
Journeys are automated multi-step drips — send, wait, branch — triggered by new leads, stage changes or enrolment. The number next to the title is how many journeys you have. At the top right are refresh, Start from Template and + New journey; until you build one, the screen says Nothing here yet with the same two buttons.
How do I build a journey?
Click + New journey — who enters, then the steps each lead goes through. (Start from Template starts you from a ready-made journey instead.)
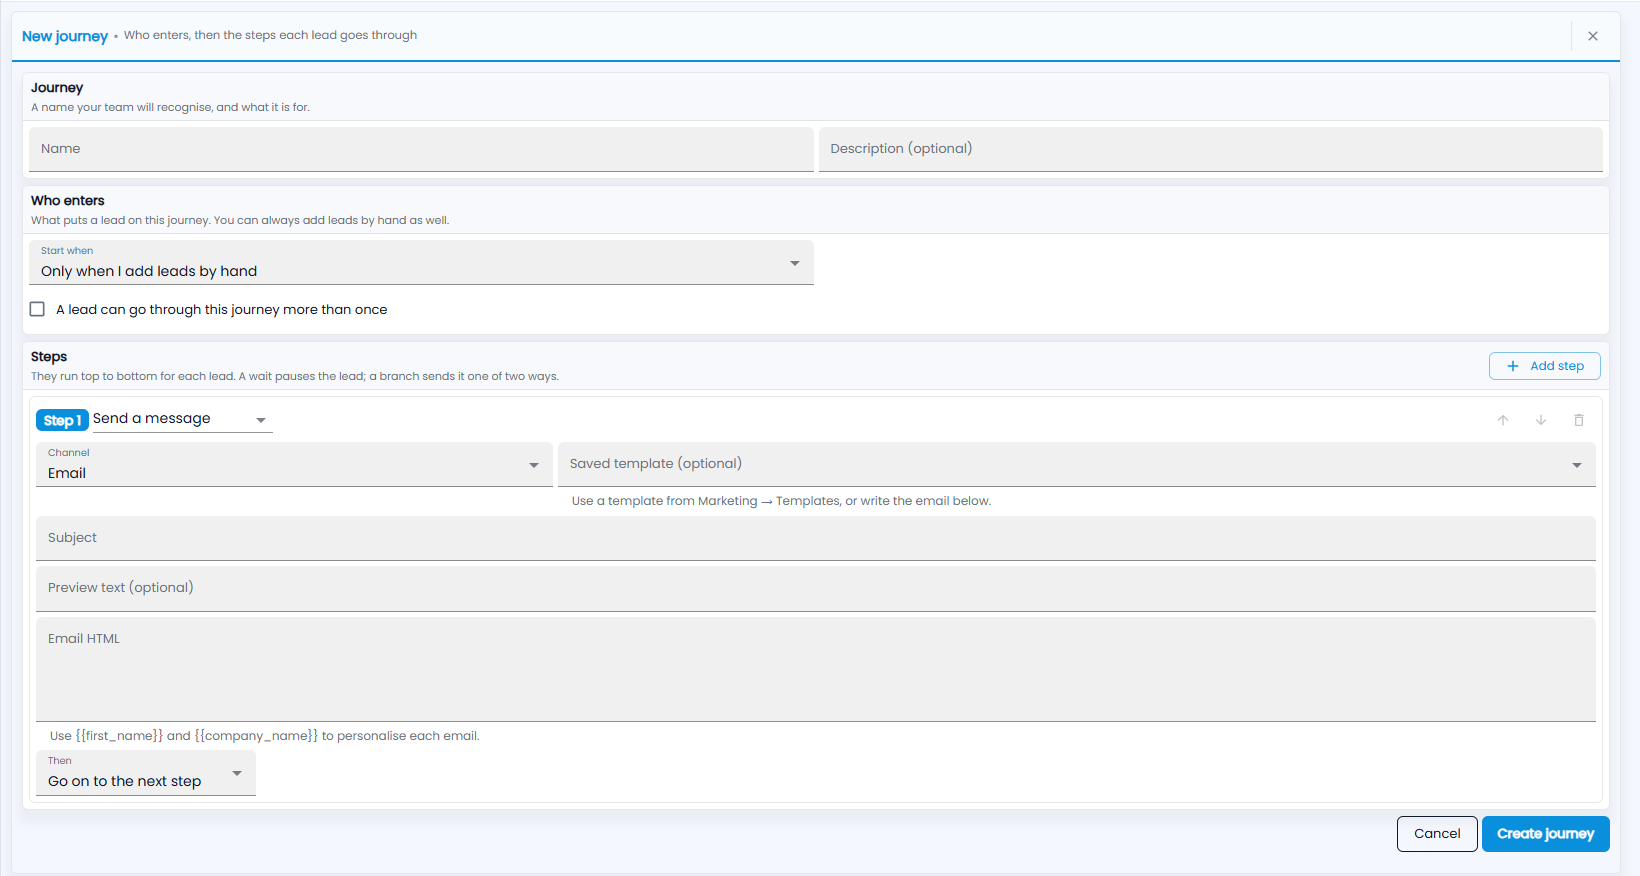
- Journey — a Name your team will recognise and an optional Description of what it is for.
- Who enters — what puts a lead on this journey, under Start when: a new lead arrives, a lead moves to a stage, a lead joins an audience, a lead goes quiet, or Only when I add leads by hand. You can always add leads by hand as well. Tick A lead can go through this journey more than once if they may repeat it.
- Steps — they run top to bottom for each lead. A wait pauses the lead; a branch sends it one of two ways. Each step starts as Send a message:
- Channel — for example Email — and an optional Saved template from your templates, or write the email below.
- Subject, an optional Preview text and the Email HTML. Use {{first_name}} and {{company_name}} to personalise each email.
- Then — Go on to the next step, or choose where the lead goes next.
- Click Create journey, or Cancel.