
Overview
Users lists everyone who can sign in to Tazk Sales. Open Settings > Users.
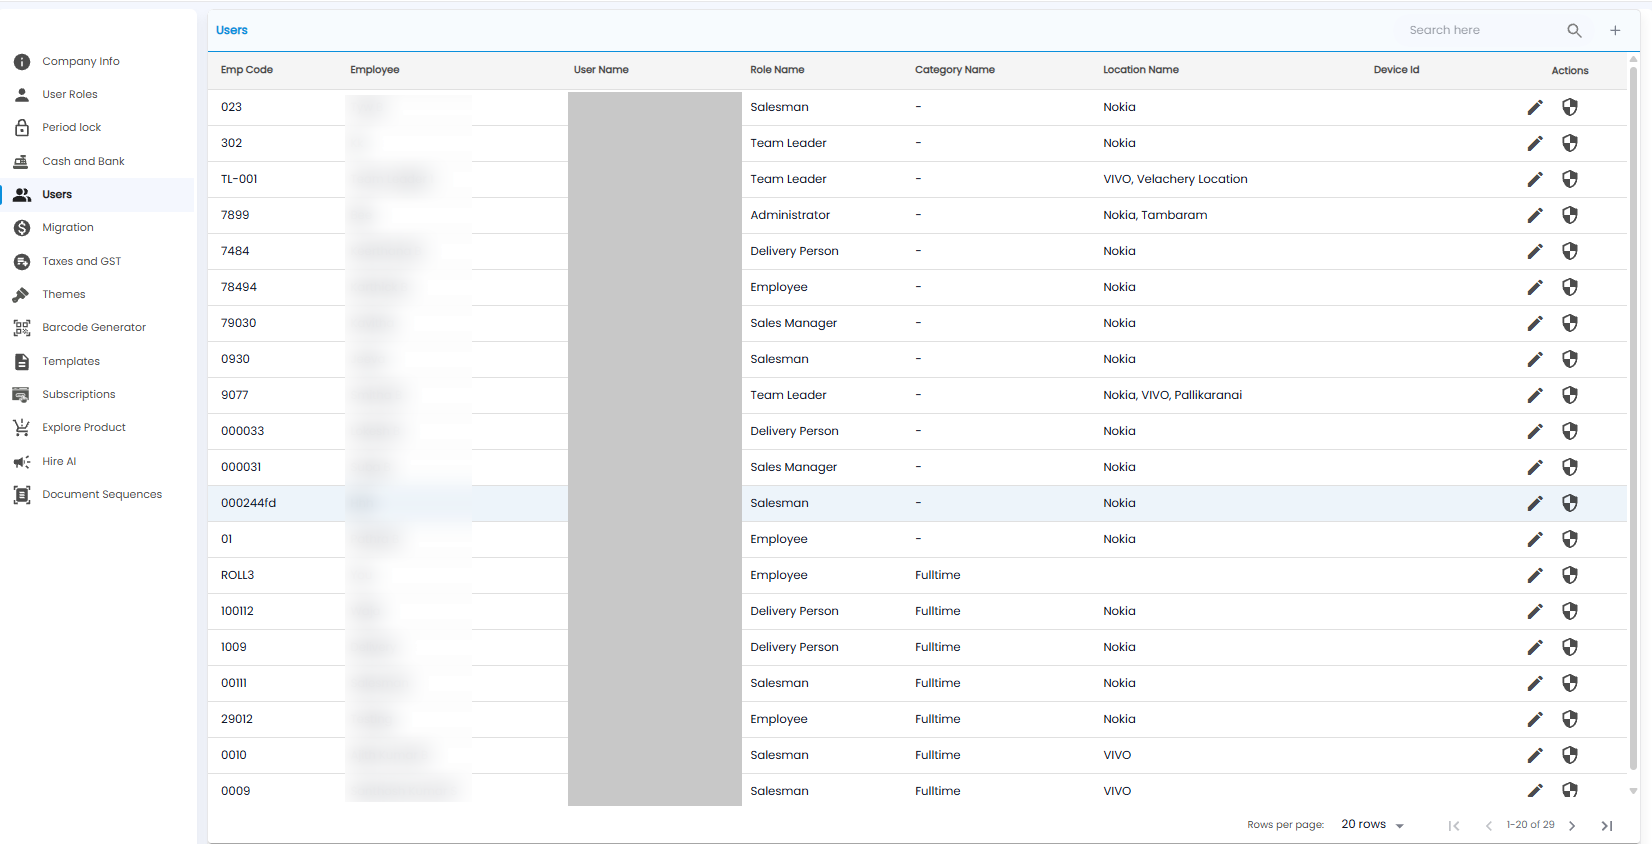
The Users List
| Column | What it shows |
|---|---|
| Emp Code / Employee | The employee code and name |
| User Name | The name they sign in with |
| Role Name | Their role, which decides what they can do — see User Roles |
| Category Name | For example Fulltime |
| Location Name | The locations they work for |
| Device Id | The device they use, where recorded |
| Actions | Edit (pencil), and the shield icon |
Use Search here to find a user. The list shows 20 rows per page.
Adding a User
Click + to open New User. It has three steps: Personal Info, Application Info, and Payroll Info. Fields marked * are required.
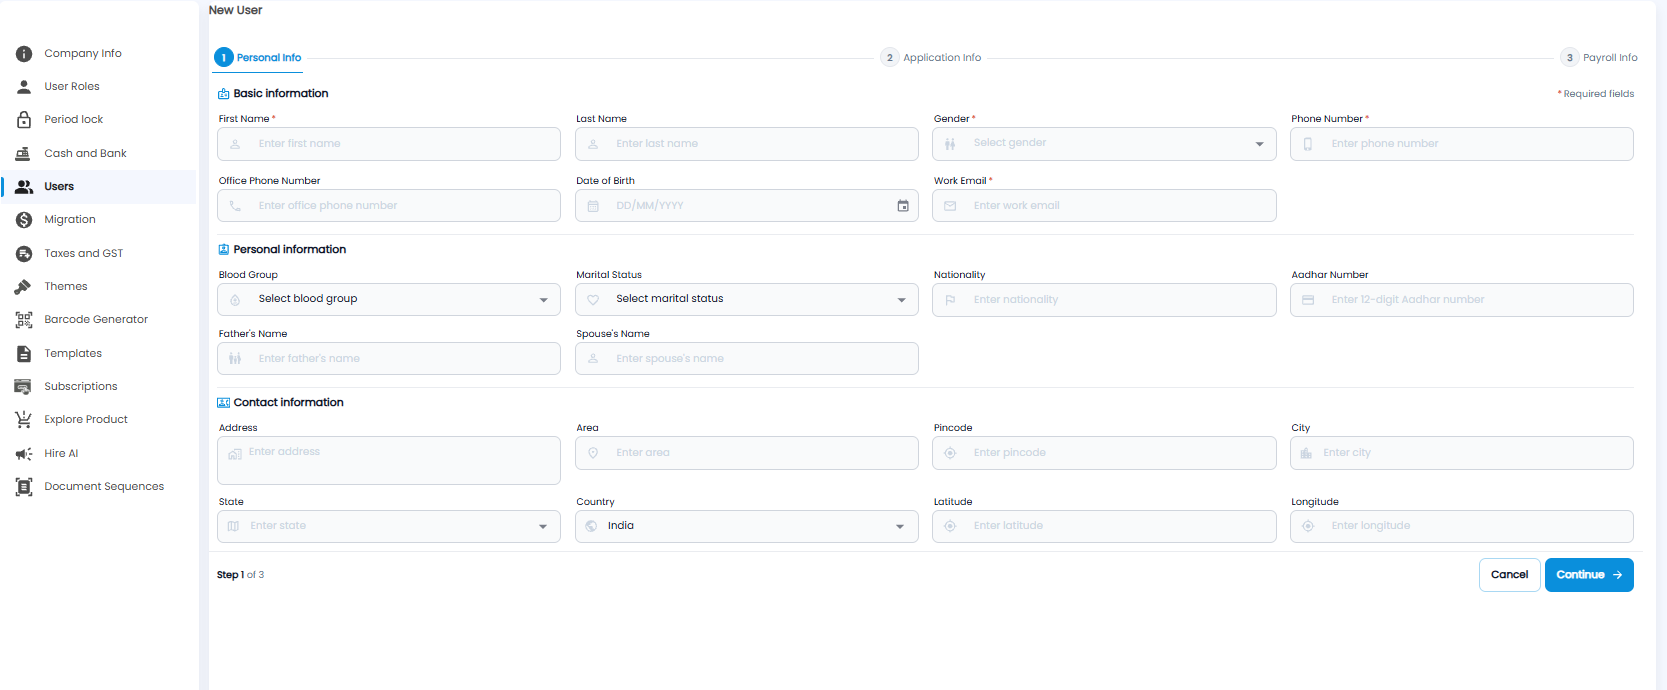
| Section | Fields |
|---|---|
| Basic information | First Name*, Last Name, Gender*, Phone Number*, Office Phone Number, Date of Birth, Work Email* |
| Personal information | Blood Group, Marital Status, Nationality, Aadhar Number (12 digits), Father's Name, Spouse's Name |
| Contact information | Address, Area, Pincode, City, State, Country (India by default), Latitude, Longitude |
Click Continue to go to the next step, or Cancel.
Note: The three steps are the same as when you add an employee — see Employee Contacts for the Application Info and Payroll Info steps.