
Where do I set attendance, leave and week off rules in Tazk Payroll?
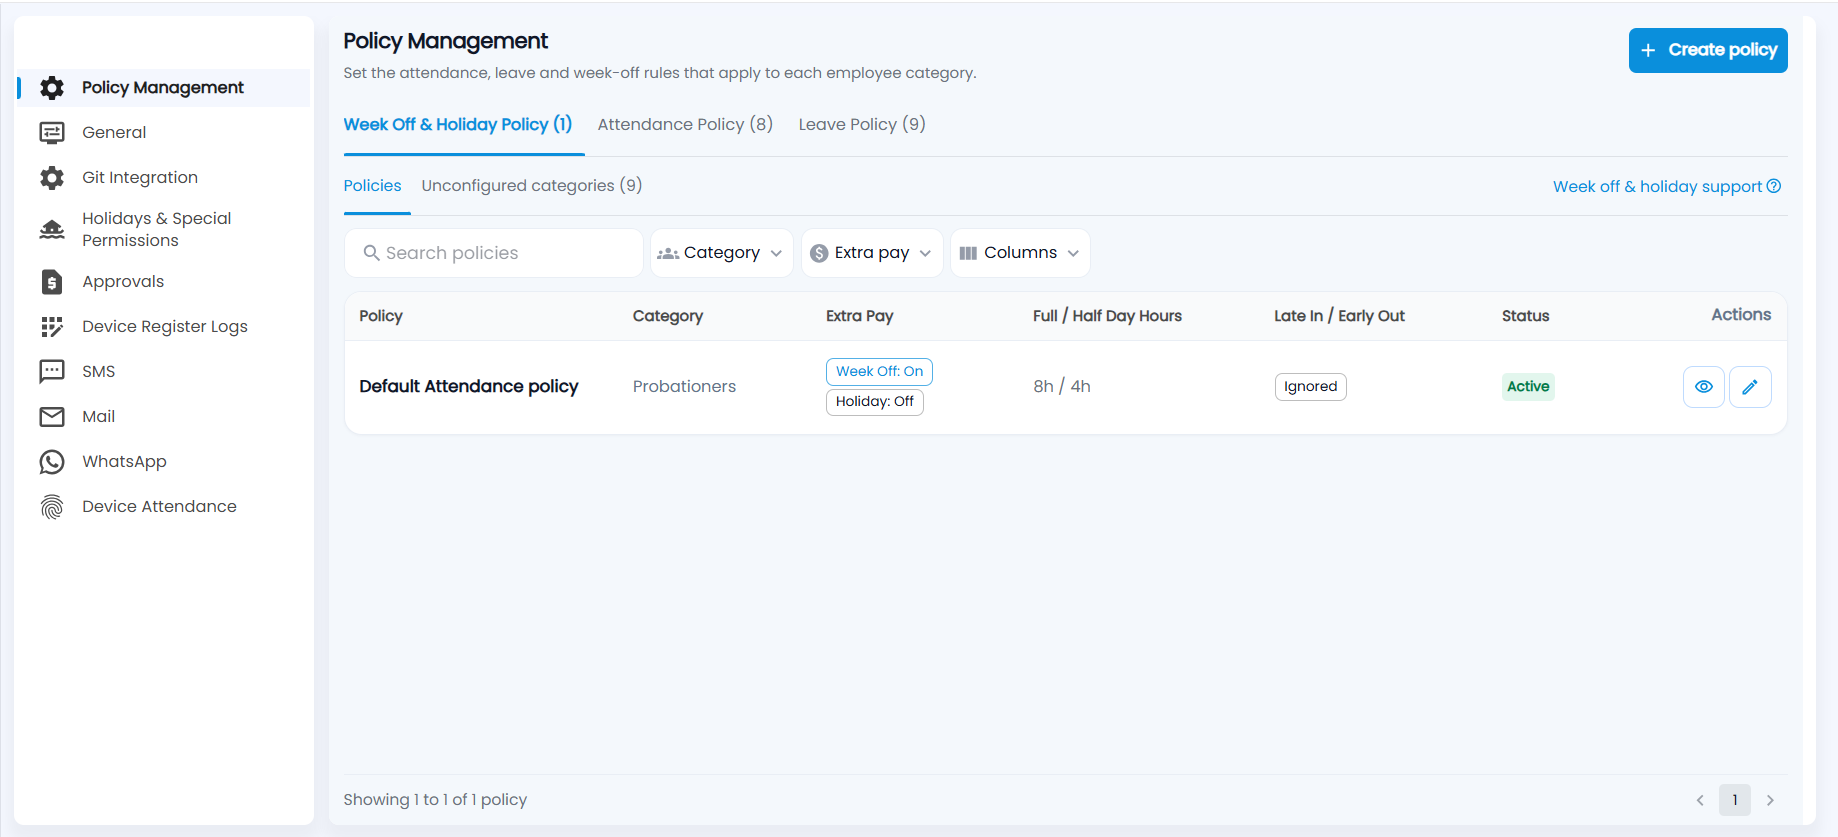
Open Configuration → Policy Management. It has three tabs — Week Off & Holiday Policy, Attendance Policy and Leave Policy — and each employee category gets one policy of each kind. The Policies list shows the policies that exist; Unconfigured categories shows the categories that still have none. Click Create policy to add one for the tab you are on. Each policy type is explained in its own section below.
What are the three policy types?
| Tab | What it decides | Section |
|---|---|---|
| Week Off & Holiday Policy | What an employee earns for working on a week off or a company holiday, and the hours that make it a full or half extra day | Week Off & Holiday Policy |
| Attendance Policy | The work day, grace time, late-in and early-out rules, breaks, permissions, overtime and punch limits | Attendance Policy |
| Leave Policy | Weekly off days, compensation off, restricted holidays and the leave types (CL, SL, PL, LOP…) with their balances | Leave Policy |
The number beside each tab is how many policies of that type exist. A policy always belongs to one employee category (Confirmed Employees, Interns, Probationers…), and a category can have only one policy of each type. You see only the tabs your role has been given.
What is an unconfigured category?
An employee category that has no policy of the current type. Open Unconfigured categories (n) to see them: Employee Category, Assigned Employees (headcount) and a red No policy chip with what is missing — for example Attendance rules not configured. Click Create policy on a row to open the form with that category already chosen. Filter the list to categories With employees or No employees yet.
How do I find a policy?
- Search policies — matches the policy name and the category name.
- Category — on every tab.
- Extra pay (Week Off & Holiday) — Week off pay on, Holiday pay on or Neither.
- Work hours (Attendance) — by hours per day, or Not set.
- Weekly leave and Comp off (Leave) — days off per week, and Enabled / Disabled.
- Columns — show or hide columns. Permission Duration (Attendance) and Restricted Holidays (Leave) are hidden until you turn them on.
You can tick several options in one filter; the badge shows how many are selected and Clear resets it. Click a column header to sort. The list shows 10 policies a page.
What do Active and Unused mean?
| Status | Meaning |
|---|---|
| Active | The category has at least one employee, so the policy is in use. |
| Unused | No employees in this category yet, so the policy governs nobody. |
| Orphaned | The employee category the policy belongs to no longer exists. |
The status is worked out from the category's headcount each time — you do not set it.
How do I view or change a policy?
- Eye icon — opens the whole policy, one card per section (for a leave policy, also the leave types table). Edit policy at the top opens the form.
- Pencil icon — opens the form directly. Change what you need and click Save changes.
How do I create a policy?
- Open the tab for the type you want and click Create policy (or Create policy on a row of Unconfigured categories).
- Fill in each tab of the form. Next checks the tab you are on; a field with a problem turns red and the tab shows a red ⓘ. You can also click the tabs in any order.
- On the last tab click Create policy. Every tab is checked again and you are taken to the first one with a problem.
The Employee category picker lists only categories that do not yet have a policy of this type. Choose several (or Select All) and one policy is created for each.
Week Off & Holiday Policy
What does the list show?
One row per policy: Policy, Category, Extra Pay (two chips — Week Off: On/Off and Holiday: On/Off), Full / Half Day Hours (for example 8h / 4h), Late In / Early Out (Considered or Ignored), Status and the view and edit icons.
Basic information
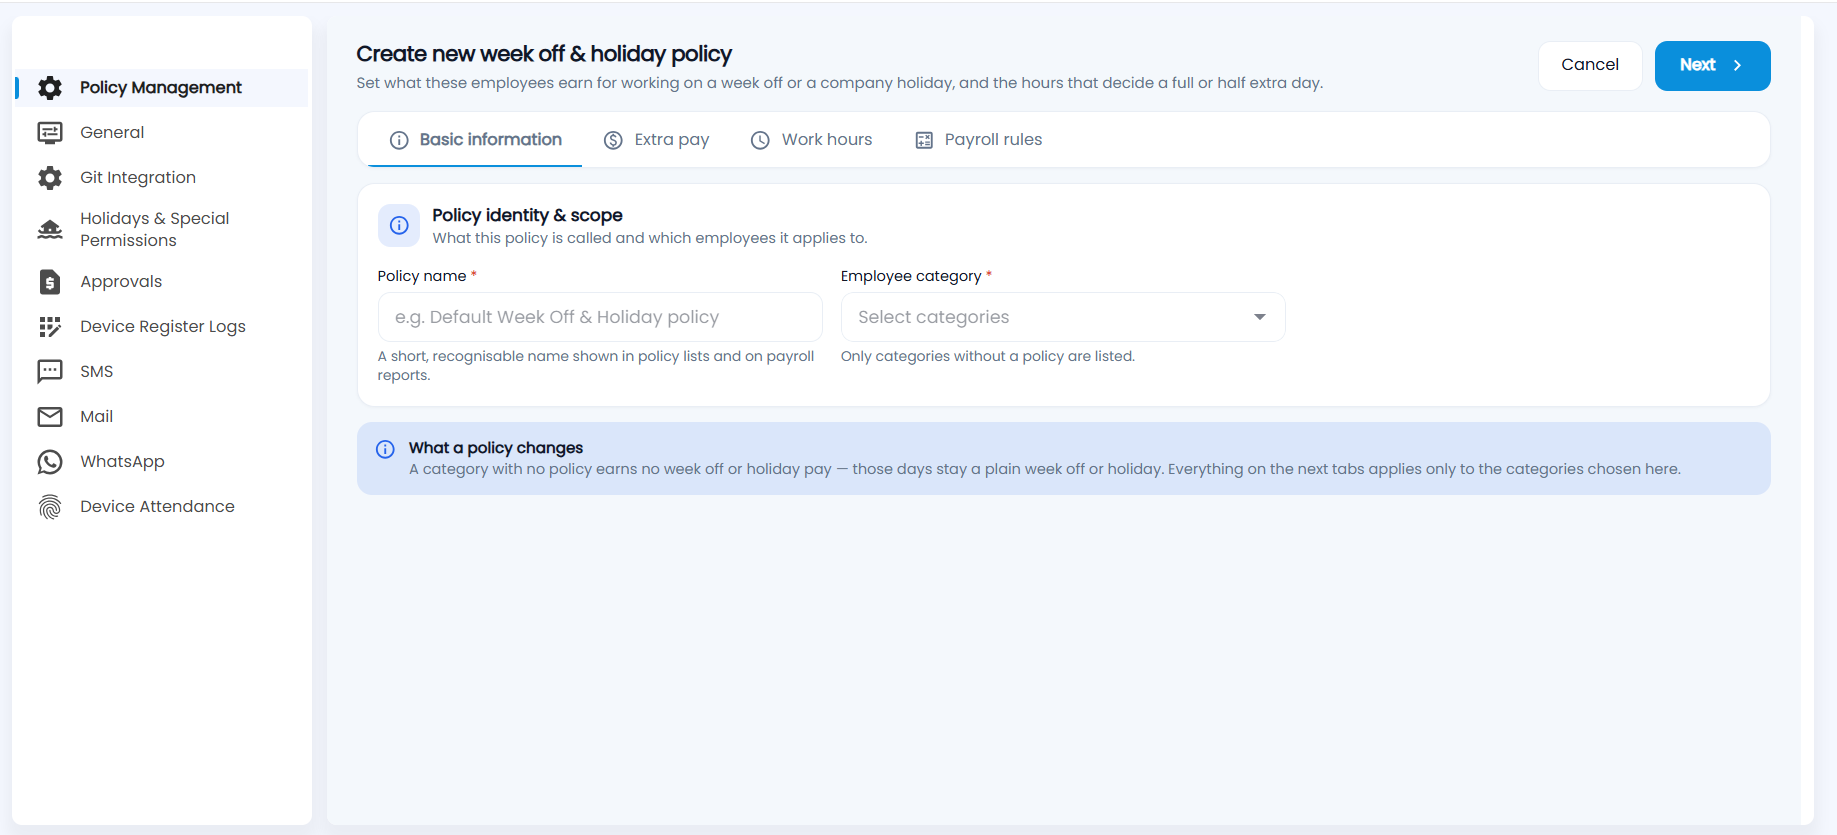
- Policy name (required) — a short name shown in policy lists and on payroll reports, e.g. Default Week Off & Holiday policy.
- Employee category (required) — only categories without a week off & holiday policy are listed. One policy is created for each category you pick.
Extra pay
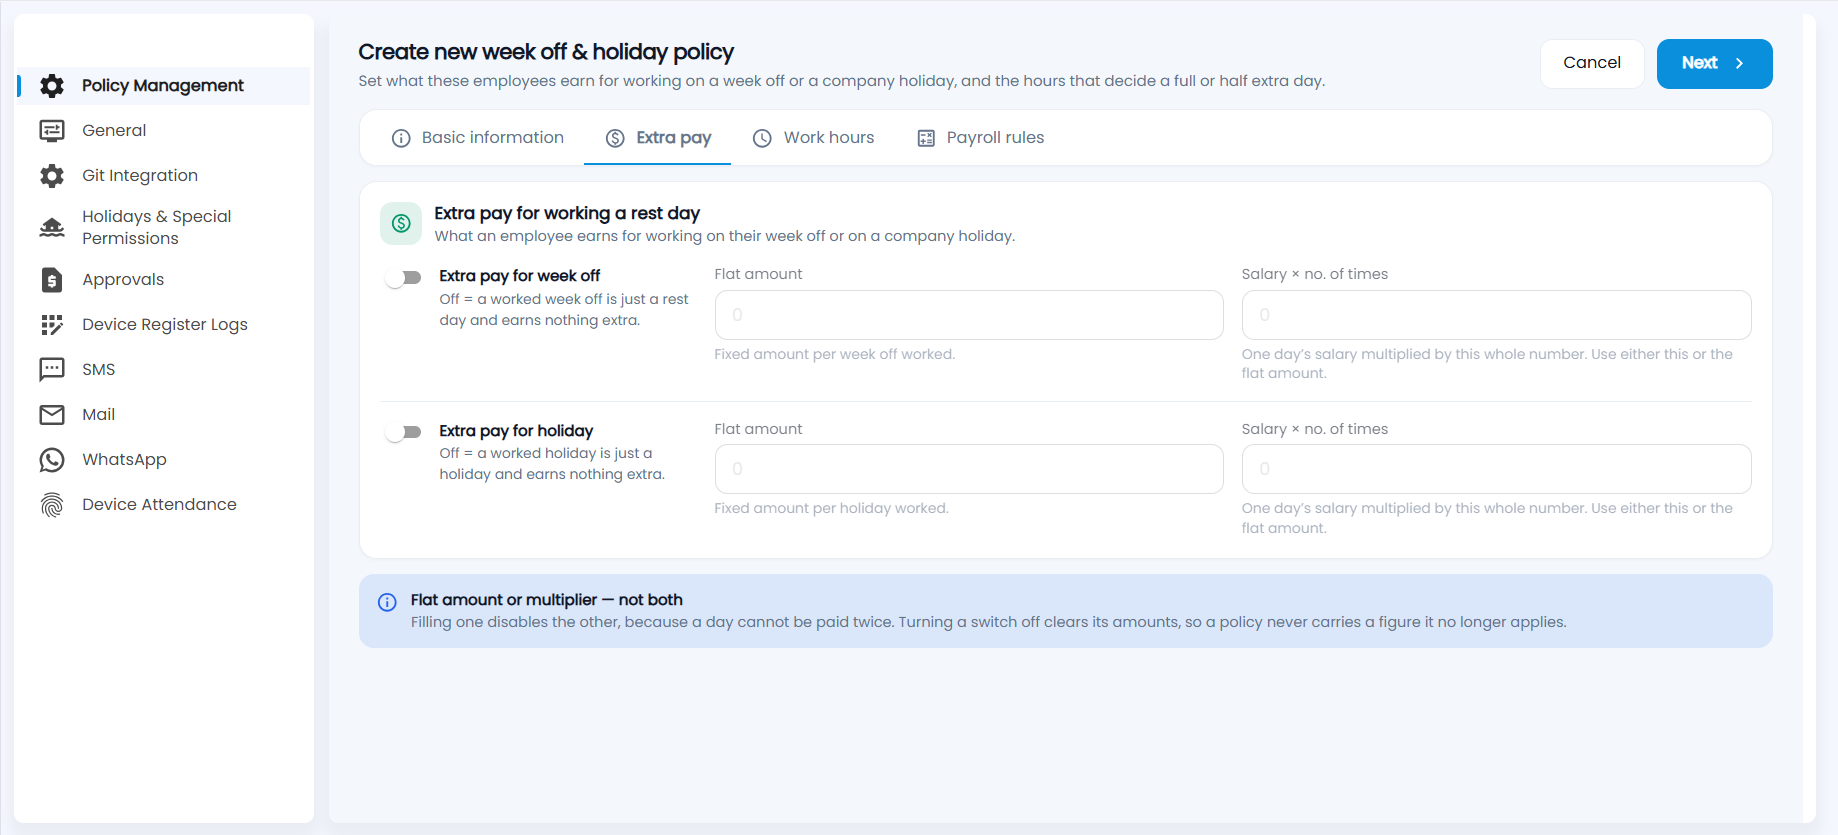
Two switches, both off to begin with:
- Extra pay for week off — off means a worked week off is just a rest day and earns nothing extra.
- Extra pay for holiday — the same for a company holiday.
For each switch you turn on, enter one of:
- Flat amount — a fixed amount for each week off (or holiday) worked.
- Salary × no. of times — one day's salary multiplied by this whole number (1 or more). For example 2 pays double a day's salary.
Work hours
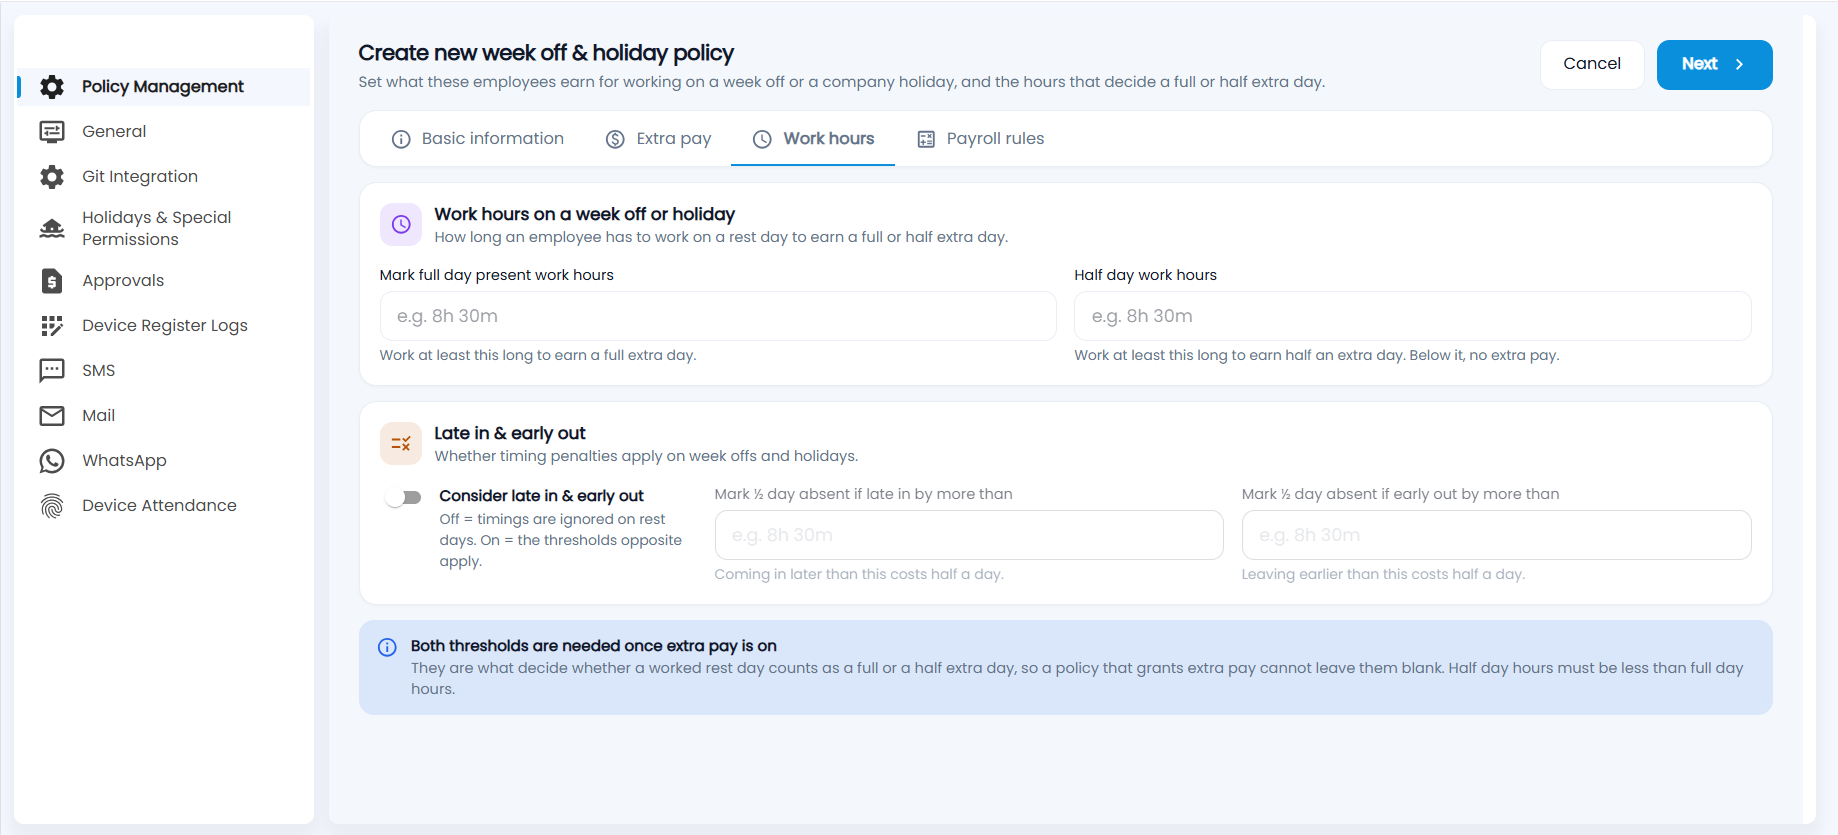
- Mark full day present work hours — work at least this long on a rest day to earn a full extra day.
- Half day work hours — work at least this long to earn half an extra day. Below it, no extra pay.
Type durations as hours and minutes, e.g. 8h 30m (up to 12 hours). Both are required once extra pay is on, and the half day must be shorter than the full day.
Consider late in & early out — off means timings are ignored on rest days. Turn it on to set Mark ½ day absent if late in by more than and Mark ½ day absent if early out by more than; arriving later or leaving earlier than that costs half a day.
Payroll rules
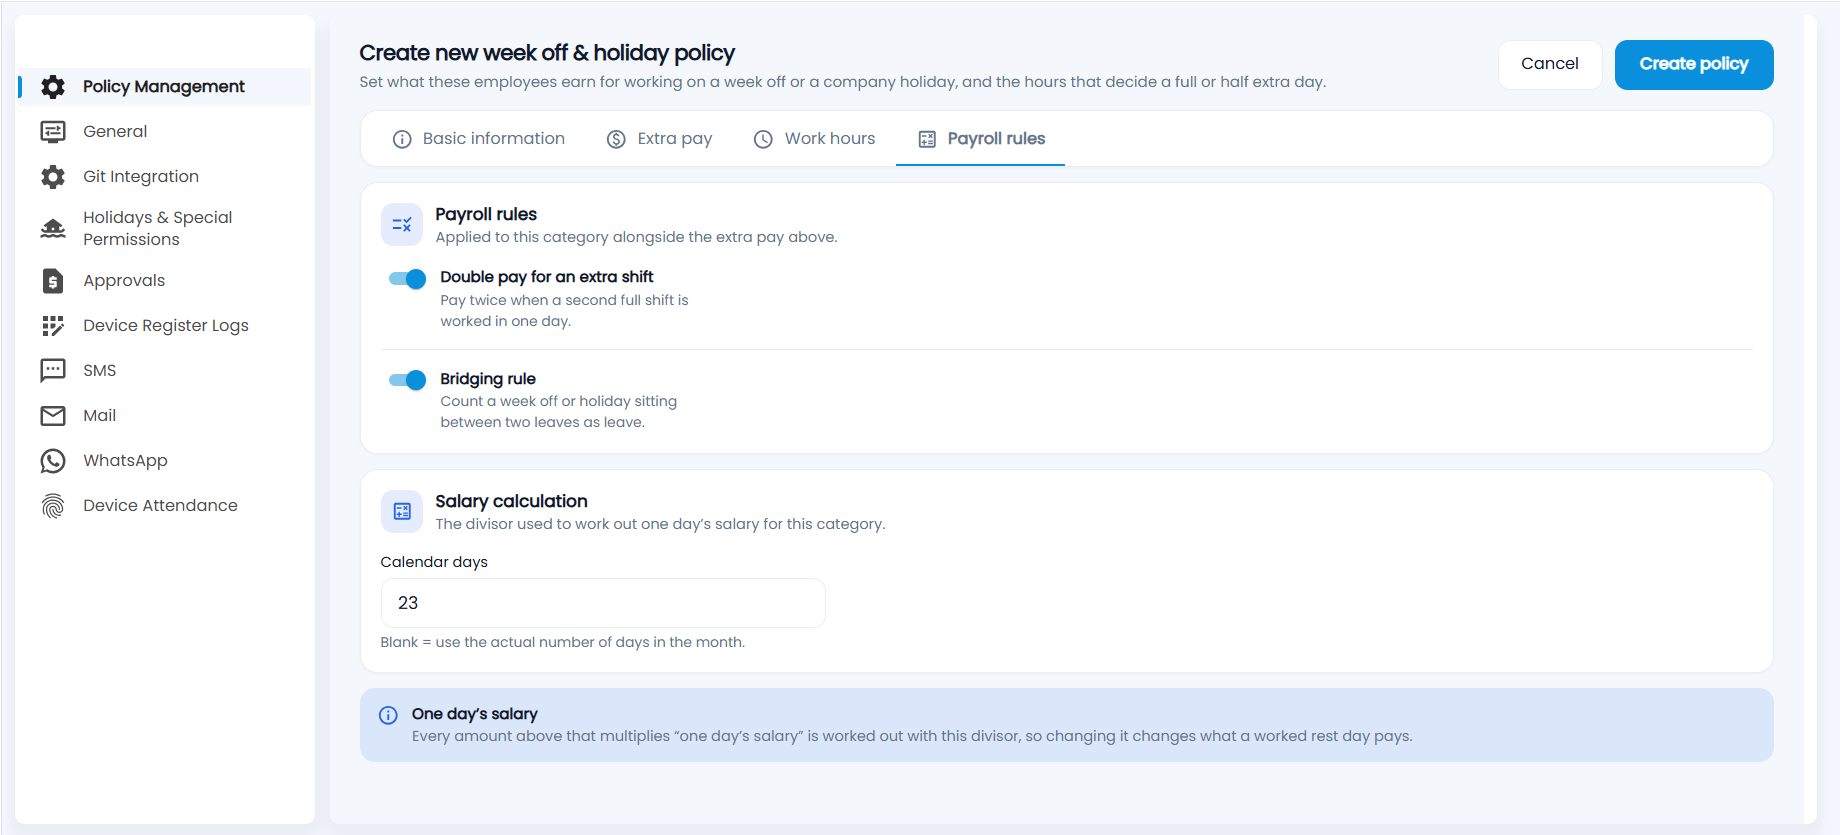
- Double pay for an extra shift — pay twice when a second full shift is worked in one day.
- Bridging rule — count a week off or holiday that sits between two leaves as leave.
- Calendar days — the divisor used to work out one day's salary for this category (1–31). Leave it blank to use the actual number of days in the month.
On a new policy these three start from the company's current payroll settings.
Click Create policy (or Save changes when editing). The extra pay is added when the month's salary is processed.
Attendance Policy
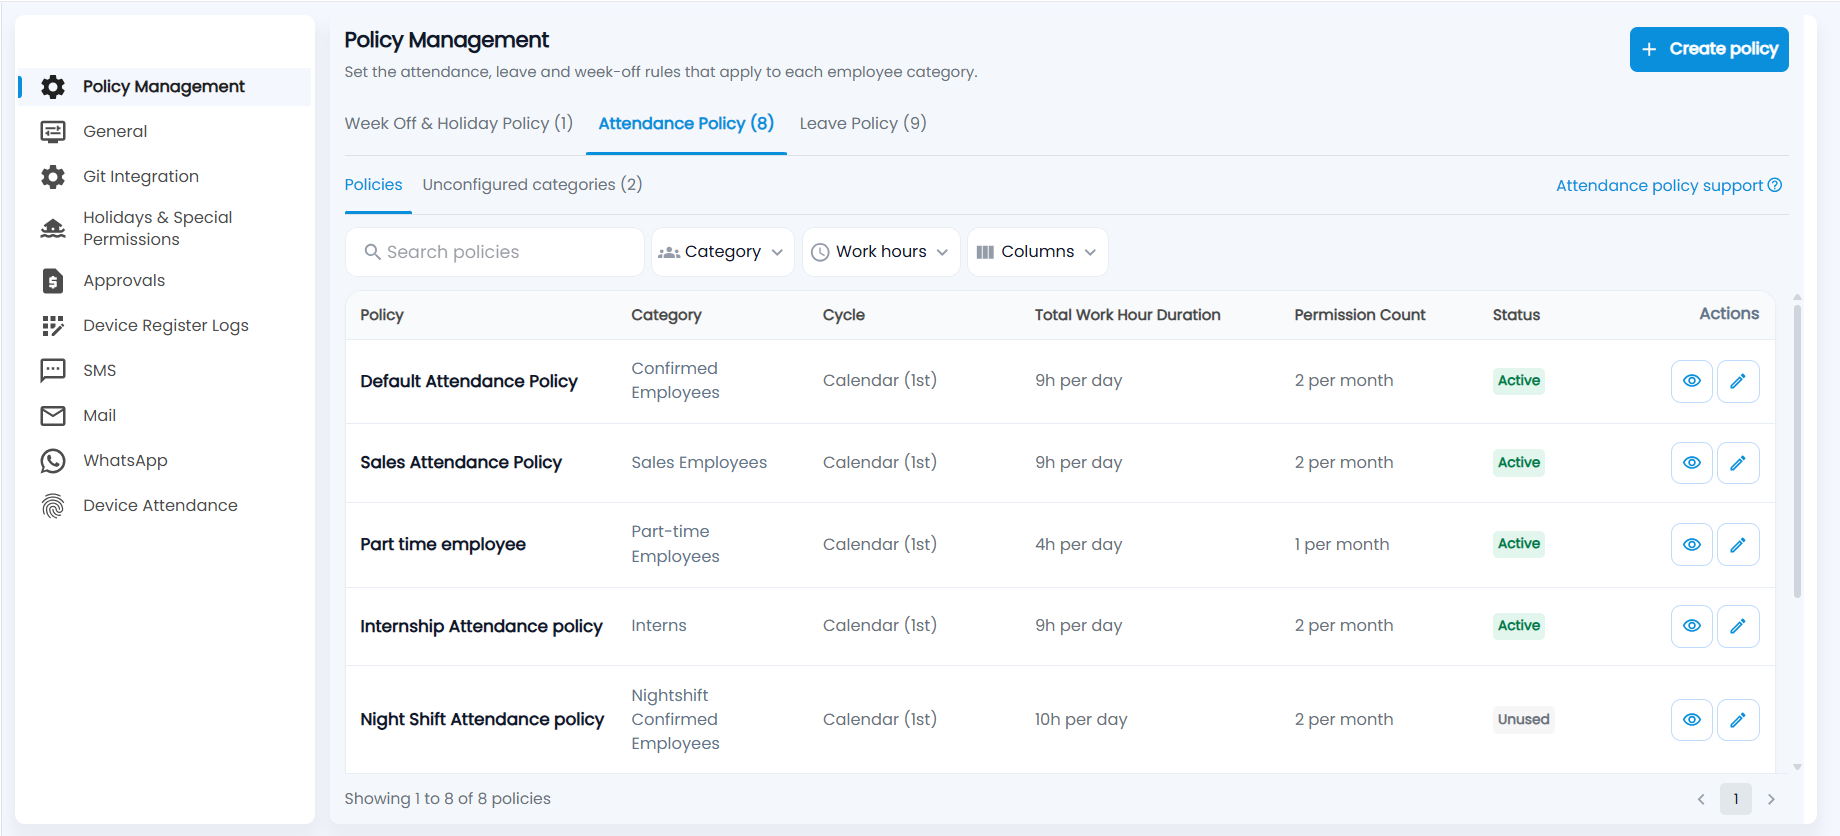
What does the list show?
One row per policy: Policy, Category, Cycle (Calendar (1st) when the cycle starts on day 1, otherwise e.g. Starts 5th), Total Work Hour Duration (9h per day), Permission Count (2 per month), Status and the view and edit icons. Permission Duration can be added from Columns.
Basic information
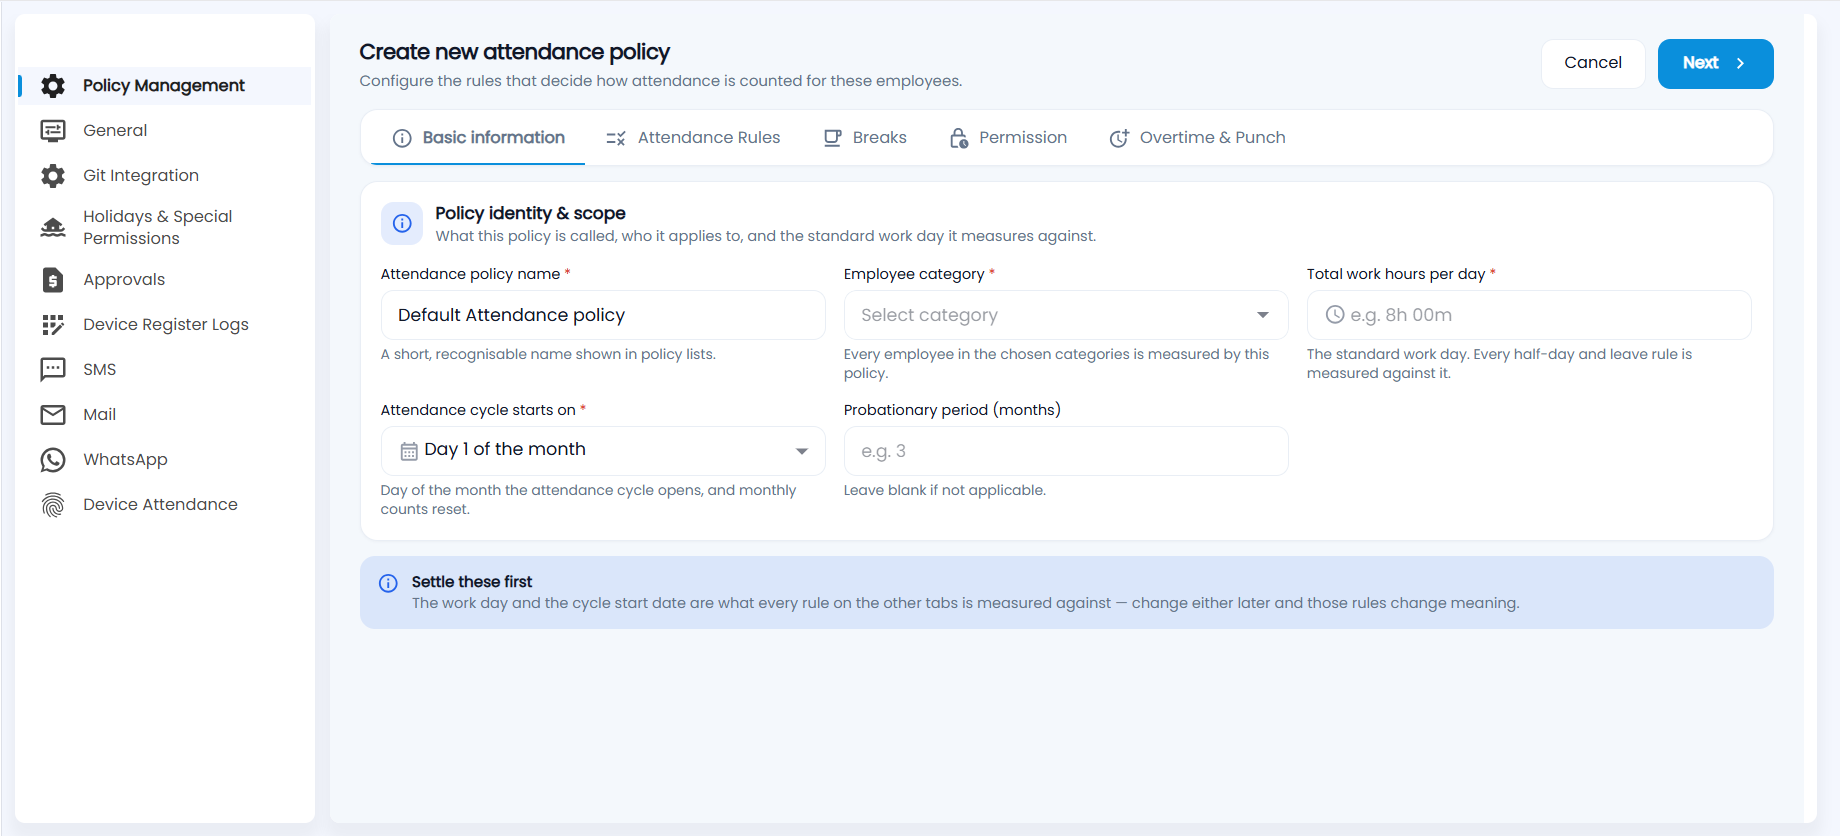
- Attendance policy name (required).
- Employee category (required) — every employee in the chosen categories is measured by this policy.
- Total work hours per day (required) — the standard work day, e.g. 8h 00m. Every half-day and leave rule is measured against it.
- Attendance cycle starts on (required) — Day 1 of the month to Day 28. The cycle opens that day and monthly counts reset.
- Probationary period (months) — 0 to 60; leave blank if not applicable.
Attendance Rules
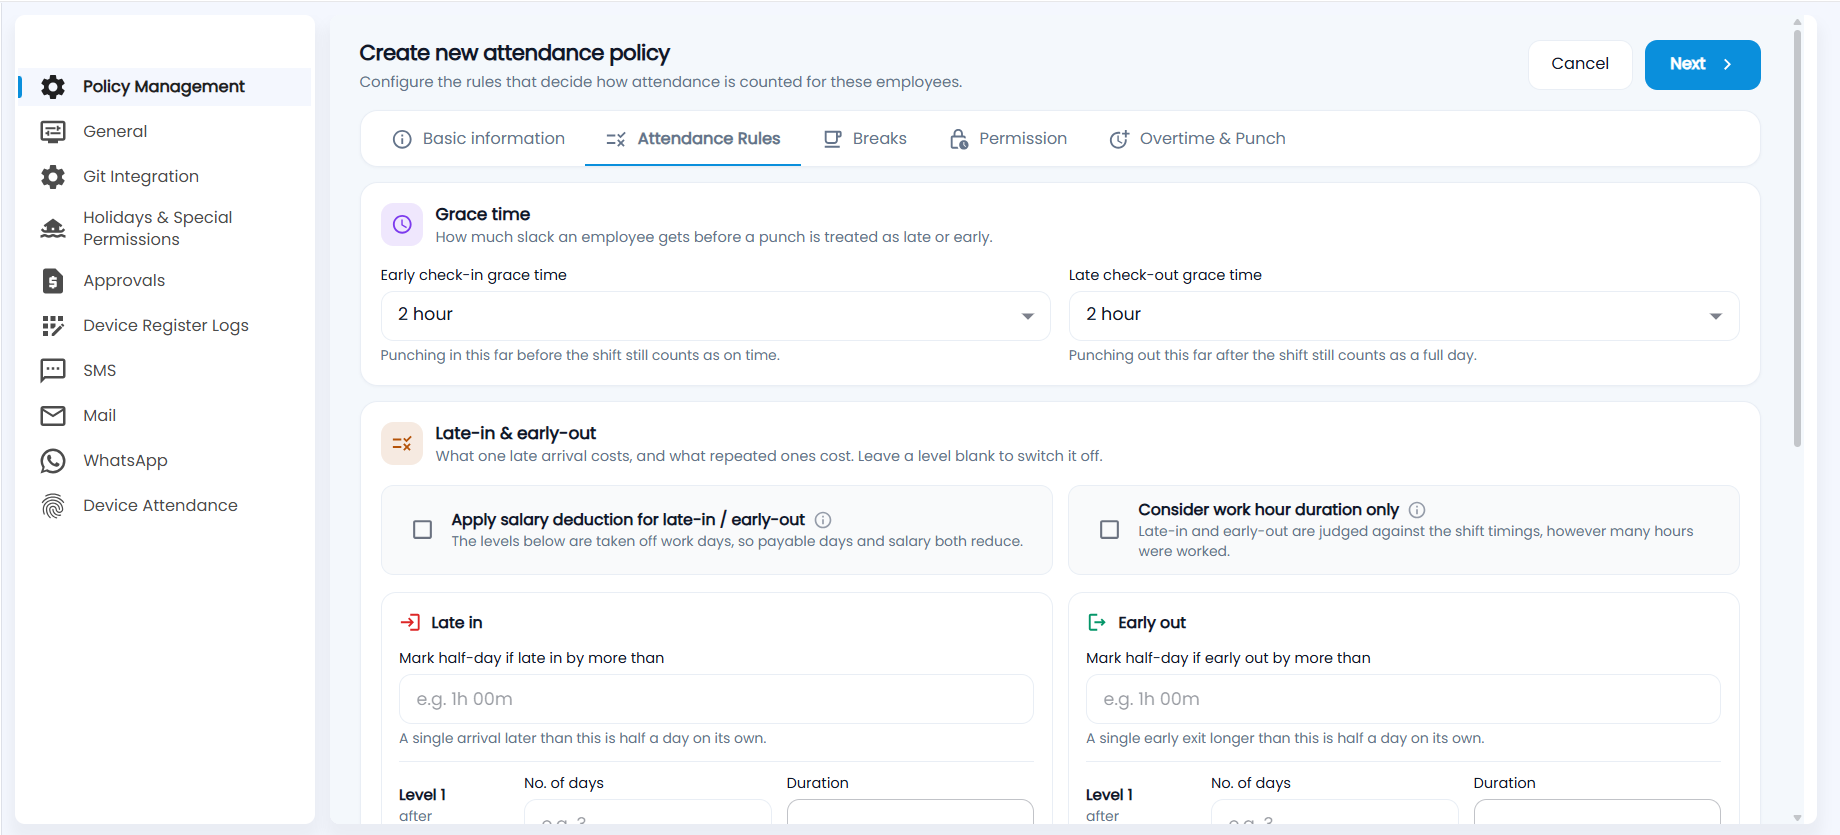
Grace time
- Early check-in grace time — punching in this far before the shift still counts as on time (1, 2 or 3 hours).
- Late check-out grace time — punching out this far after the shift still counts as a full day.
Late-in & early-out
- Apply salary deduction for late-in / early-out — on: the penalties are deducted from salary and payable days are untouched. Off: they are taken off work days, so payable days and salary both reduce.
- Consider work hour duration only — on: a day on which the required hours were worked is never marked late-in or early-out. Off: late-in and early-out are judged against the shift timings, however many hours were worked.
The Late in and Early out columns work the same way:
- Mark half-day if late in (early out) by more than — a single arrival later (or exit earlier) than this is half a day on its own.
- Level 1, Level 2 and Level 3 — what repeated late arrivals cost: after a No. of days (1–31) of being late by more than the Duration, a half day is marked. Level 3 then repeats every that many days. Enter the number of days first; the duration is then required.
Leave a level blank to switch it off. If the Late in and Early out levels use the same day counts they are counted together; otherwise separately.
Short work day
- Mark half-day if work duration is less than
- Count as leave if work duration is less than
Breaks
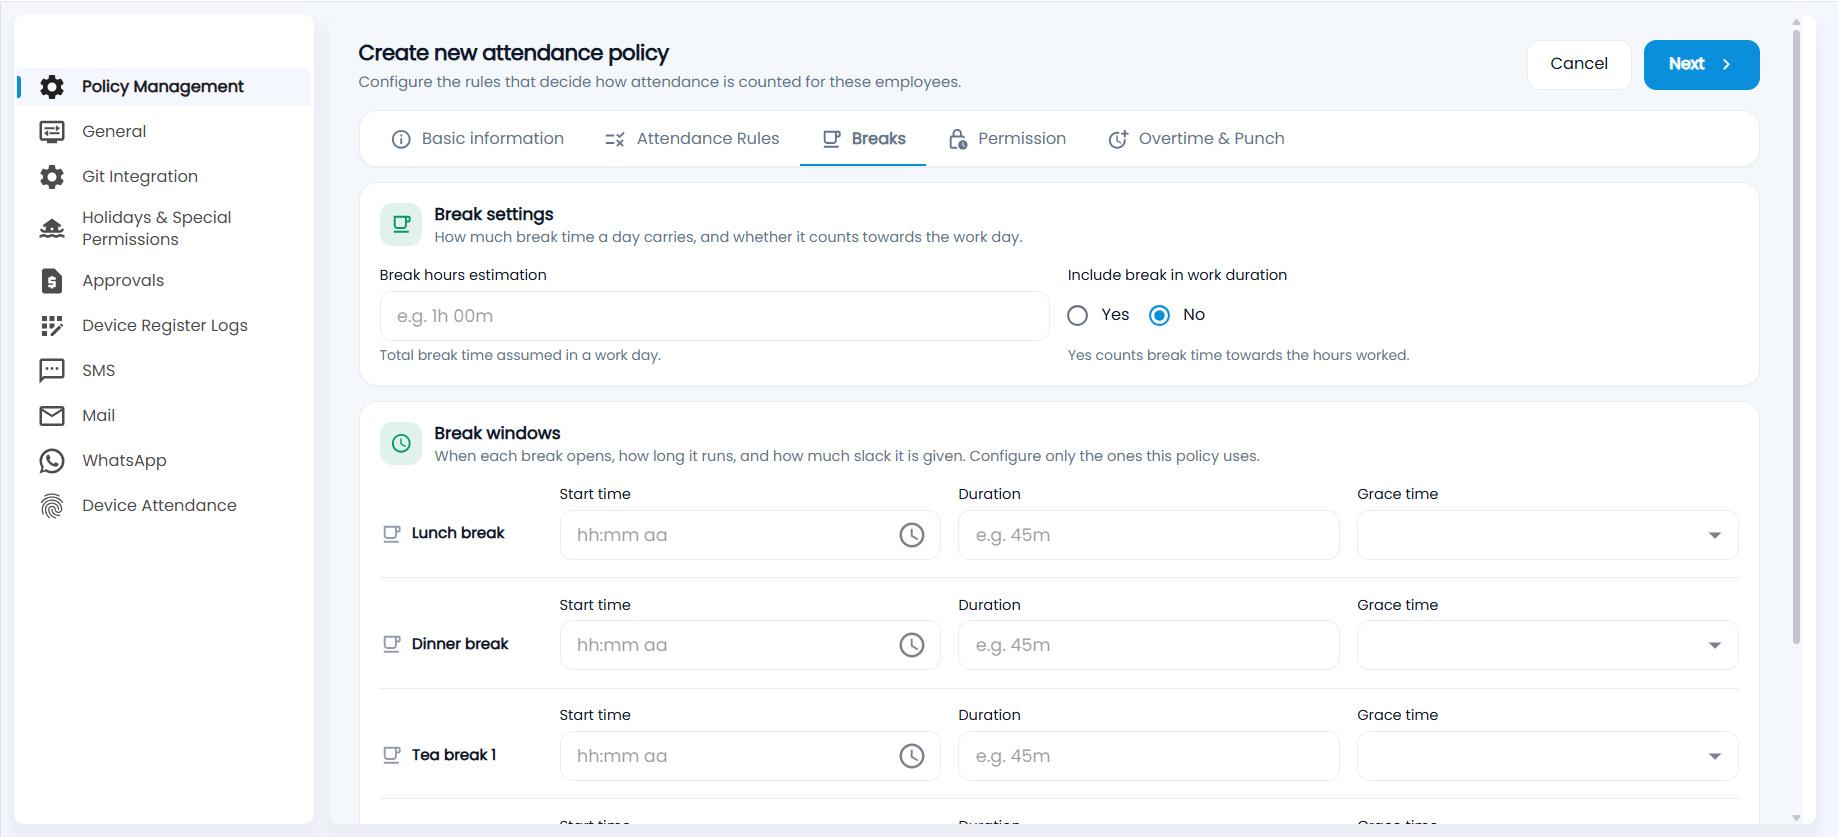
- Break hours estimation — the total break time assumed in a work day.
- Include break in work duration — Yes counts break time towards hours worked; No (default) does not.
- Break windows — Lunch break, Dinner break, Tea break 1 and Tea break 2, each with a Start time, Duration and Grace time (None, 5, 15 or 30 minutes). Configure only the ones this policy uses. Breaks may not overlap once their grace time is added.
Permission
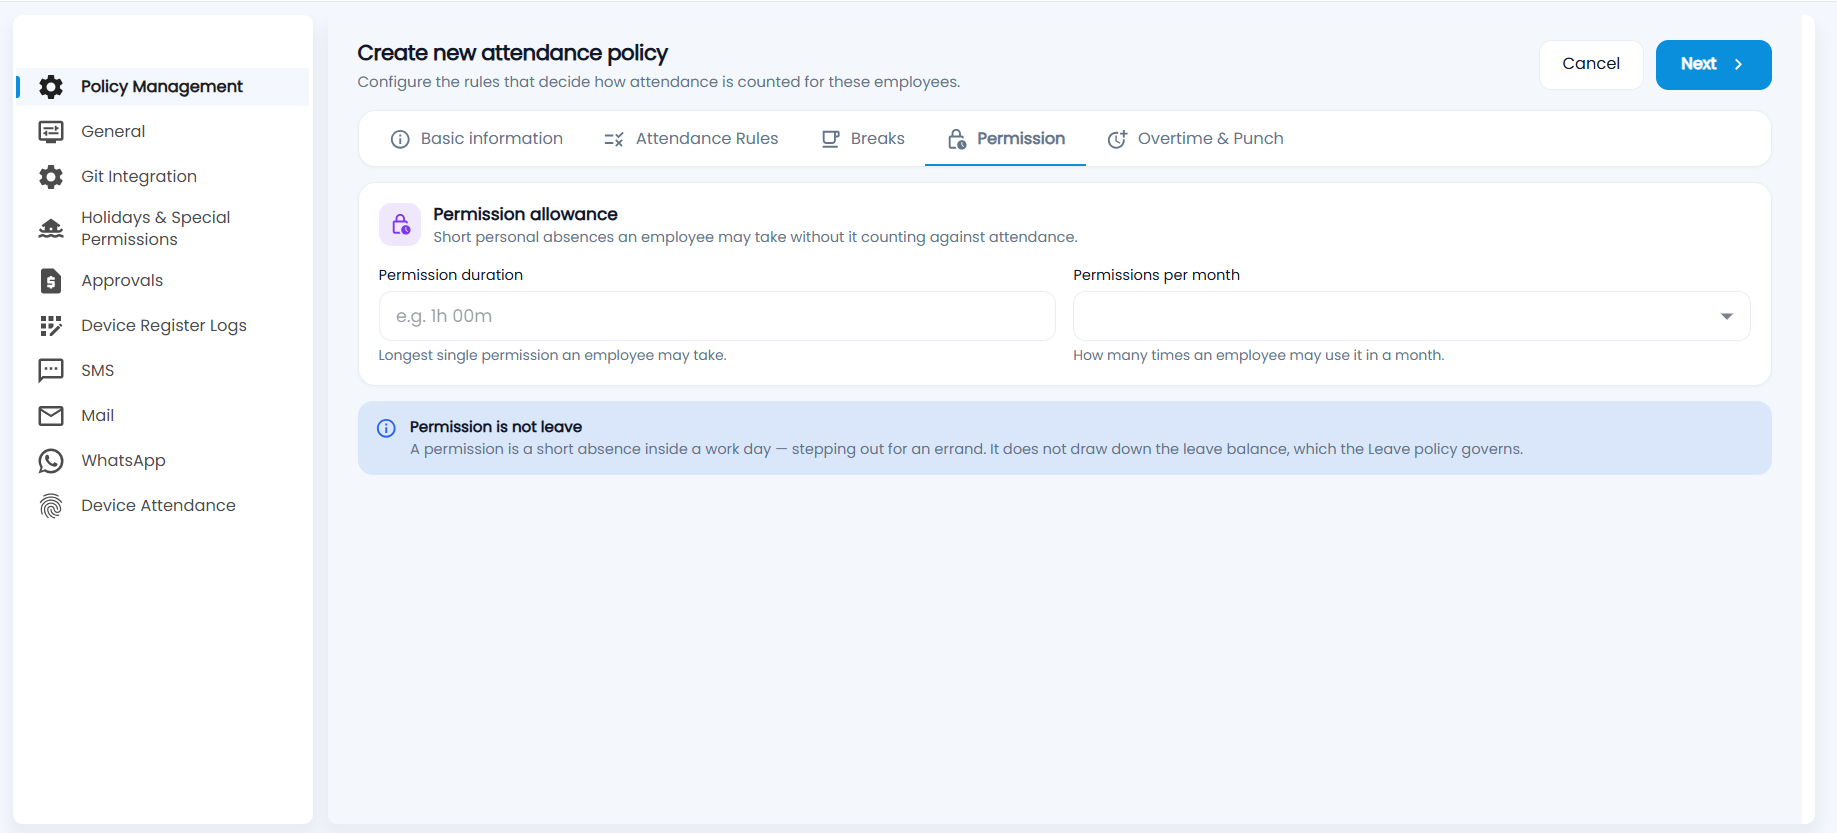
- Permission duration — the longest single permission an employee may take (up to 5 hours).
- Permissions per month — how many times it may be used in a month (1–5).
Overtime & Punch
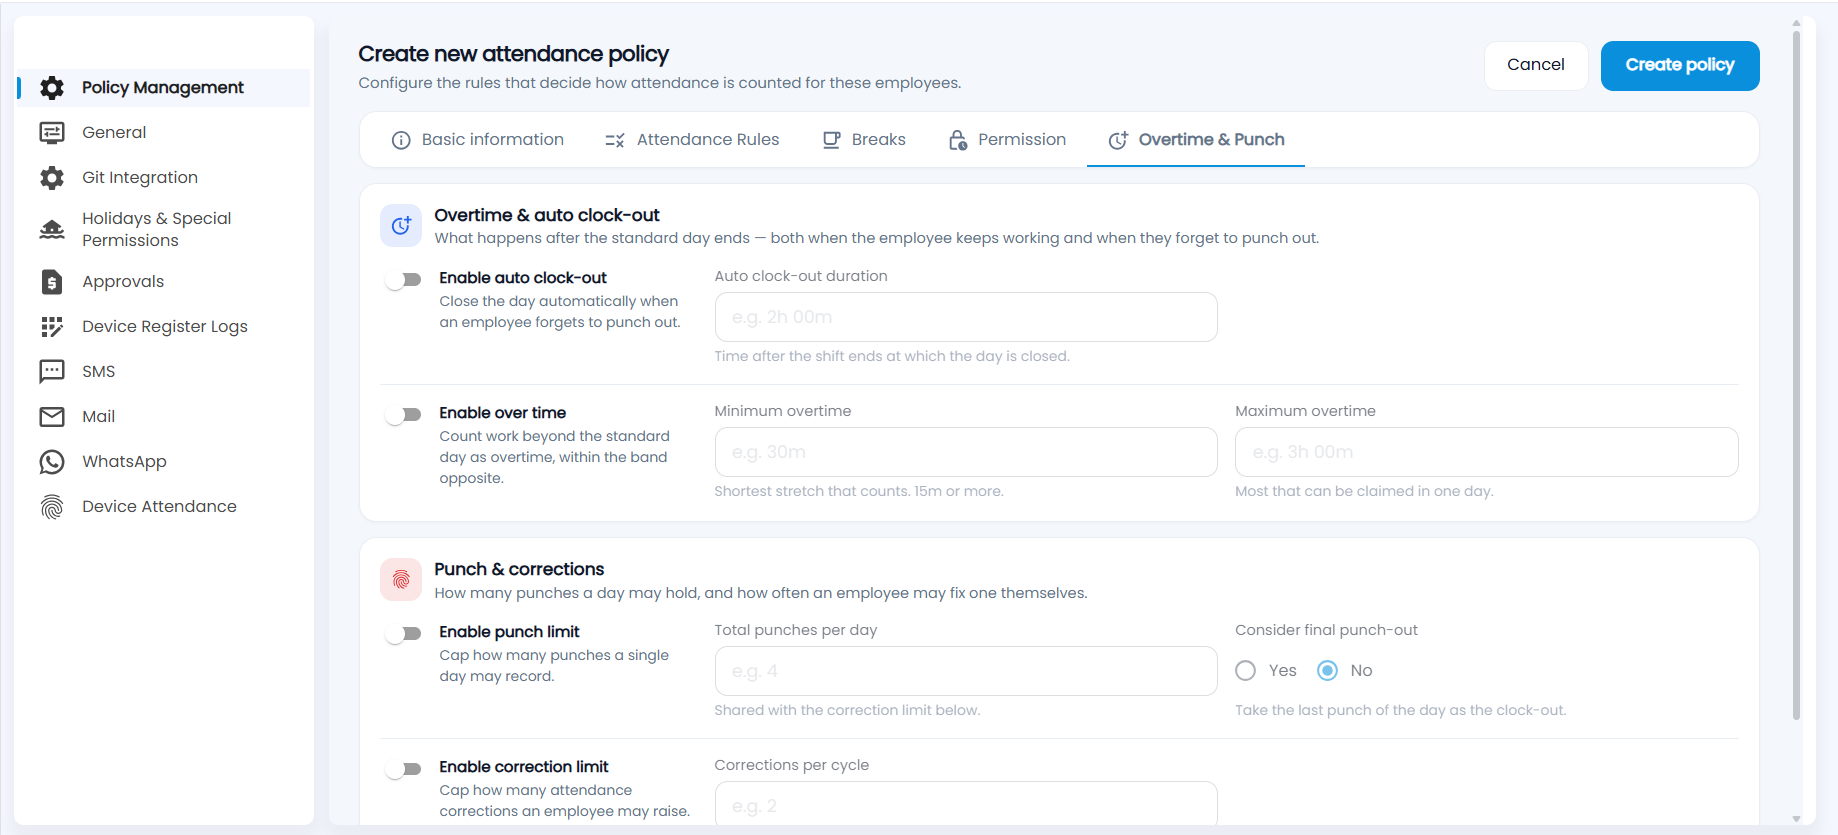
All switches start off; the fields beside a switch are required once it is on.
- Enable auto clock-out — closes the day automatically when an employee forgets to punch out. Auto clock-out duration is the time after the shift ends at which the day is closed.
- Enable over time — counts work beyond the standard day as overtime, within Minimum overtime (the shortest stretch that counts, 15m or more) and Maximum overtime (the most that can be claimed in a day).
- Enable punch limit — caps Total punches per day. Consider final punch-out Yes takes the last punch of the day as the clock-out.
- Enable correction limit — caps Corrections per cycle, the attendance corrections an employee may raise. Total punches per day is shared with it, so it is required when either limit is on.
Click Create policy (or Save changes when editing). The rules are applied when attendance is processed in Attendance Process, before salary.
Leave Policy
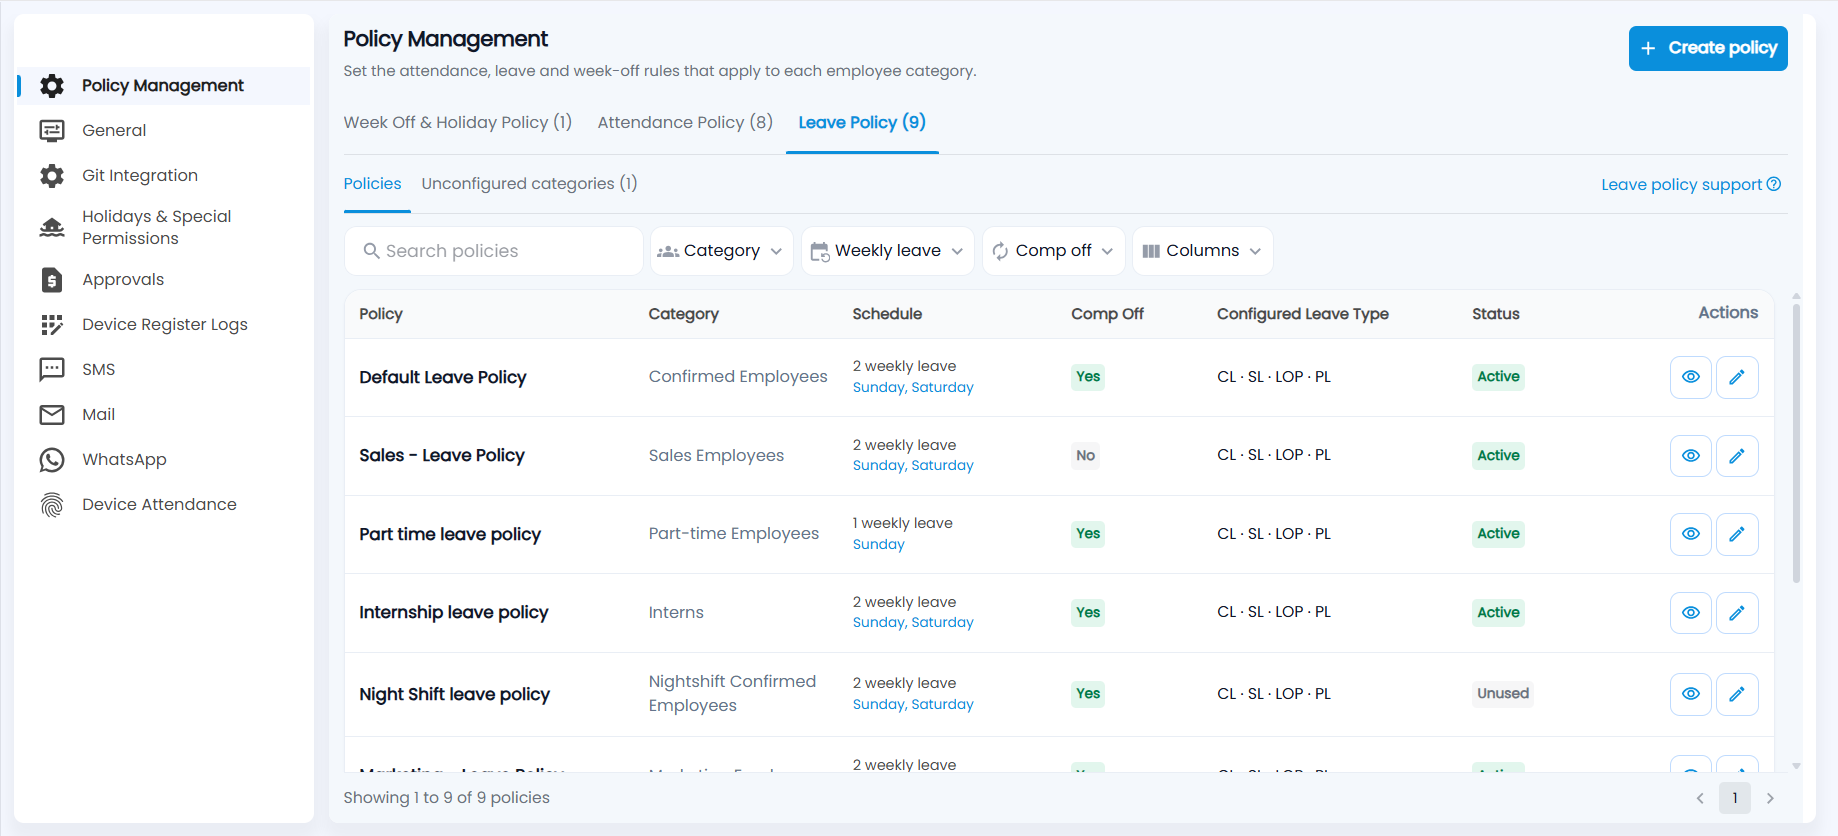
What does the list show?
One row per policy: Policy, Category, Schedule (e.g. 2 weekly leave with Sunday, Saturday under it), Comp Off (Yes / No), Configured Leave Type (codes such as CL · SL · LOP · PL; more than four show +N, with the full list on hover), Status and the view and edit icons. Restricted Holidays can be added from Columns.
Basic information
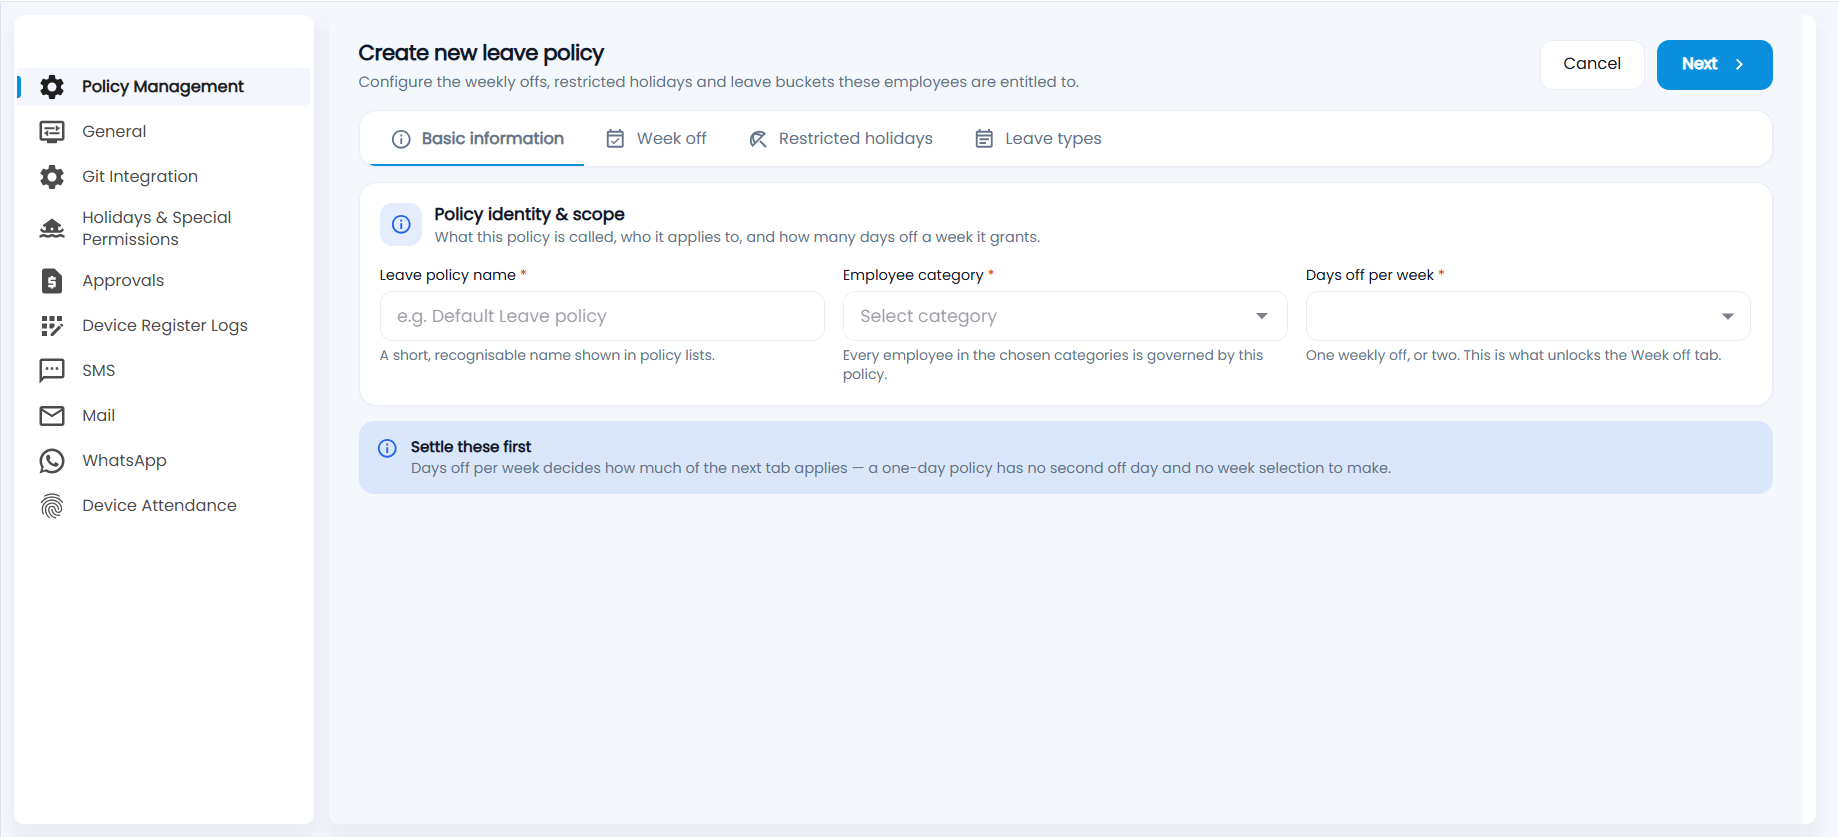
- Leave policy name (required).
- Employee category (required) — every employee in the chosen categories is governed by this policy.
- Days off per week (required) — 1 day a week or 2 days a week. Choose it first: it decides how much of the Week off tab applies.
Week off
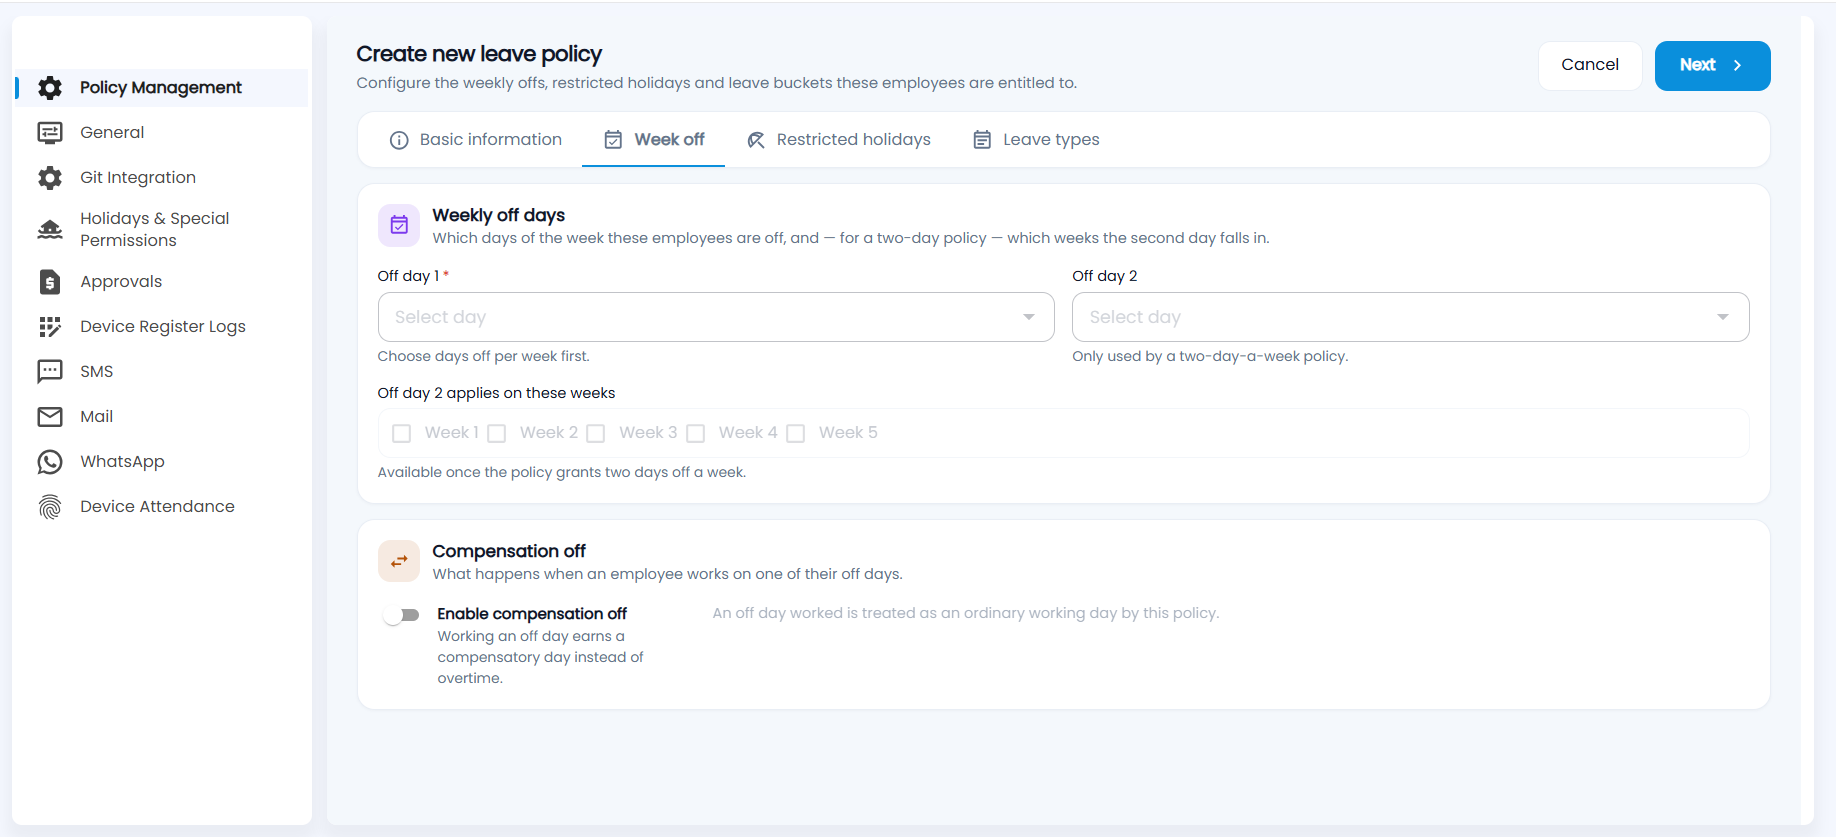
- Off day 1 — the weekly off day, e.g. Sunday. Available once days off per week is chosen.
- Off day 2 — only for a two-day policy, e.g. Saturday. It cannot be the same day as Off day 1.
- Off day 2 applies on these weeks — tick Week 1 to Week 5 for the weeks of the month the second day is off (for example only the 2nd and 4th Saturdays). Two-day policies only.
- Enable compensation off — working an off day earns a compensatory day instead of overtime. Off means an off day worked is treated as an ordinary working day.
Restricted holidays
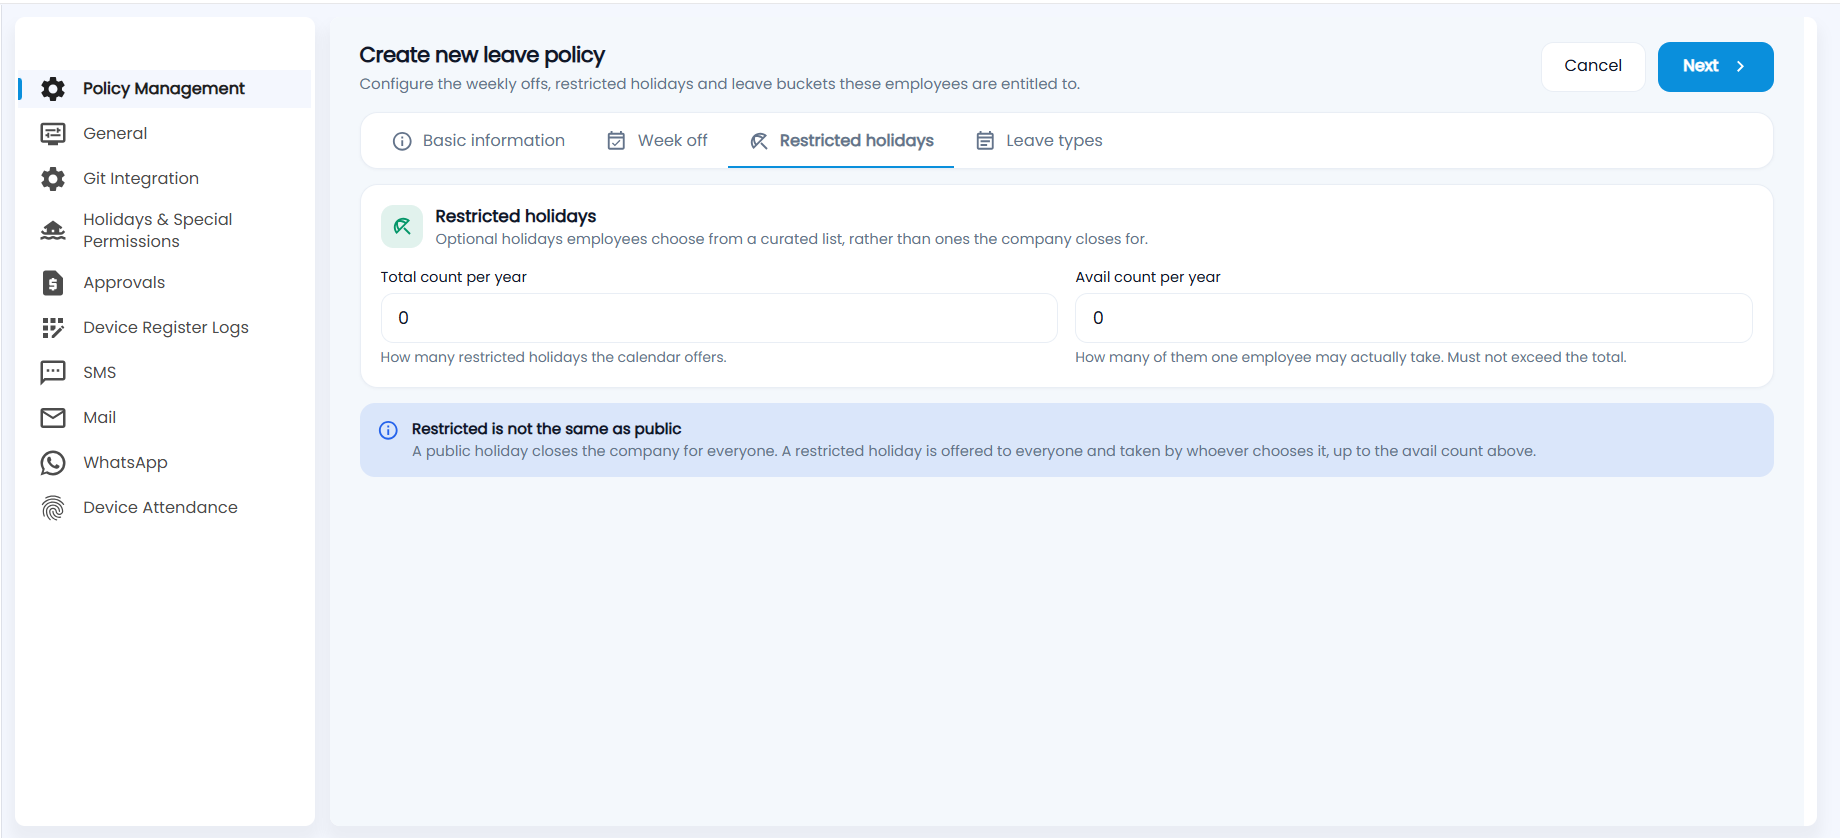
- Total count per year — how many restricted holidays the calendar offers.
- Avail count per year — how many of them one employee may actually take. It can never be more than the total.
Leave types
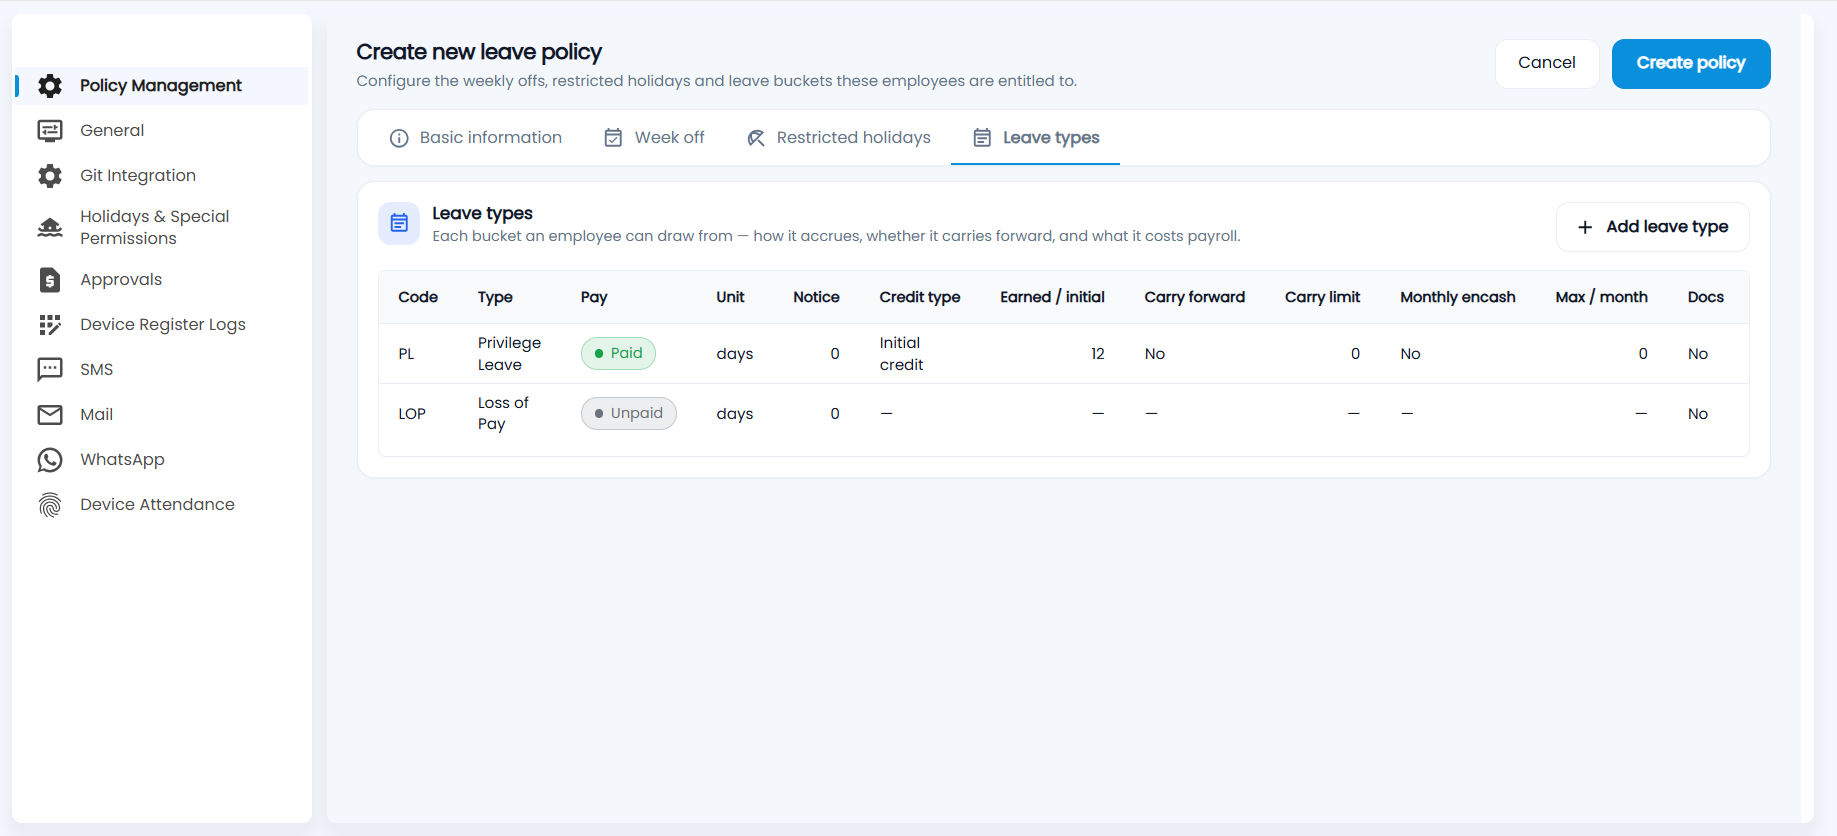
Each row is a leave bucket an employee can draw from: Code, Type, Pay (Paid / Unpaid), Unit, Notice, Credit type, Earned / initial, Carry forward, Carry limit, Monthly encash, Max / month and Docs, with edit and delete icons. A new policy starts with Privilege Leave (Paid, initial credit of 12 days) and Loss of Pay (Unpaid) when the company has those types.
Adding a leave type
- Click Add leave type.
- Pick the Leave type (required) — only types not already added are listed; the Leave code fills in. Use + to create a new leave type (name and code) for the whole company.
- Choose Pay treatment — Paid or Unpaid. An unpaid type needs nothing more.
- For a paid type set:
- Minimum notice (days).
- Credit type — Earned (with Earned days per month) or Initial credit (with Initial credit count), up to 31.
- Maximum leave per month — 0 leaves it unrestricted.
- Enable carry forward (with a Carry forward limit) or Enable monthly encash — one or the other. Casual Leave cannot be carried forward.
- Documents required — the employee must attach a document to apply.
- Click Add (or Update when editing a row).
Click Create policy (or Save changes when editing). When an employee applies for leave, the policy decides the balance, notice, monthly cap and carry forward; approved leave then flows into Attendance Process and salary — paid leave has no salary impact, unpaid leave is deducted.