
How do I add a product in Tazk POS?
Open Inventory → Product Master, go to the Products tab and click + to open the product form. Enter the name, category and brand, choose the product type (Serialized, Non-serialized or Batch) and unit, set the GST preference, tax category and HSN code, enter the selling price, buying price and MRP, then click Submit. To add many products at once, use More actions → Upload with the sample template.
What is in the Product Master?
Click Inventory → Product Master. The workspace has a tab for each part of the catalogue your role can use: Overview, Products, Bulk Edit, Tags, Variants, Ecom Integration, Import / Export and Settings. Each is described below.
What does the Overview tab show?
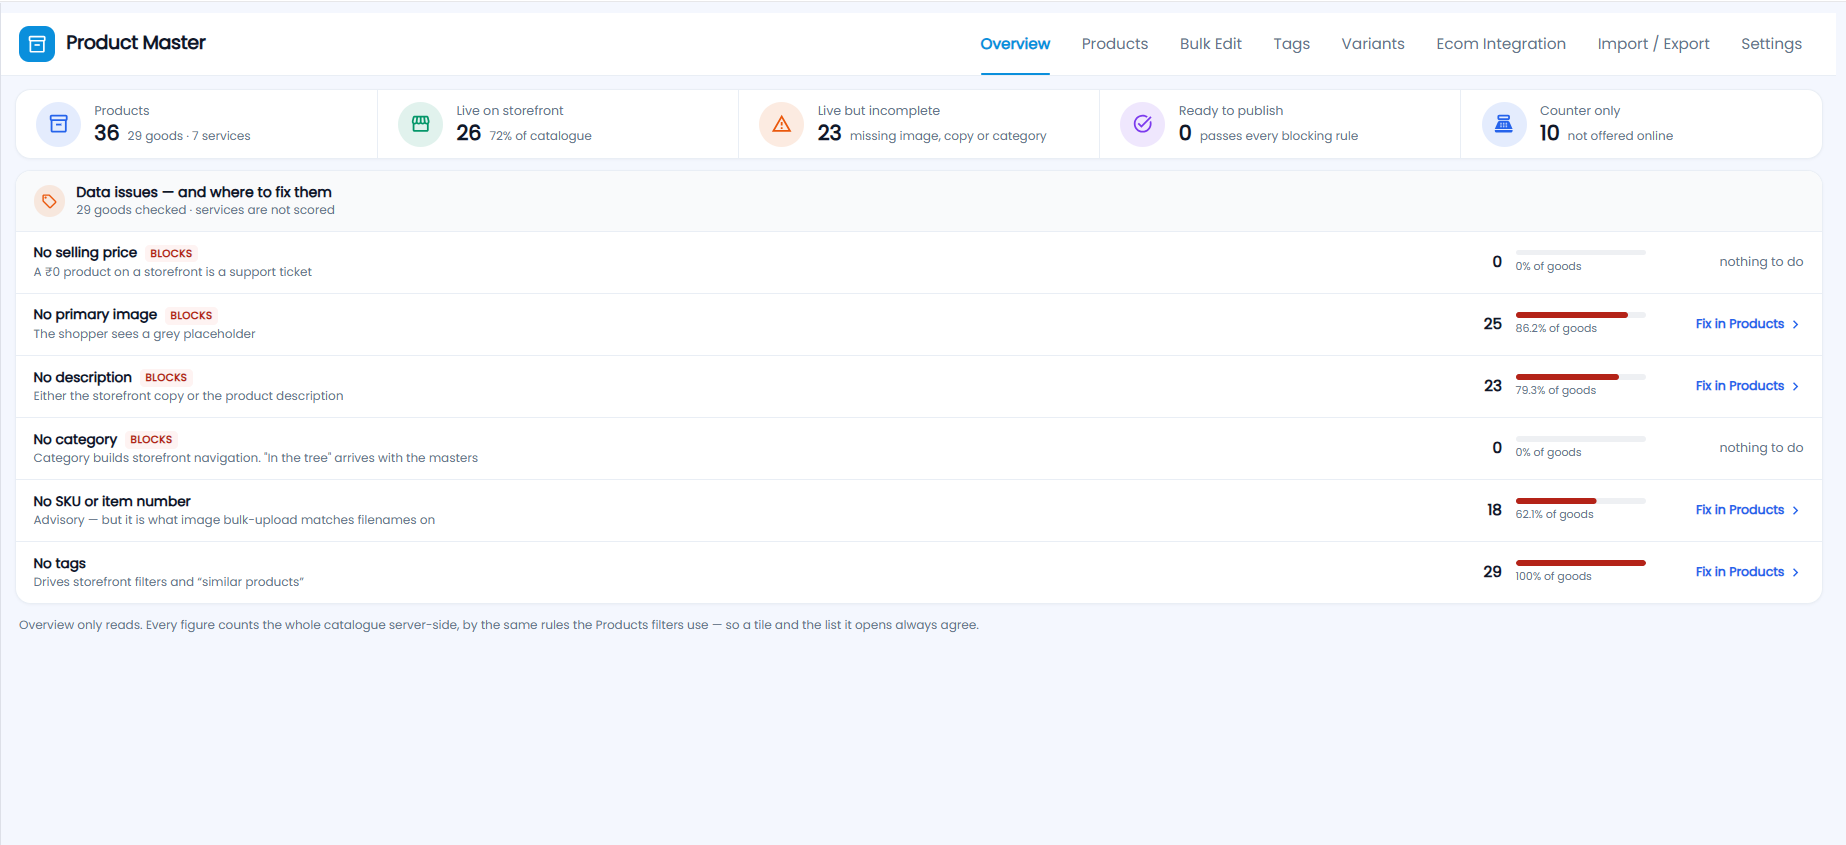
Five tiles sum up the catalogue:
| Tile | What it counts |
|---|---|
| Products | All products, split into goods and services |
| Live on storefront | Products visible in your online store, and what share of the catalogue that is |
| Live but incomplete | Online, but missing an image, copy or category |
| Ready to publish | Not online yet, but passing every blocking rule |
| Counter only | Sold at the counter and not offered online |
Below, Data issues — and where to fix them checks your goods (services are not scored). Each row shows how many goods have the problem and what share that is: No selling price, No primary image, No description and No category are marked BLOCKS because they stop a product being published; No SKU or item number and No tags are advice. Click Fix in Products to open exactly those products, or a row to take them to Bulk Edit with the field already chosen. Nothing to do means no product has that problem. Overview only reads — it never changes anything.
What does the Products tab show?
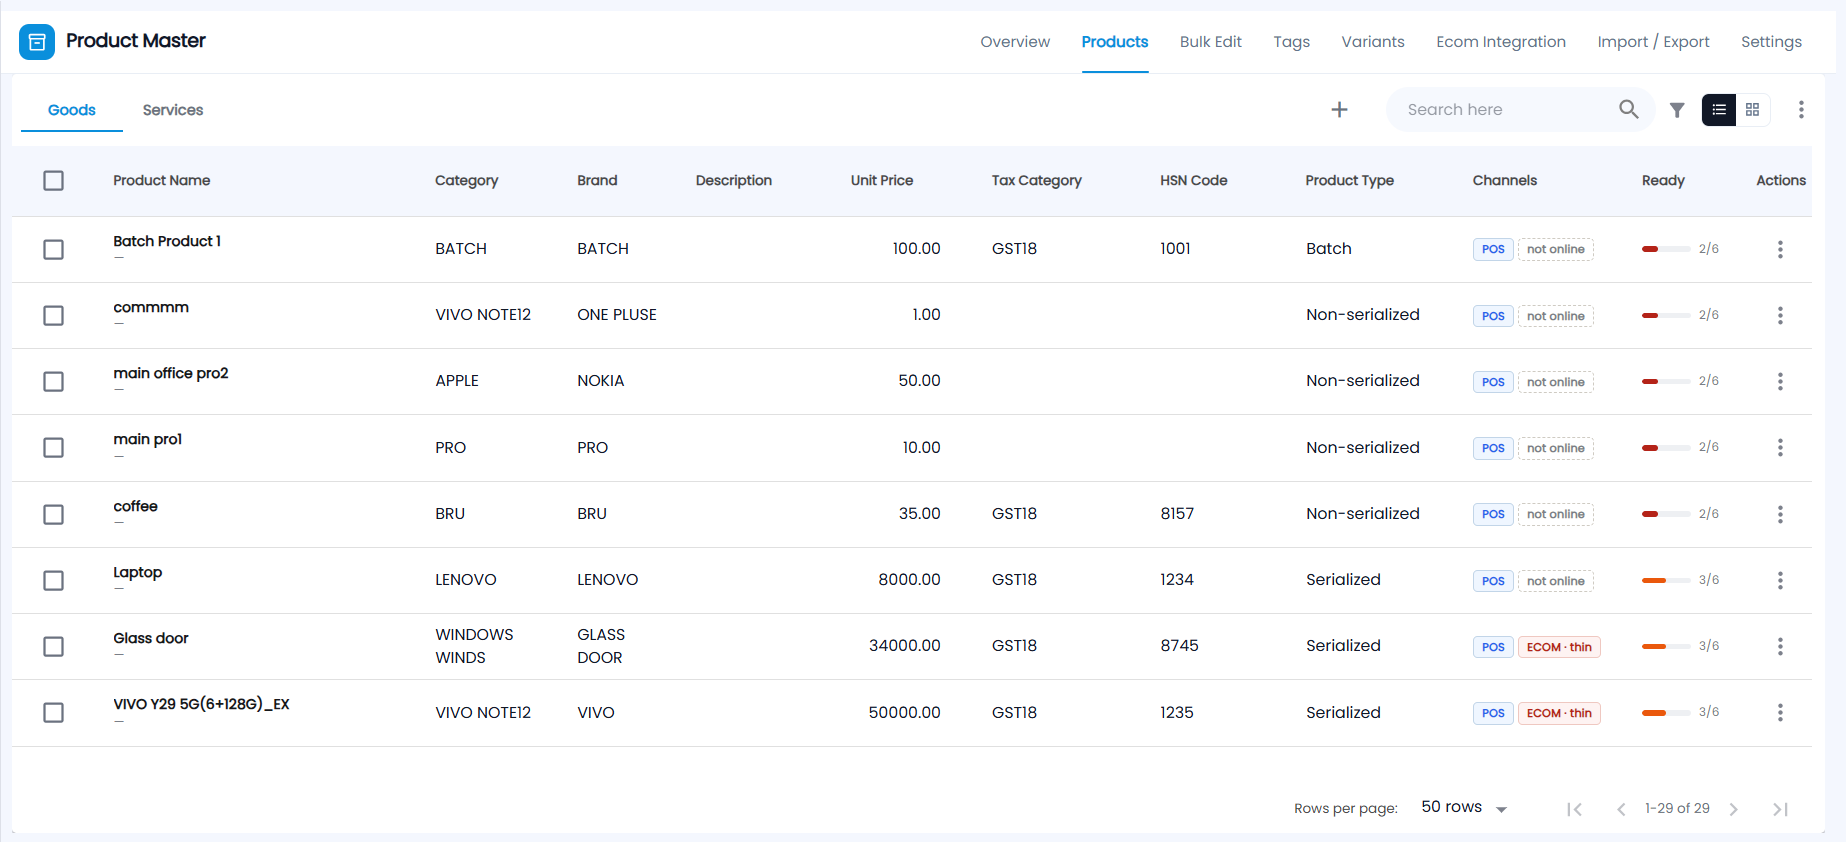
The Products tab has Goods and Services tabs, then + (add a product), Search here, the filter icon, the list / gallery switch and a More actions (⋮) menu. Tick rows with the checkboxes to act on several products at once. The columns are:
| Column | Description |
|---|---|
| Product Name | Name, with the variant, colour, model or SKU underneath (Service Name on Services) |
| Category / Brand / Description | How the product is grouped and described |
| Unit Price | Selling price |
| Tax Category | The GST rate applied, for example GST18 |
| HSN Code | HSN for goods (SAC Code for services) |
| Product Type | Serialized, Non-serialized or Batch |
| Channels | POS, plus not online or an ECOM chip (ECOM · thin when the online listing is missing details) |
| Ready | A bar showing how many of the 6 publish checks the product passes, for example 2/6 |
| Actions | The ⋮ menu with Edit and Delete |
The list shows 50 rows per page by default.
How do I add a product?
- On the Products tab, click +. Choose Goods or Service.
- Basic Information — Product Name, Category, Brand, Model, Variant, SKU and Description.
- Product Settings — Condition (New or Old), Product Type, Where it sells (Counter only, Online only or Both) and Dealers (Can see it or Hidden).
- Item Details — the Unit the product is sold in (from your company’s units).
- Tax Details — GST Preference, Tax Category and the HSN Code (up to 8 digits; for services the SAC code, up to 6).
- Pricing Details — Selling Price, Buying Price and MRP/MOP, all excluding tax.
- Inventory & Other Info — the stock settings below.
- Optionally add up to 6 Product Images (a picture is required if the product sells online).
- Click Submit.
If a product with the same name already exists, you are told before it is saved and can use a different name instead.
Which product type should I choose?
| Product Type | Use it for |
|---|---|
| Serialized | Items where every unit has its own serial or IMEI number — phones, appliances. Each unit is tracked through Lot Traceability |
| Non-serialized | Items counted only by quantity |
| Batch | Items bought and sold in batches with manufacture and expiry dates |
How do I set GST and HSN for a product?
Under Tax Details, choose the GST Preference:
- Taxable — choose the Tax Category (the GST rate) and enter the HSN Code.
- Non-Taxable — no tax is charged and the tax category is left blank.
- Tax at Invoice Time — the rate is picked on each invoice. This option is not offered when e-invoicing is turned on.
The tax category decides the GST charged on Invoices and at the Sales Counter, and the HSN code is printed on them and used in GST reports.
What are the stock settings?
| Field | What it does |
|---|---|
| Lifecycle / Warranty | Typed as years and months, for example 2Y 6M |
| Stock Limit | Enable to set a Minimal Stock Reminder quantity |
| Expiry | Enable to set an expiry date |
| Automatic Reorder Level | Enable to set a Reorder Level; stock at or below it shows as Low Stock |
| No Inventory Tracking | Enable for items you sell without counting stock |
| All Locations | Every location, or Selected locations to sell the product only at the locations you pick |
How do I import many products at once?
- On the Products tab, open More actions and choose Upload.
- Download the Sample Template and fill one row per product: Name, SKU, Description, Category, Brand, Model, Cost Price, Unit Price, Max Price, Product Type (Serialized, Non-serialized or Batch), Taxable (Yes or No), Tax Percent, Quantity Per Pack, HSN Code and Unit.
- Upload the file. Every row is checked first; if any row has a problem (a duplicate name in the sheet, a unit that does not match one of your units, a missing name) nothing is uploaded and the row number is shown so you can fix it.
If some products already exist, you are told which ones before you continue. The upload creates products only — to bring in their opening stock, use the upload on Stocks.
How do I change many products together?
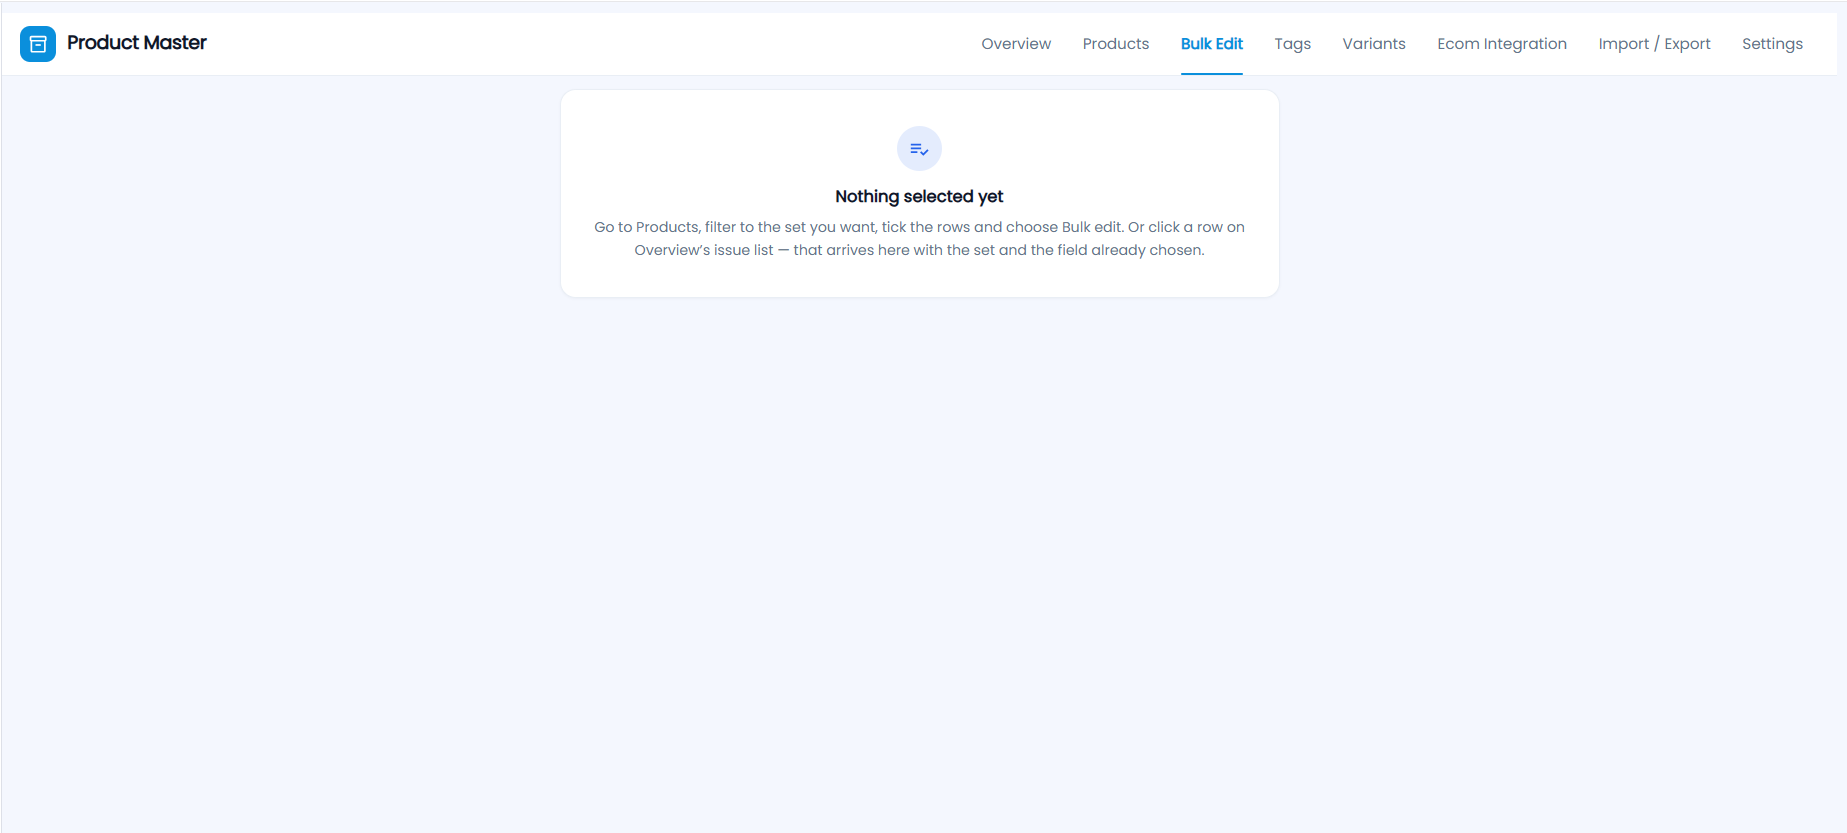
On the Products tab, filter to the set you want, tick the rows and choose Bulk edit — or click a row on the Overview issue list, which arrives with the set and the field already chosen. Until then the Bulk Edit tab says Nothing selected yet.
Pick the field to change — Category, Brand, Tags, Selling price, MRP, HSN / SAC code, Online price, Short description, SEO title, Stock display, Featured, Sell online or Sell at the counter. Nothing is written until you have seen the preview, which lists what will change, what is already correct and what is refused (with the reason).
How do tags work?
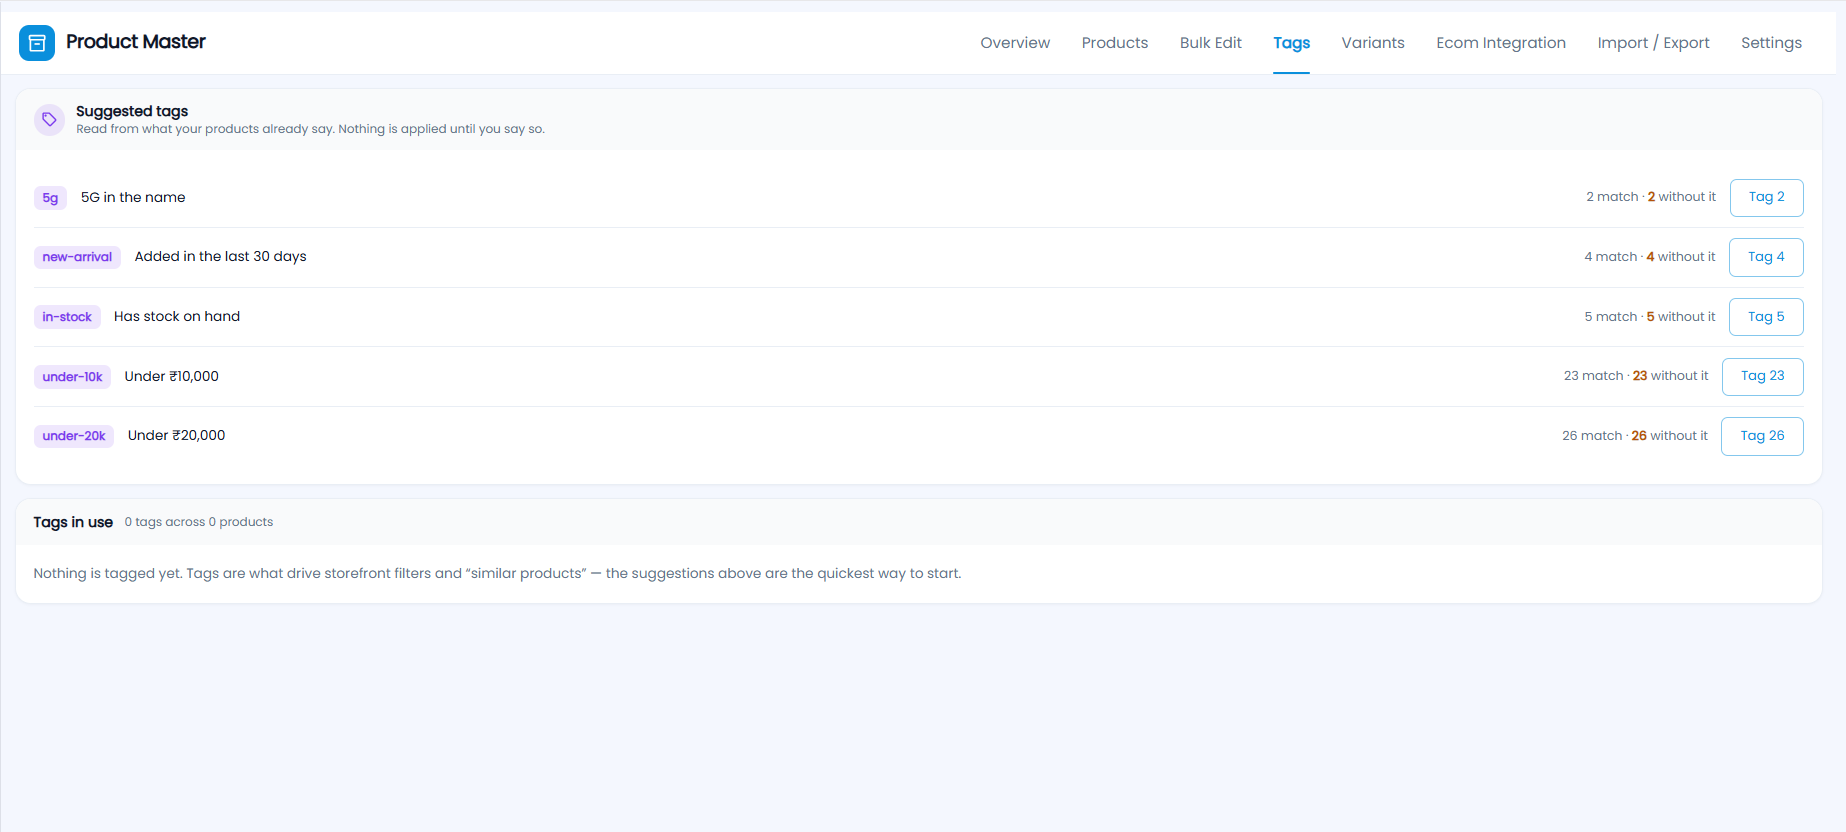
Tags drive storefront filters and “similar products”. Suggested tags are read from what your products already say — for example 5g (5G in the name), new-arrival (added in the last 30 days), in-stock (has stock on hand), under-10k and under-20k (price bands). Each row shows how many products match and how many are still without the tag; click Tag N to tag them. Nothing is applied until you click. Tags in use lists the tags already on products, and how many products carry them.
How do variants work?
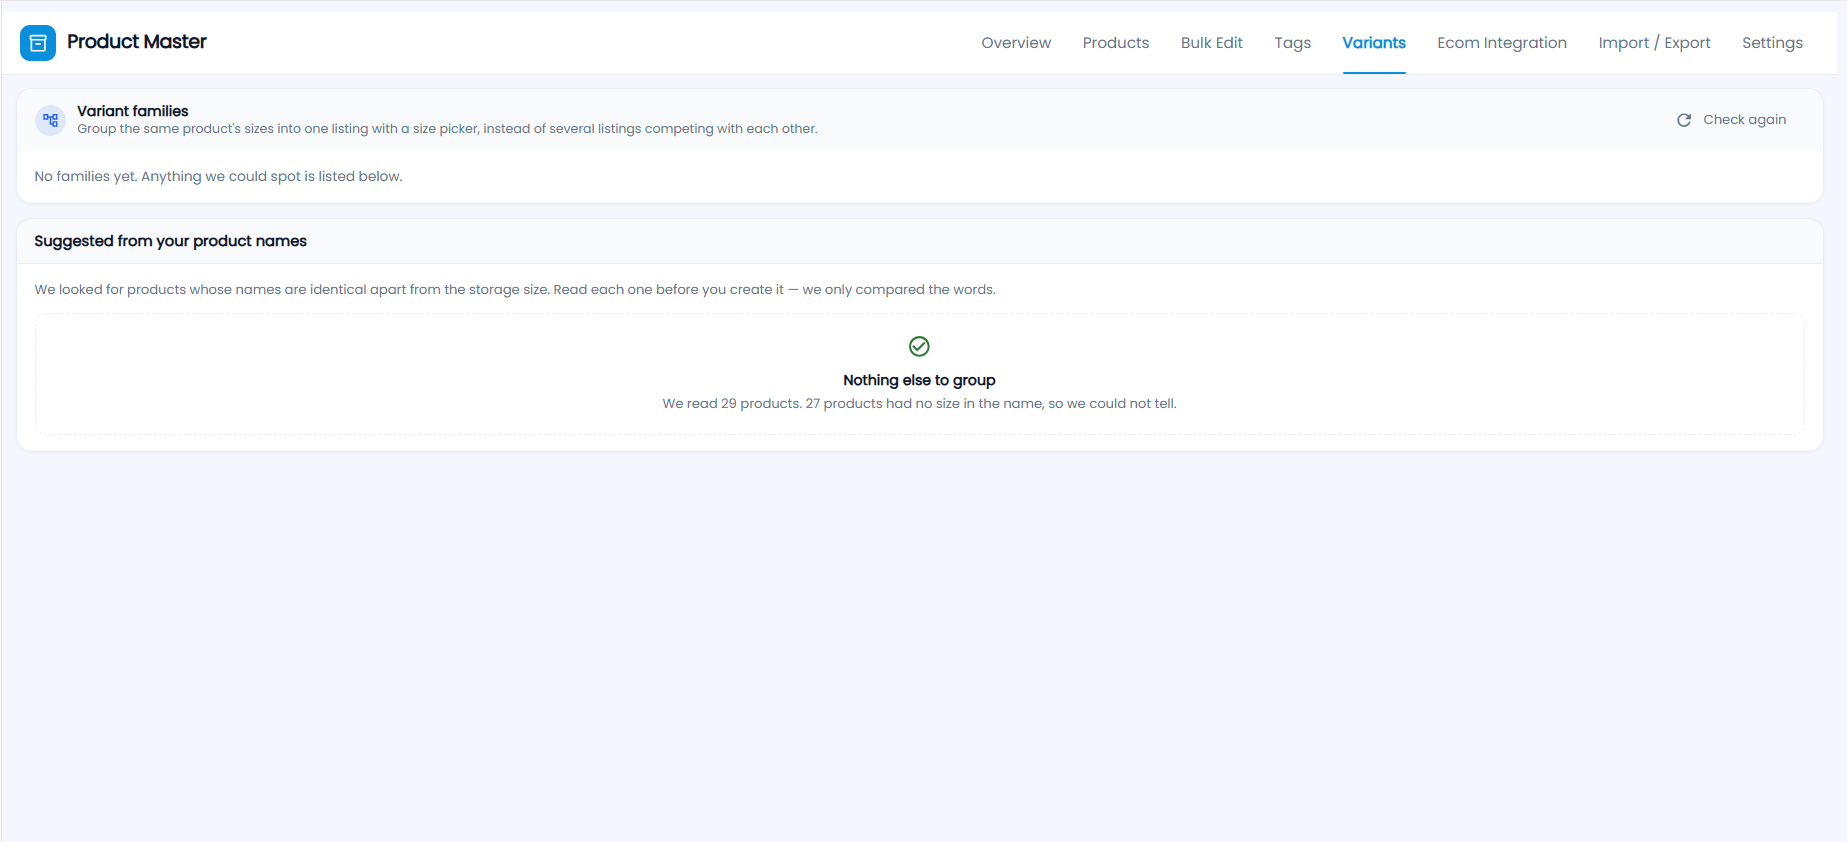
Variant families group the same product’s sizes into one listing with a size picker, instead of several listings competing with each other. Under Suggested from your product names, Tazk looks for products whose names are identical apart from the storage size — read each suggestion before you create it, because only the words are compared. Tick the ones you want and create the family; you can rename a family later, or disband it (the products stay, only the grouping goes). Nothing else to group means no more matches were found; click Check again after adding products.
What does Ecom Integration show?
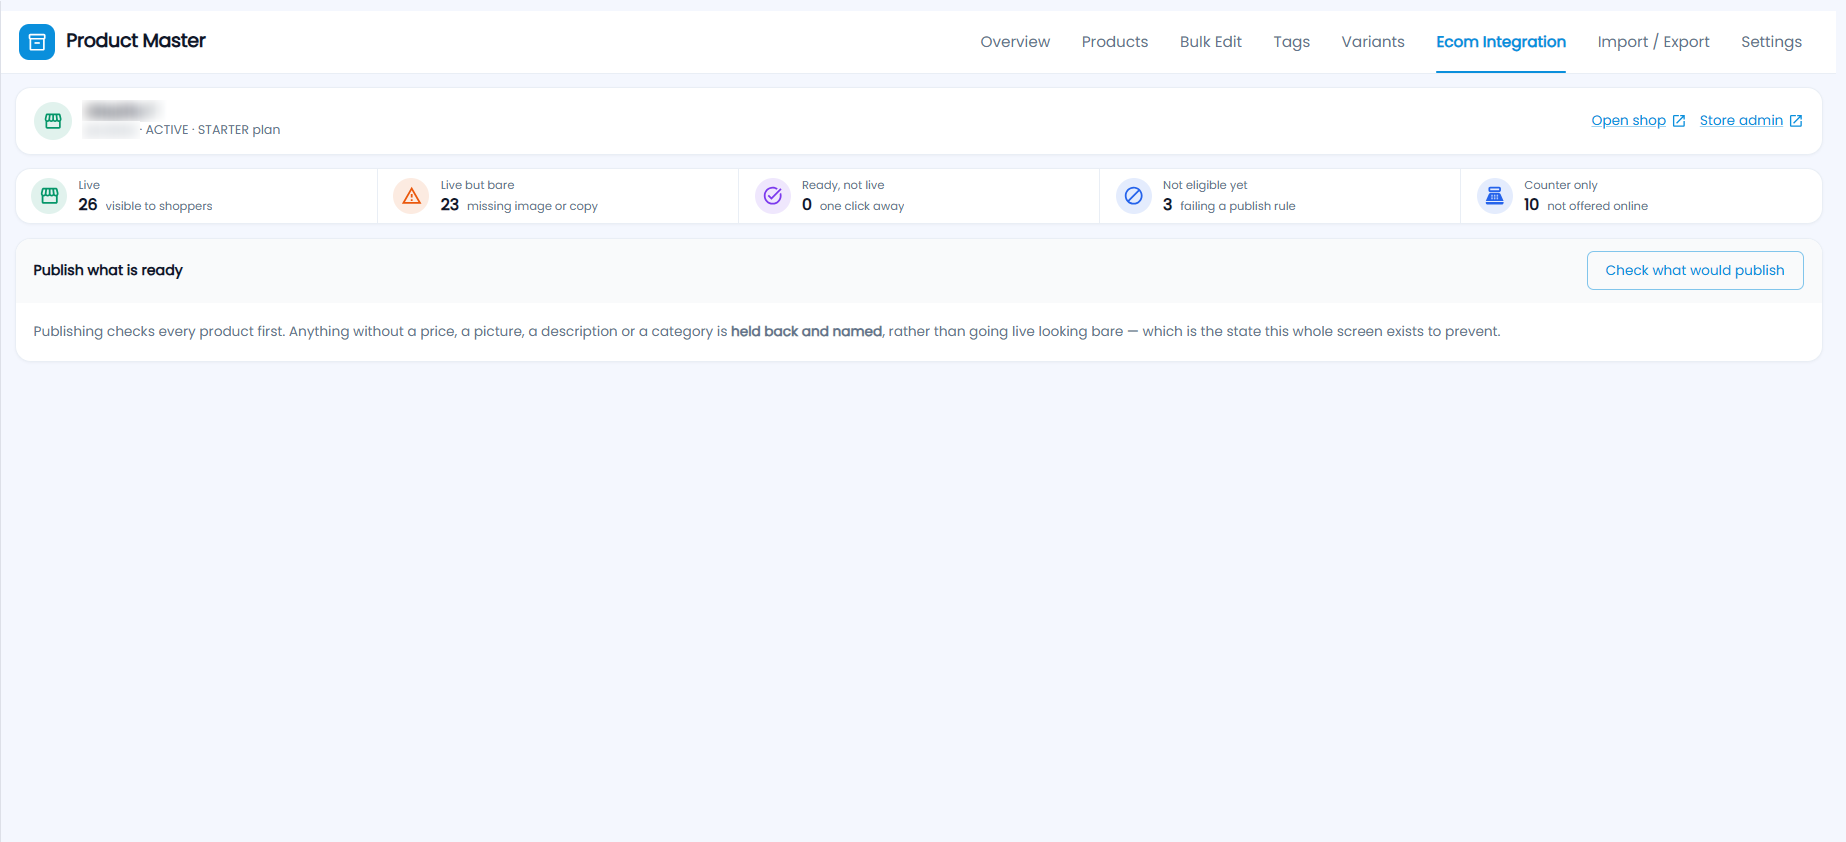
The top card shows your online store, its status and plan, with Open shop and Store admin links. The tiles count products that are Live (visible to shoppers), Live but bare (missing an image or copy), Ready, not live (one click away), Not eligible yet (failing a publish rule) and Counter only (not offered online).
Under Publish what is ready, click Check what would publish. Publishing checks every product first: anything without a price, a picture, a description or a category is held back and named, rather than going live looking bare.
What is on Import / Export?
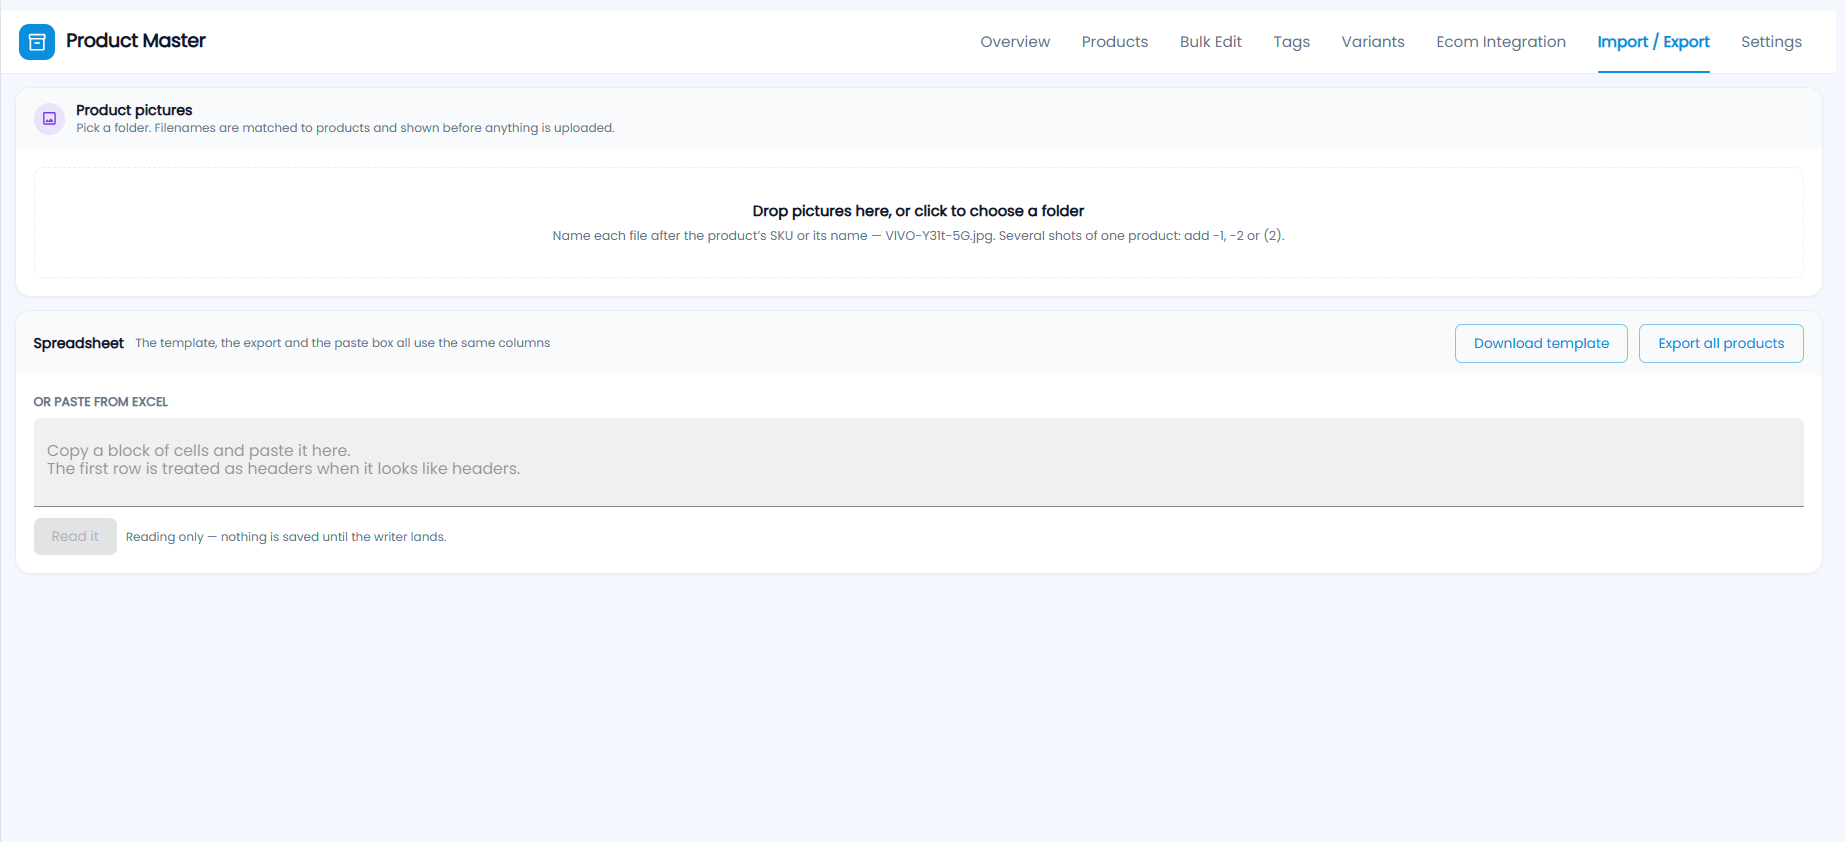
- Product pictures — drop pictures or click to choose a folder. Name each file after the product’s SKU or name, for example VIVO-Y31t-5G.jpg; for several shots of one product add -1, -2 or (2). Filenames are matched to products and shown before anything is uploaded; unmatched files are skipped.
- Spreadsheet — Download template and Export all products use the same columns. The Or paste from Excel box reads a block of cells (the first row is treated as headers when it looks like headers) with Read it, but it is reading only — nothing is saved from it yet. To create products from a file, use More actions → Upload on the Products tab (below).
What is on the Settings tab?
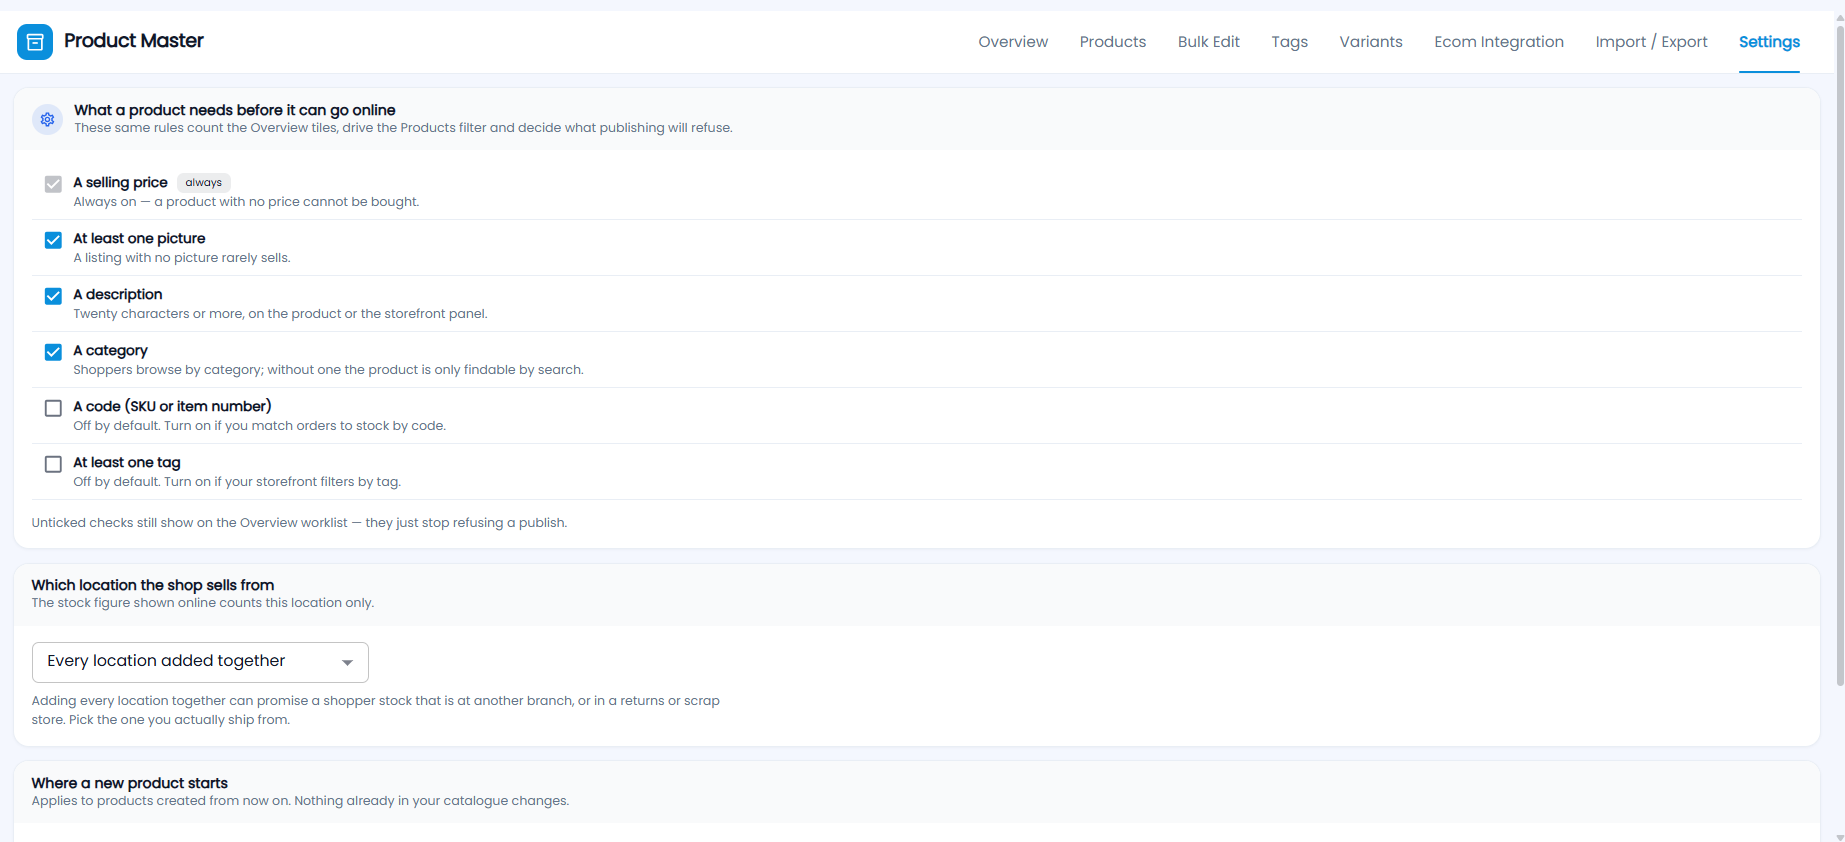
What a product needs before it can go online — these same rules count the Overview tiles, drive the Products filter and decide what publishing refuses:
- A selling price — always on; a product with no price cannot be bought.
- At least one picture, A description (twenty characters or more, on the product or the storefront panel) and A category — on by default.
- A code (SKU or item number) and At least one tag — off by default; turn them on if you match orders to stock by code or filter your storefront by tag.
Unticked checks still show on the Overview worklist — they just stop refusing a publish.
Which location the shop sells from sets the stock figure shown online. Every location added together can promise shoppers stock that is at another branch, or in a returns or scrap store, so pick the location you actually ship from. Where a new product starts sets the defaults for products created from now on; nothing already in your catalogue changes.