
How do I move stock between locations in Tazk POS?
Select the sending location in the header, open Inventory → Stock Transfer and click +. Choose the destination location, add each product and quantity (entering the serial numbers for serialized items and the batches for batch items), and click Submit. A challan number is assigned and the transfer shows as initiated until the destination location receives it in Stock Receive.
What does the Stock Transfer page show?
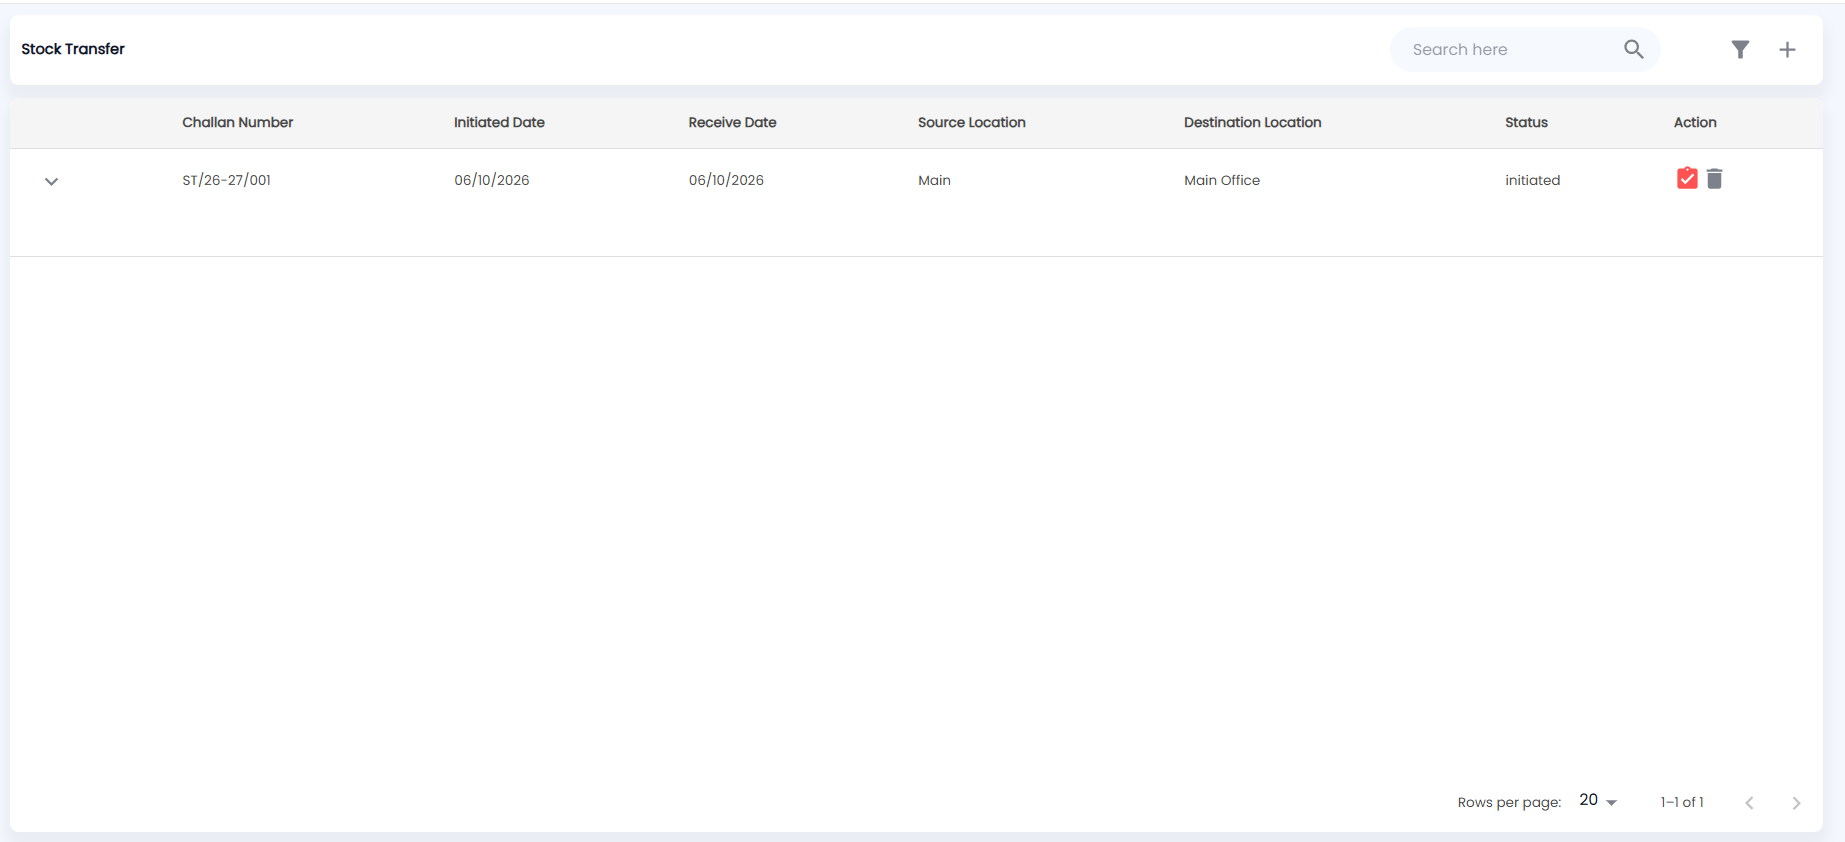
Click Inventory → Stock Transfer. It lists the transfers sent from the location selected in the header; the toolbar has Search here, the filter icon and +.
| Column | Description |
|---|---|
| Challan Number | The transfer’s document number, for example ST/26-27/001 |
| Initiated Date | When it was sent |
| Receive Date | When it was received |
| Source Location / Destination Location | Where the stock went from and to |
| Status | initiated, partially received or received |
| Action | The red challan icon opens the transfer challan, and the bin deletes the transfer |
Expand a row with the arrow to see each product’s Quantity, Received Quantity and status, and for serialized items each serial number marked Received or Pending.
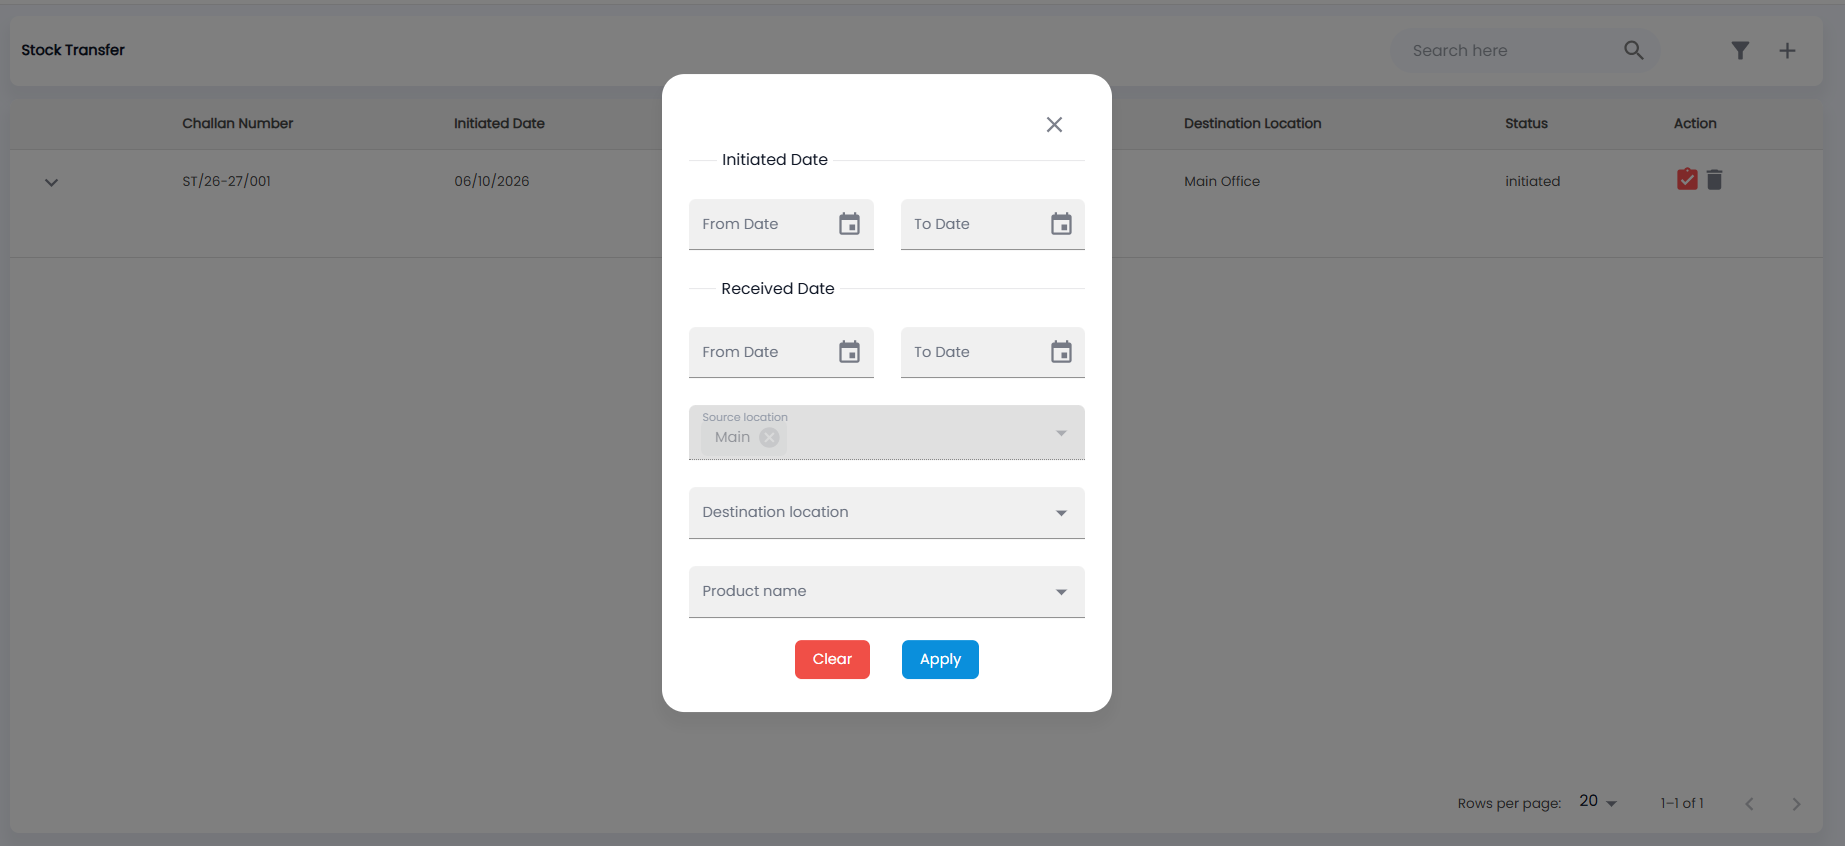
Click the filter icon to narrow the list by Initiated Date (From / To), Received Date (From / To), Source location, Destination location and Product name, then Apply or Clear. The source is fixed to the header location.
How do I create a stock transfer?
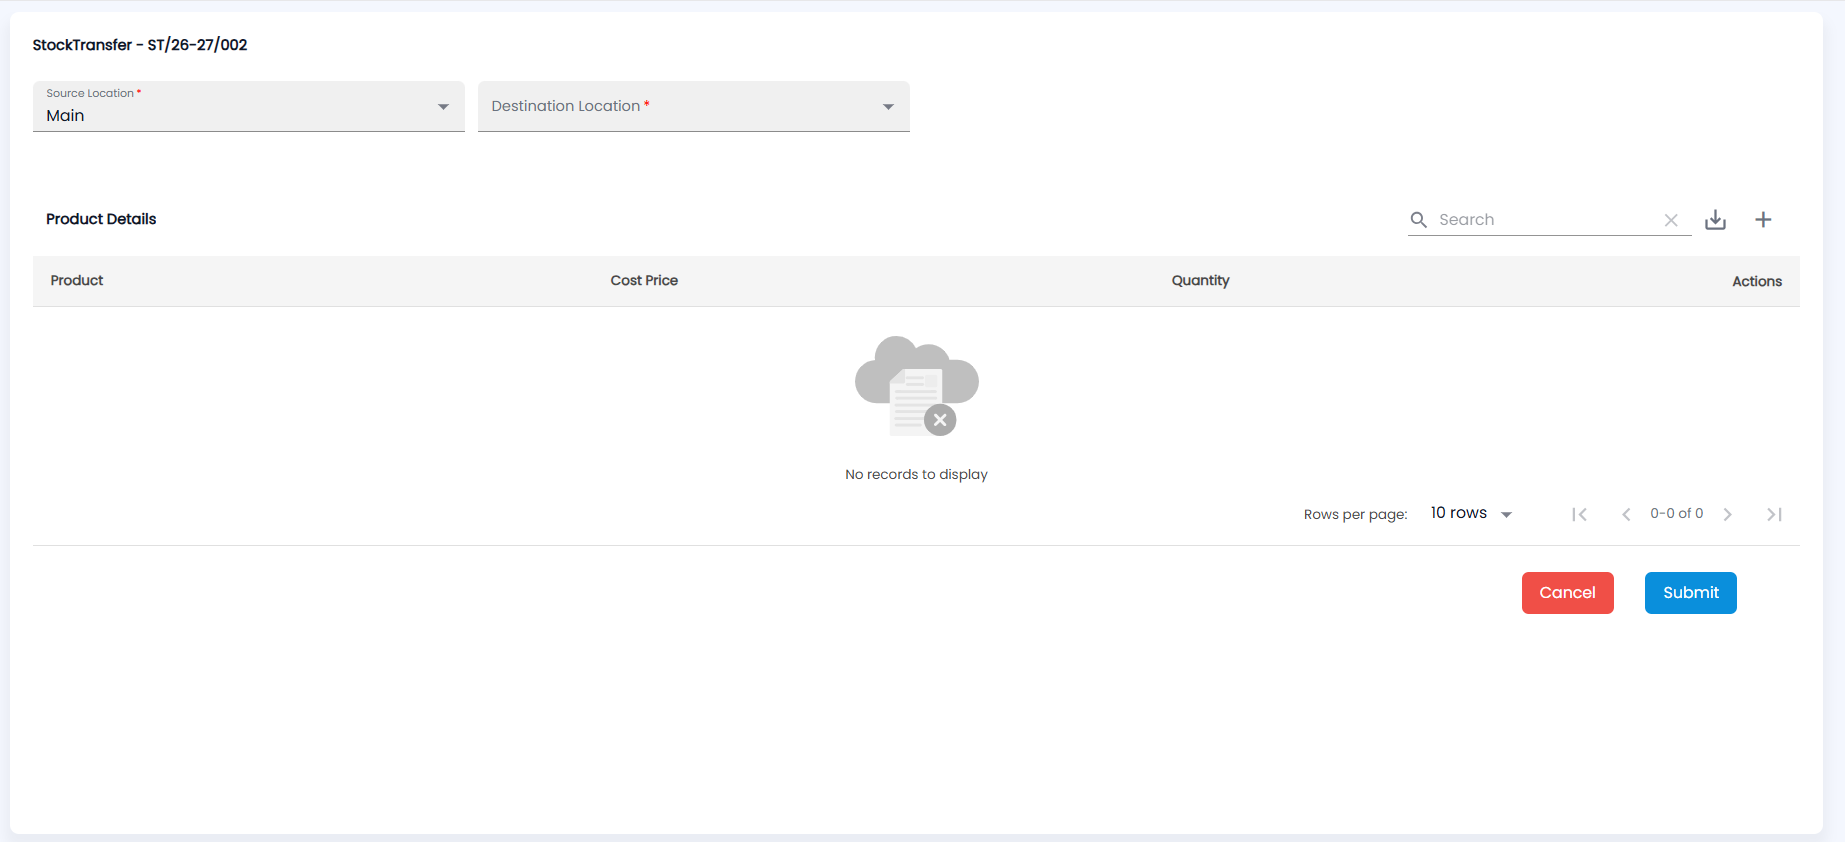
- Select the location you are sending from in the header.
- On Stock Transfer, click +. The StockTransfer form opens with the next challan number (for example ST/26-27/002).
- Check the Source Location (required; the header location) and choose the Destination Location (required).
- Under Product Details, click + to add a product (or Search the lines you have added) and enter the Quantity. The Cost Price is filled in from the stock.
- For a serialized product, enter or scan each serial number. A serial must be in stock at the source location and not already on another line of the transfer.
- For a batch product, allocate the quantity across batches. The batch quantities must add up to the line quantity.
- Repeat for each product and click Submit (or Cancel).
The challan number is assigned by the system when the transfer is saved, so two locations sending at the same time never get the same number.
What happens after I send a transfer?
The destination location sees the transfer in Stock Receive and confirms what arrived. As items are received, the status moves from initiated to partially received and then received, and the stock appears at the destination in Stocks. Each serial number’s journey is recorded in Lot Traceability.