
How do I make risky sales and receipts need approval in Tazk POS?
Discount and quotation rules are set on Configuration → Approvals. Where your plan includes them, go to Configuration and open Credit Enforcement (sales to customers over their credit limit or with overdue invoices), Payment Approval (cheques dated after the invoice due date) or Inventory Defect Approval (defects sent from stock). Switch the rule on, pick at least one Approver and, optionally, Verifiers, then click Save changes. Held items wait in Approvals until someone signs them off.
How do the three sign-off tabs work?
Credit Enforcement, Payment Approval and Inventory Defect Approval appear only where your plan includes them (they are not on a typical POS rail). They all have the same layout:
- A master switch turns the rule on or off.
- Tenant default routing sets the Verifiers (optional) and Approvers used at every location.
- Per-location overrides has one box per location, each with its own Verifiers and Approvers.
The flow is always Verifier → Approver. Any one verifier and any one approver on the list can act. If no verifier is set, the request goes straight to approver review. You choose people from a list of eligible employees (administrators and managers).
| Rule | Applies to |
|---|---|
| You leave a location's lists empty | That location uses the tenant defaults |
| You fill in anything for a location | That location uses only its own lists, not the defaults |
| You set only Approvers for a location | The verify step is skipped there |
| The switch is ON | At least one tenant Approver is needed before you can save |
The Save changes button appears only if your role can create on that tab.
What does Credit Enforcement do?
Header: Credit Enforcement • Block sales when customer is over credit limit or aging. When Enable credit-limit enforcement on sales is ON, a sale to a customer who is over their credit limit, or who has overdue invoices, is saved as a draft. It needs Verifier → Approver sign-off in Approvals before it goes through.
What does Payment Approval do?
Header: Payment Approval • Route cheque receipts dated past the invoice due date for sign-off. When Enable payment approval on receipts is ON, a receipt whose cheque date is after the invoice due date is held as a pending request. The receipt is generated only after Verifier → Approver sign-off. See Receipts and Cheques.
What does Inventory Defect Approval do?
Header: Inventory Defect Approval • Route defects sent from inventory stock for sign-off. When Enable approval for defects sent from inventory is ON, a Send Defect that includes stock taken from inventory (not stock collected back from a customer) is held for sign-off. Nothing is written until it is approved, so rejecting it leaves your stock untouched.
How do I add an approval rule on the Approvals tab?
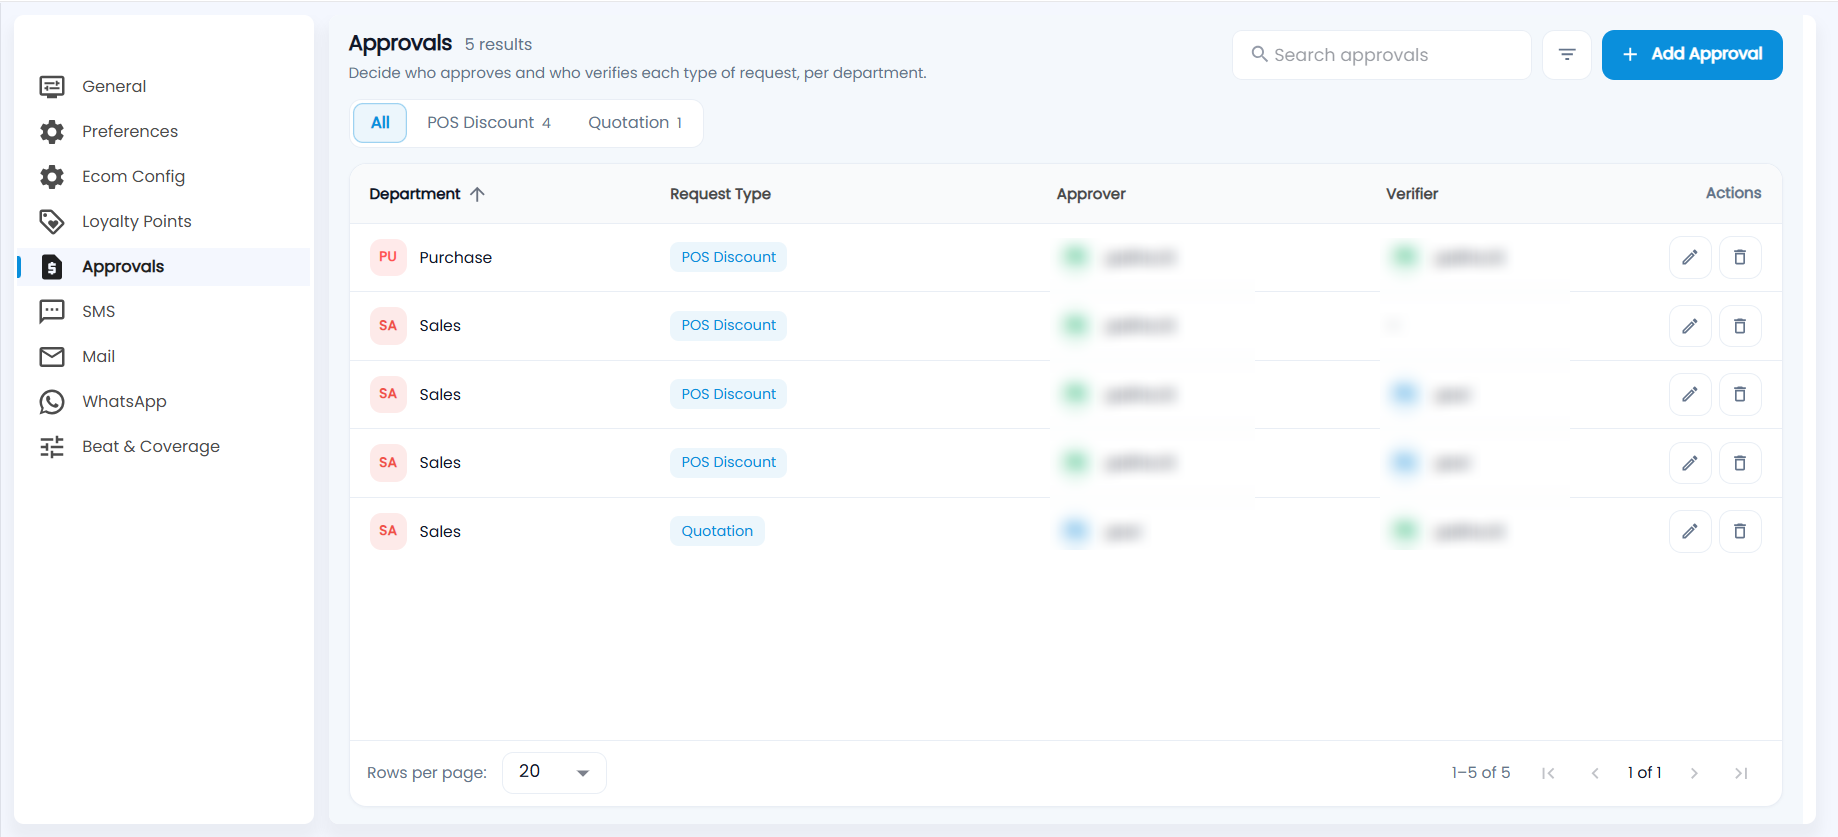
The Approvals tab (Decide who approves and who verifies each type of request, per department) shows how many rules you have, chips to filter by request type (All, POS Discount, Quotation, each with a count), Search approvals, a filter and Add Approval. The columns are Department (sortable), Request Type, Approver, Verifier (a dash if none) and Actions — edit and delete.
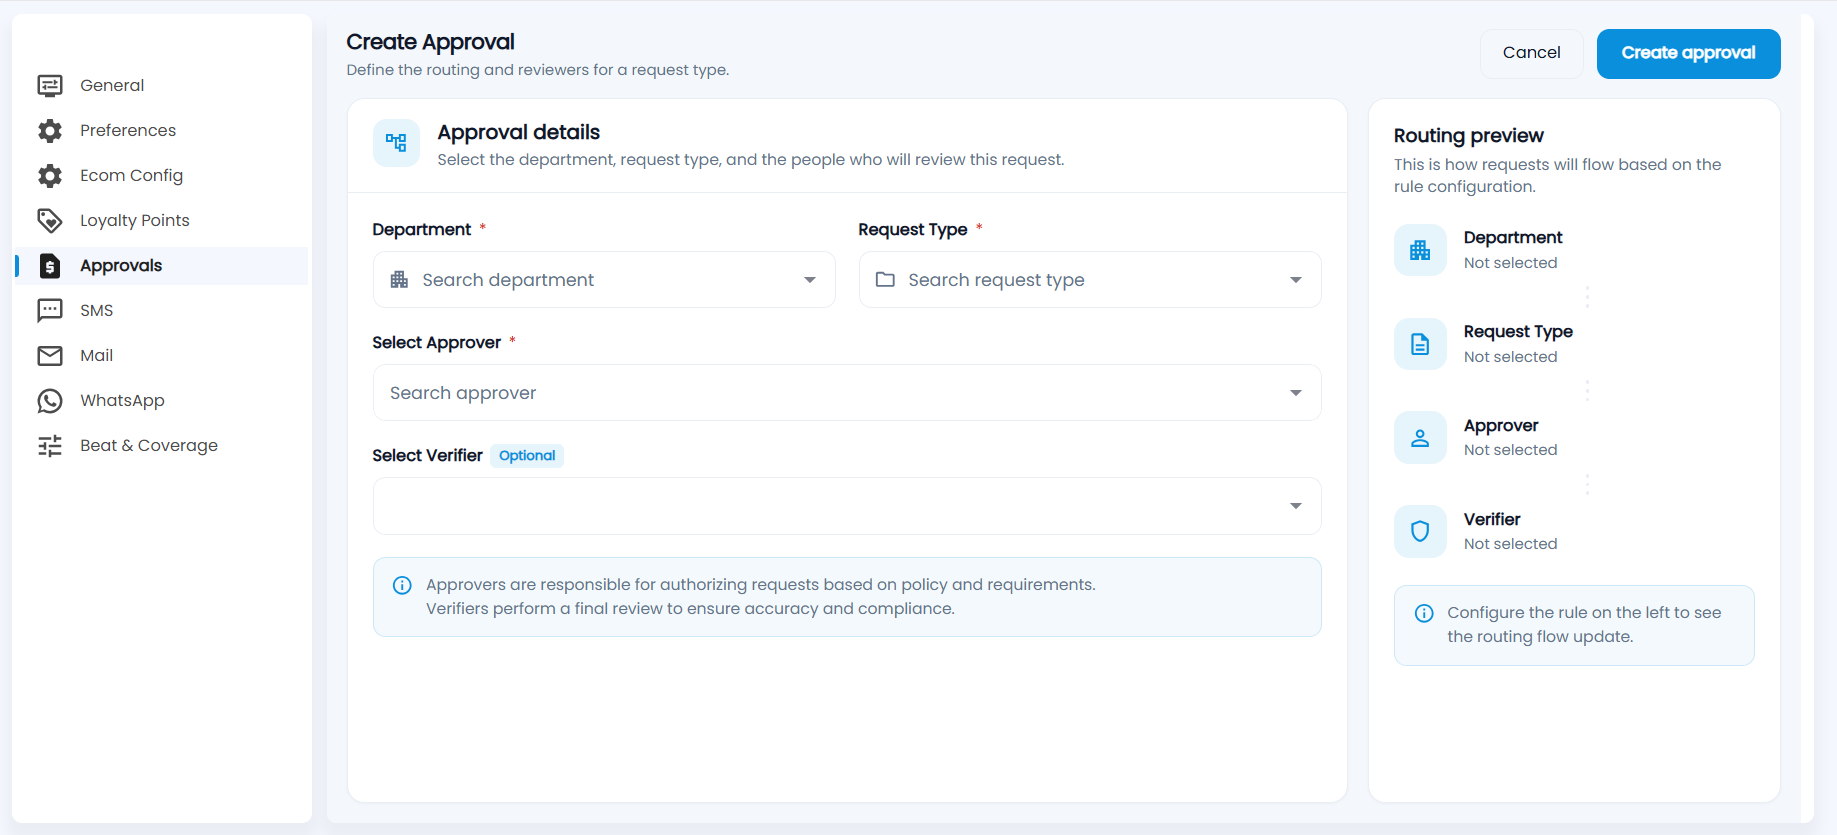
- Click Add Approval. Create Approval opens — Define the routing and reviewers for a request type.
- Under Approval details, choose the Department and the Request Type (both required).
- For a Quotation request type, enter Quotation Amount Greater Than and Product Discount Greater Than. Quotations above those limits need approval.
- For a POS Discount request type, choose the Sale Counter, enter the Maximum Discount Allowed and decide whether to Allow Price Change.
- Pick the Select Approver (required) and, optionally, Select Verifier. Approvers authorise requests based on policy; verifiers do a final review for accuracy and compliance.
- Check the Routing preview on the right, which shows the department, request type, approver and verifier as you fill them in, and click Create approval (or Cancel).
Related: Quotation, Sales Counter.