
How do I set company targets in Tazk POS?
Open Sales Target → Company Targets and click Add. Pick the month (or a date range), choose Branch, Brand or Product, and enter the commitment — value, collection, quantity and more for branches, or value and quantity for brands and models. Suggest from history can prefill the figures from last month × a growth %. Click Create. Company targets are the commitment plan; they do not change salesman incentives.
What does the Company Targets list show?
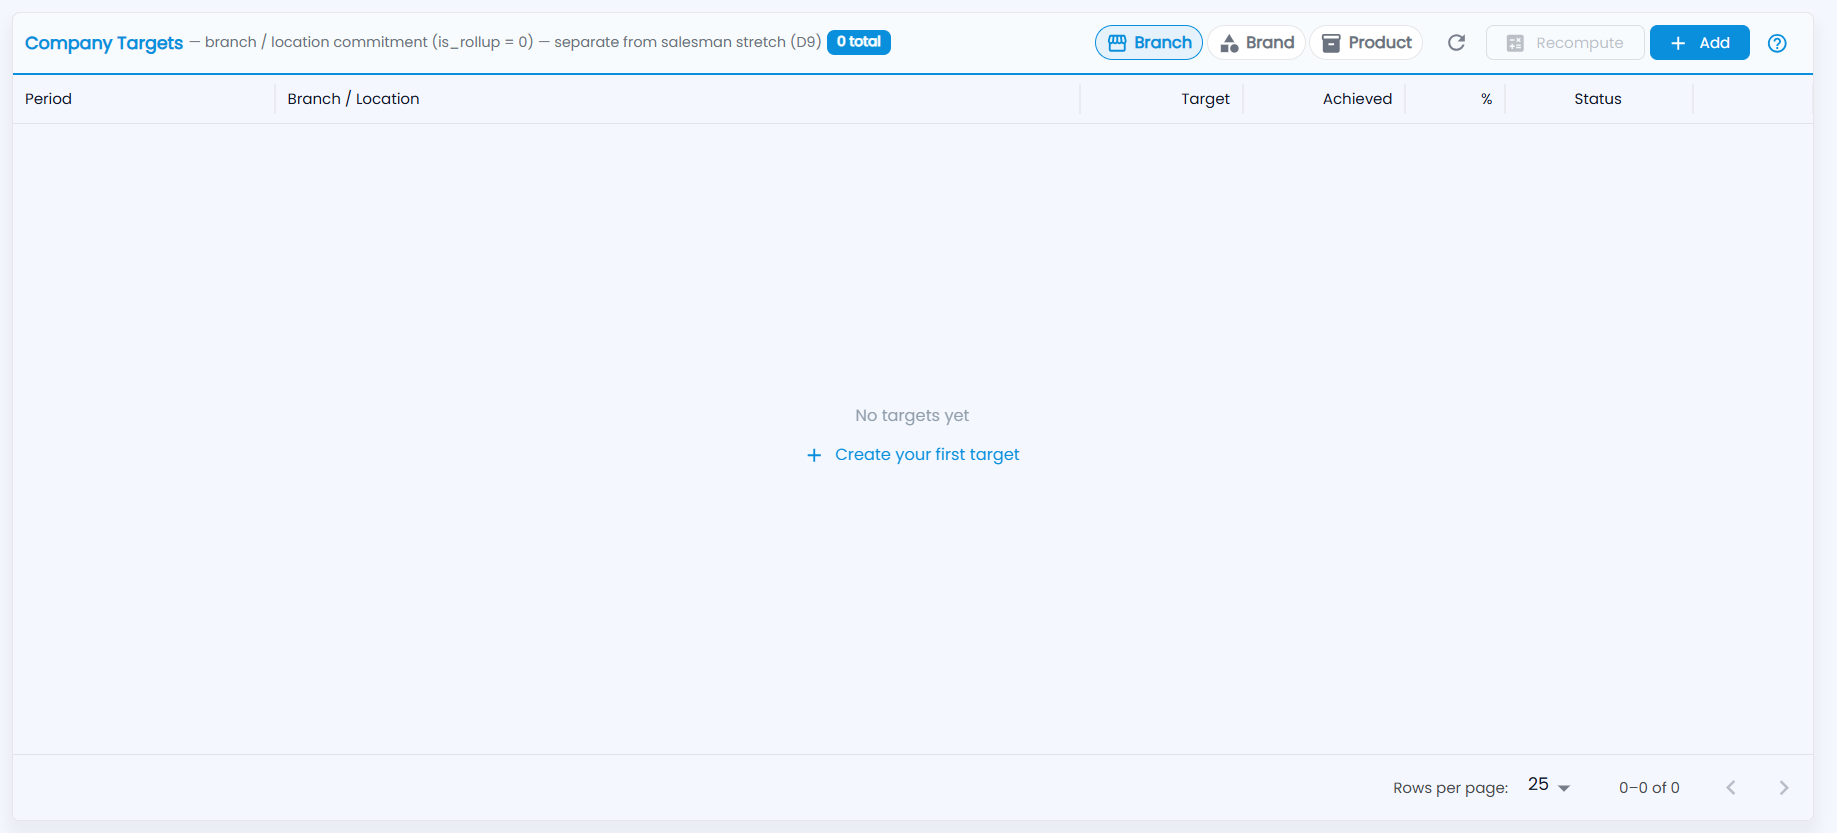
Open Sales Target → Company Targets. The badge next to the title counts the targets (for example 0 total). Switch between Branch, Brand and Product in the title band; on Brand and Product each brand or model gets its own row.
| Column | What it shows |
|---|---|
| Period | The target period |
| Branch / Location | The branch (or company-wide) and level |
| Target / Achieved / % | The commitment, what has been achieved, and the percentage |
| Status | Draft, Published, Locked or Closed. A Draft row has a Publish button that makes the targets final. |
The list follows the branch picked in the header. The title band has Refresh, Recompute (recalculates achievement for the newest period; greyed out while there are no targets) and Add. Use the pencil to edit a row and the bin to delete it (you are asked to confirm; it cannot be undone). With no targets yet, click Create your first target in the middle of the list. It shows 25 rows per page.
How do I create company targets?
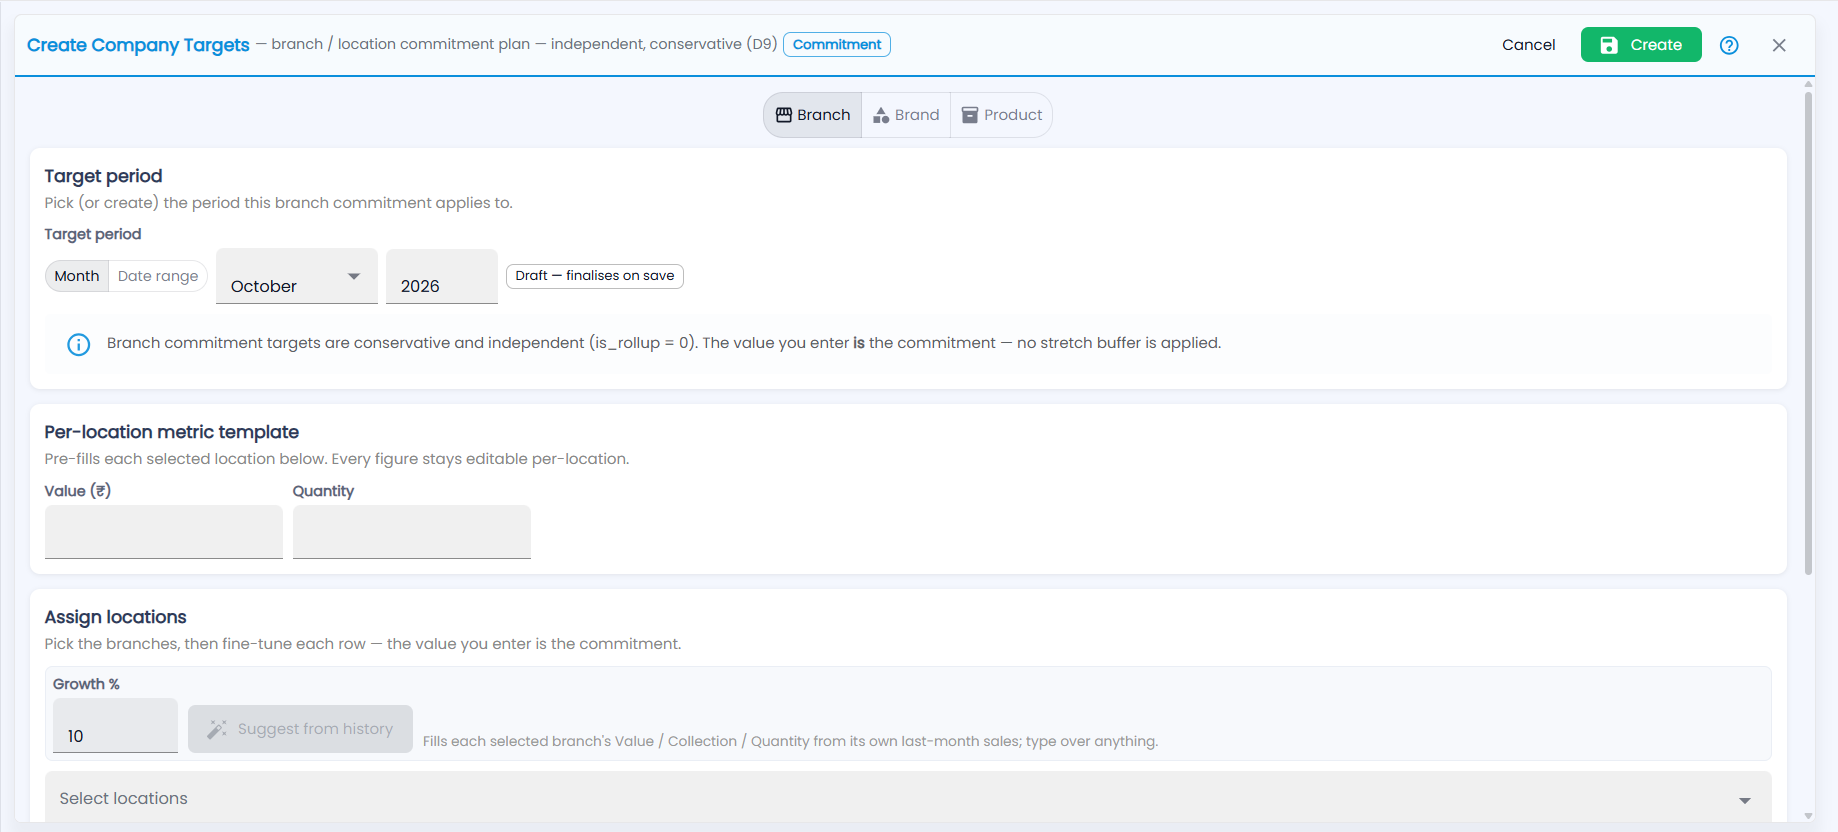
- Click Add. Create Company Targets opens with the Commitment badge.
- Choose the level: Branch, Brand or Product.
- Under Target period, choose Month and the month and year (the current month to start), or Date range for any from–to window. The period shows Draft — finalises on save: it is created for you when you save.
- Fill the level's section (below).
- Click Create (Save when editing).
| Level | What you enter |
|---|---|
| Branch | An optional Per-location metric template that prefills every selected branch — for example Value (₹) and Quantity; the metrics depend on your account — then Assign locations: Select locations and fine-tune each branch's row |
| Brand | Commitment scope (Company-wide or one Branch), then Add brand rows with Target Value (₹) and Target Qty |
| Product | Pick a brand, then Add model rows with Target Value (₹) and Target Qty for each model |
Every section has Suggest from history: enter a Growth % (10 to start) and it fills each selected row from that branch's own last-month sales × (1 + growth %). It is greyed out until you select something. Type over any figure. Negative targets are not allowed.
Where do I track company targets?
Achievement is computed from your billing, receipts and stock movements. See it on the Company tab of Achievement and the Sales Target Dashboard.