
Overview
Company Targets are the commitment for each branch or location — the realistic number you plan the business on. They are kept separate from salesman stretch targets.

The List
The badges next to the title show how many targets there are in total and how many are live. Switch between Branch, Brand, and Product targets at the top right.
| Column | What it shows |
|---|---|
| Period | For example July 2026, with its dates |
| Branch / Location | The location the target is for |
| Target / Achieved / % | The commitment, what was achieved, and the percentage |
| Status | For example Published |
| Icons | Edit (pencil) or delete (bin) |
Click Recompute to update the achieved figures from the latest sales, the refresh icon to reload, + Add to create targets, and ? for help.
Creating Company Targets
Click + Add. The form is marked Commitment. Choose Branch, Brand, or Product at the top.
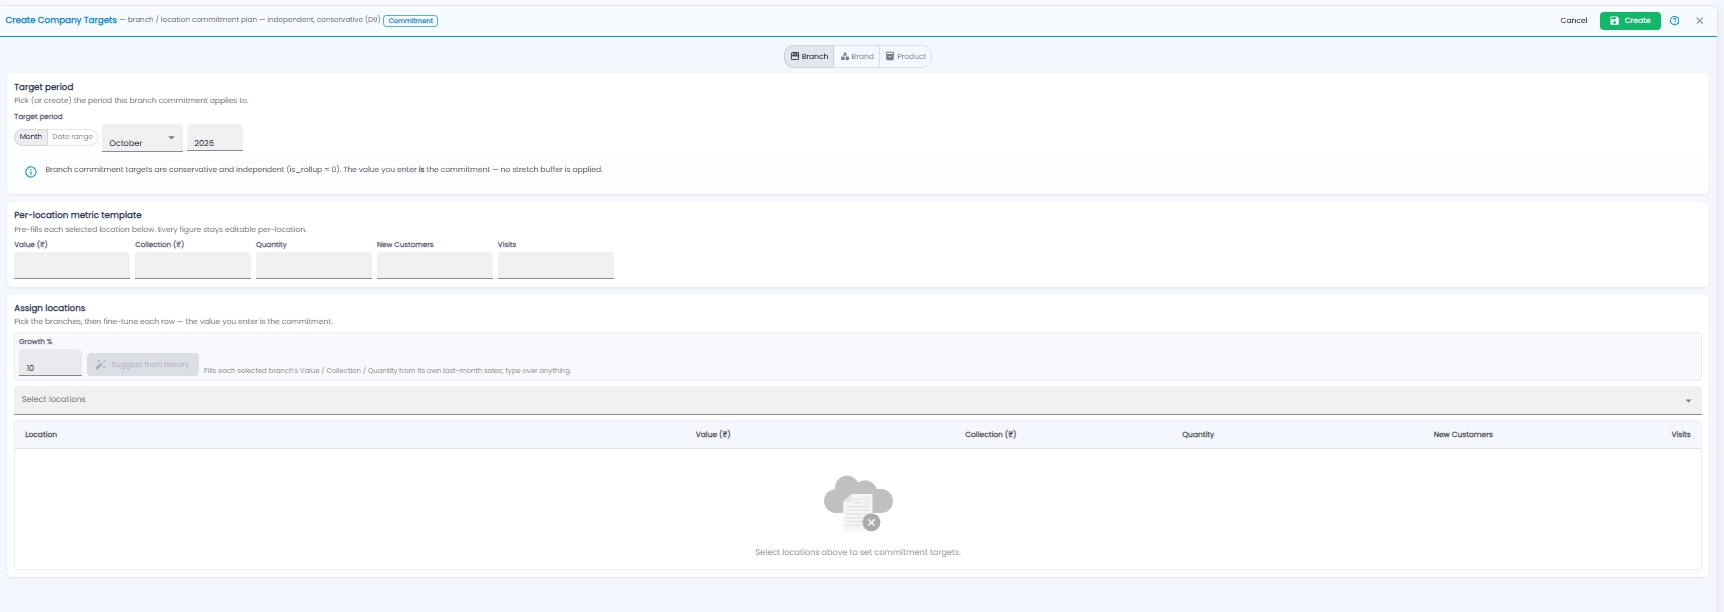
- Target period — pick Month and choose the month and year, or Date range for custom dates. The value you enter is the commitment; no stretch buffer is added
- Per-location metric template — enter Value (₹), Collection (₹), Quantity, New Customers, and Visits. These pre-fill every location you select, and stay editable per location
- Assign locations — pick the branches under Select locations. To start from past sales, set a Growth % (10 by default) and click Suggest from history: it fills each branch's value, collection, and quantity from its own last-month sales plus the growth
- Fine-tune each row in the table
- Click Create, or Cancel (or ×) to leave without saving