
Overview
The Employee tab is your Employee Directory — where you manage and explore your organization's workforce. Open Contacts from the sidebar and select Employee.
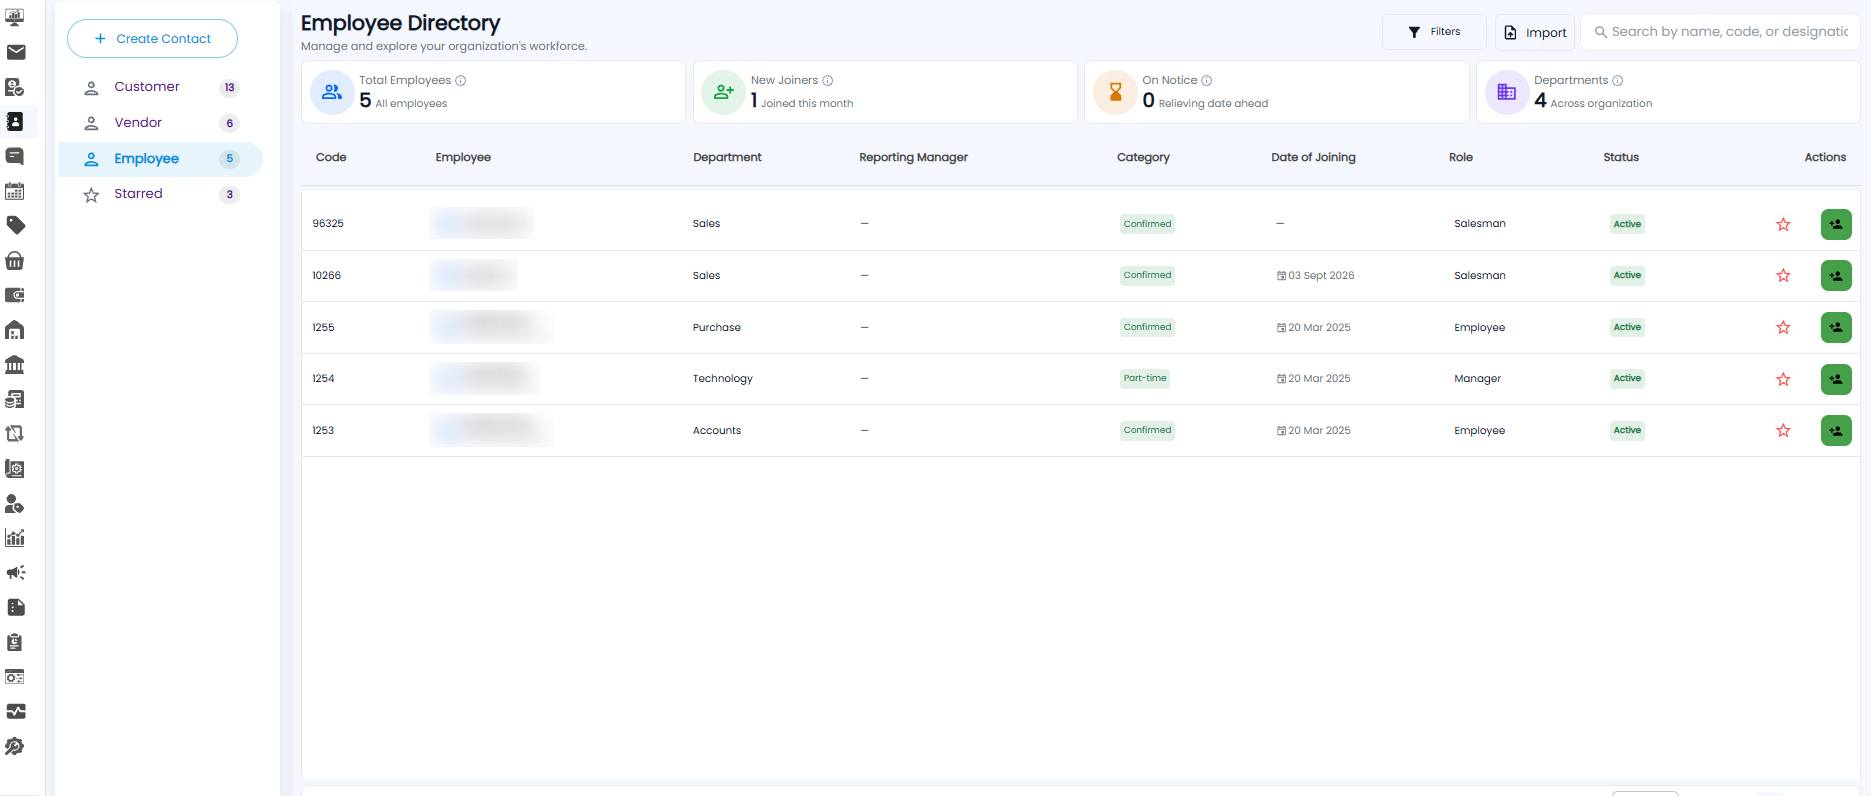
Summary Cards
| Card | What it shows |
|---|---|
| Total Employees | All your employees |
| New Joiners | Employees who joined this month |
| On Notice | Employees with a relieving date ahead |
| Departments | How many departments you have across the organization |
The Employee Table
| Column | What it shows |
|---|---|
| Code | The employee code |
| Employee | Name, with designation underneath when set |
| Department | For example Sales, Purchase, or Accounts |
| Reporting Manager | Who they report to |
| Category | For example Confirmed or Part-time |
| Date of Joining | When they joined |
| Role | Their role in Tazk, for example Salesman, Manager, or Employee |
| Status | For example Active |
| Actions | The star adds the employee to Starred; the green button gives more actions for that employee |
At the top right, use Search by name, code, or designation, Filters to narrow the list, and Import to add many employees from a file.
Adding an Employee
Select the Employee tab and click + Create Contact. The New Employee form opens. It has three steps; the bottom left shows which one you are on (for example Step 1 of 3). Fields marked * are required.
Step 1: Personal Info
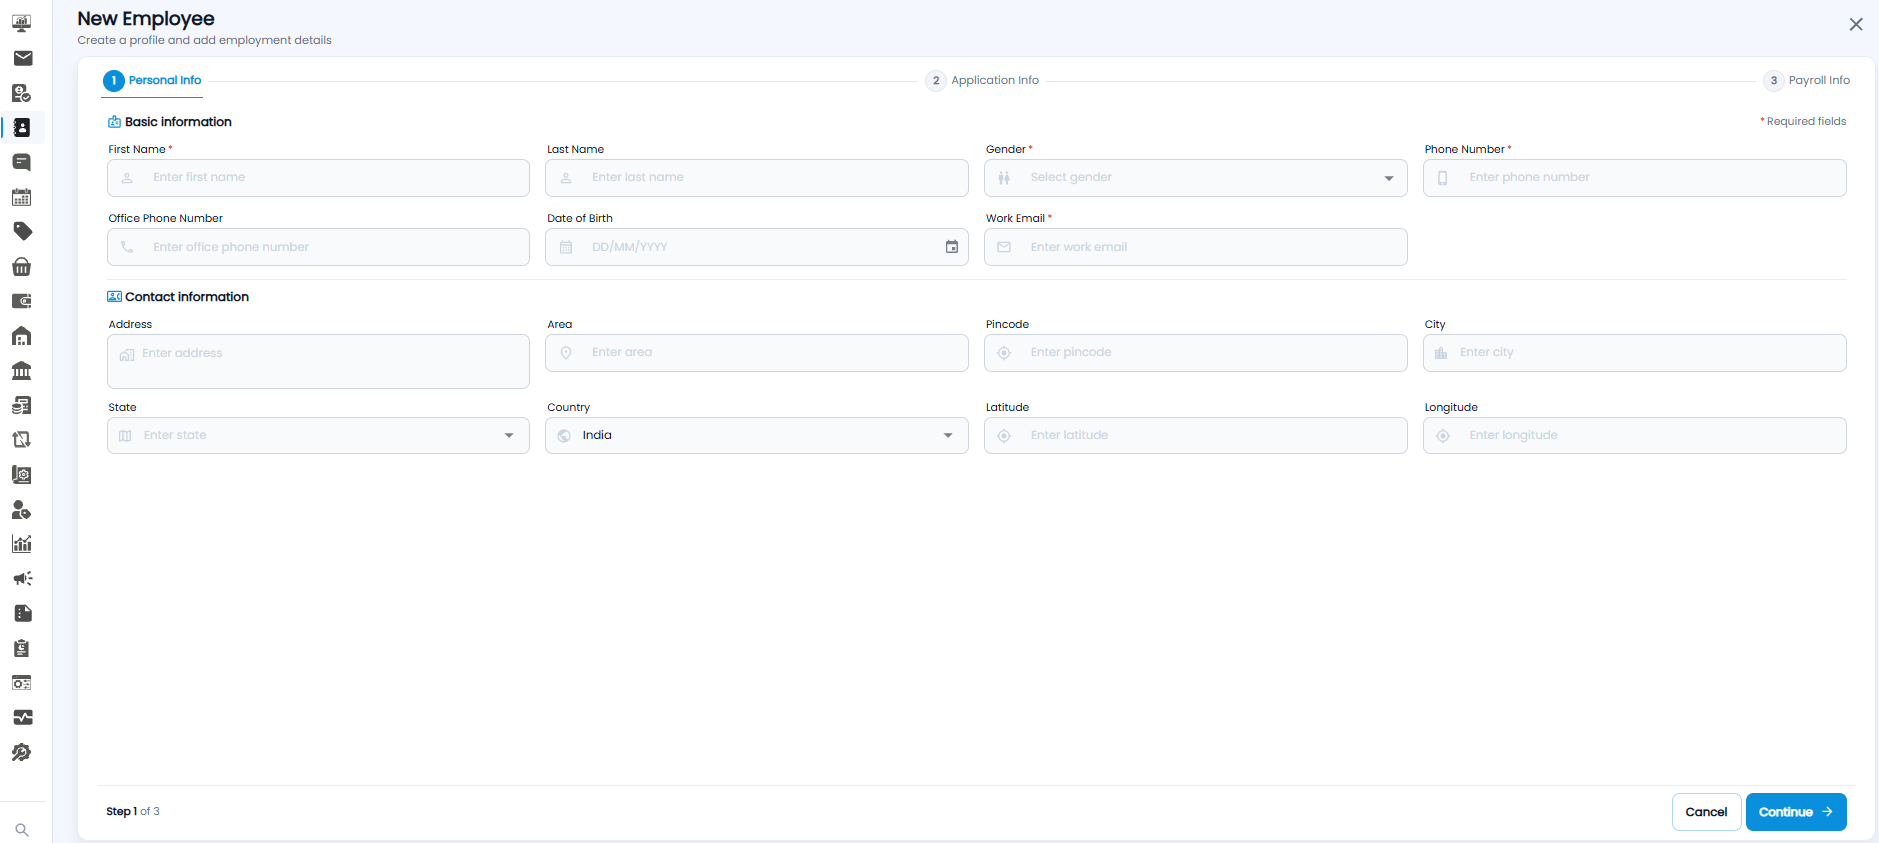
| Section | Fields |
|---|---|
| Basic information | First Name*, Last Name, Gender*, Phone Number*, Office Phone Number, Date of Birth, Work Email* |
| Contact information | Address, Area, Pincode, City, State, Country (India by default), Latitude, Longitude |
Click Continue.
Step 2: Application Info
Set up how the employee signs in to Tazk.
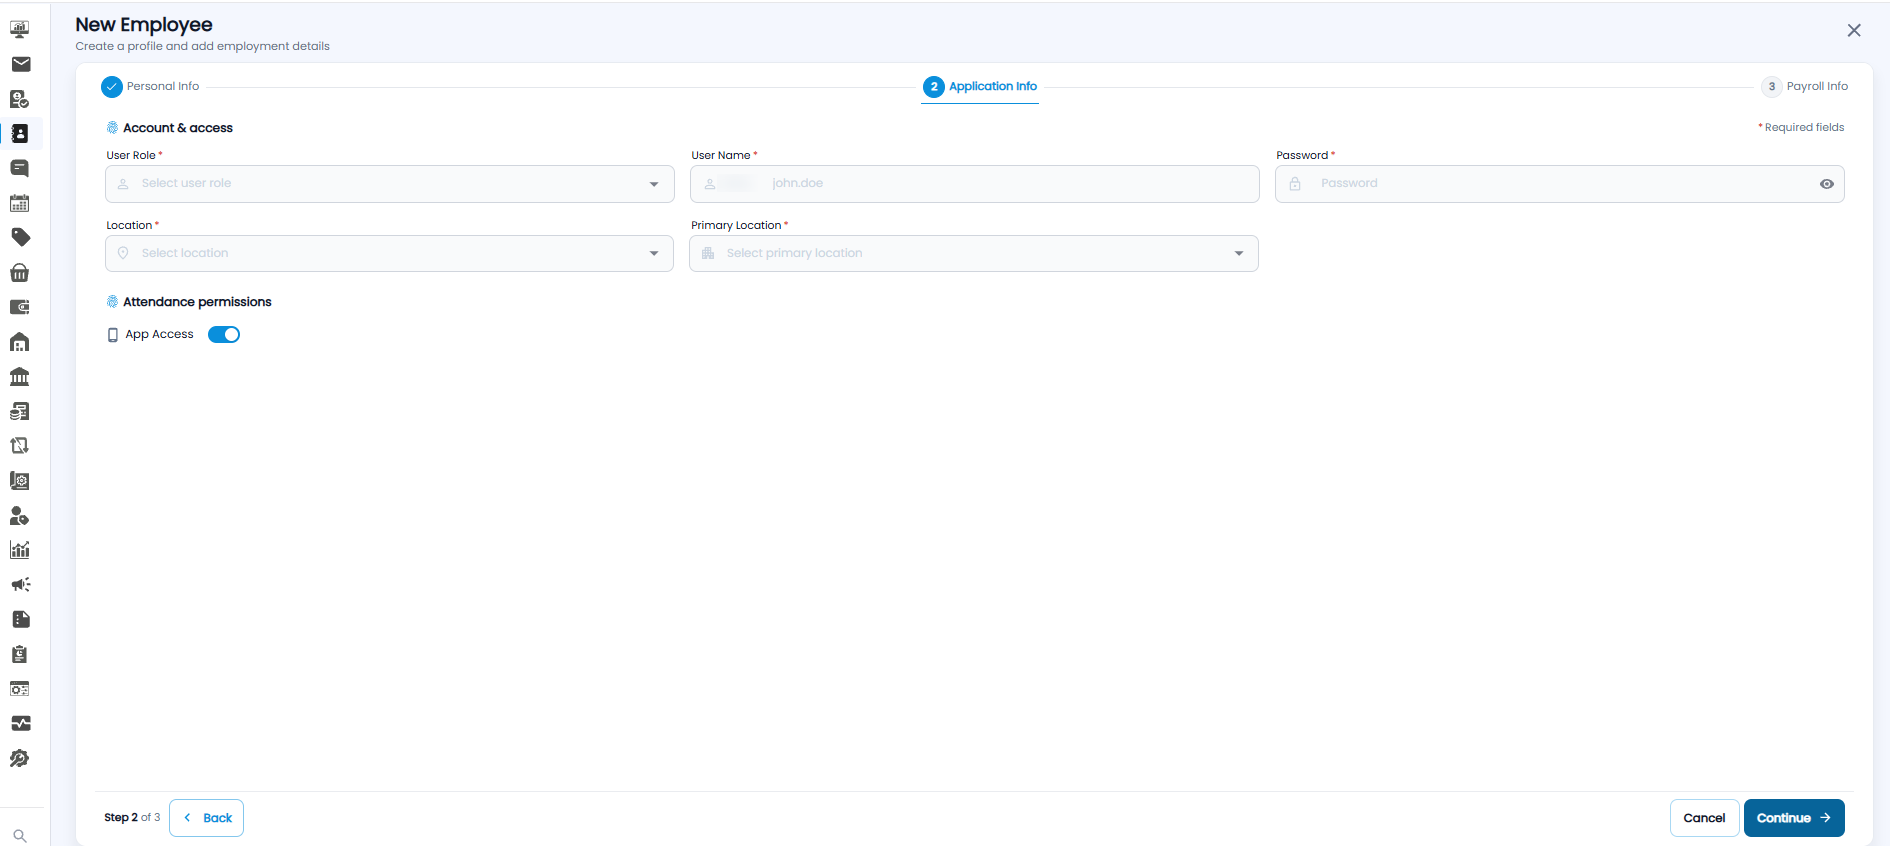
| Field | Required | Description |
|---|---|---|
| User Role | Yes | What the employee can see and do in Tazk |
| User Name | Yes | The name they sign in with. It starts with your company's prefix (for example anbu.); type the rest, such as john.doe |
| Password | Yes | Their sign-in password. Click the eye icon to show it |
| Location | Yes | The locations they work at |
| Primary Location | Yes | Their main location |
| App Access | — | Under Attendance permissions. On by default, so the employee can use the mobile app |
Click Continue, or Back to return to step 1.
Step 3: Payroll Info
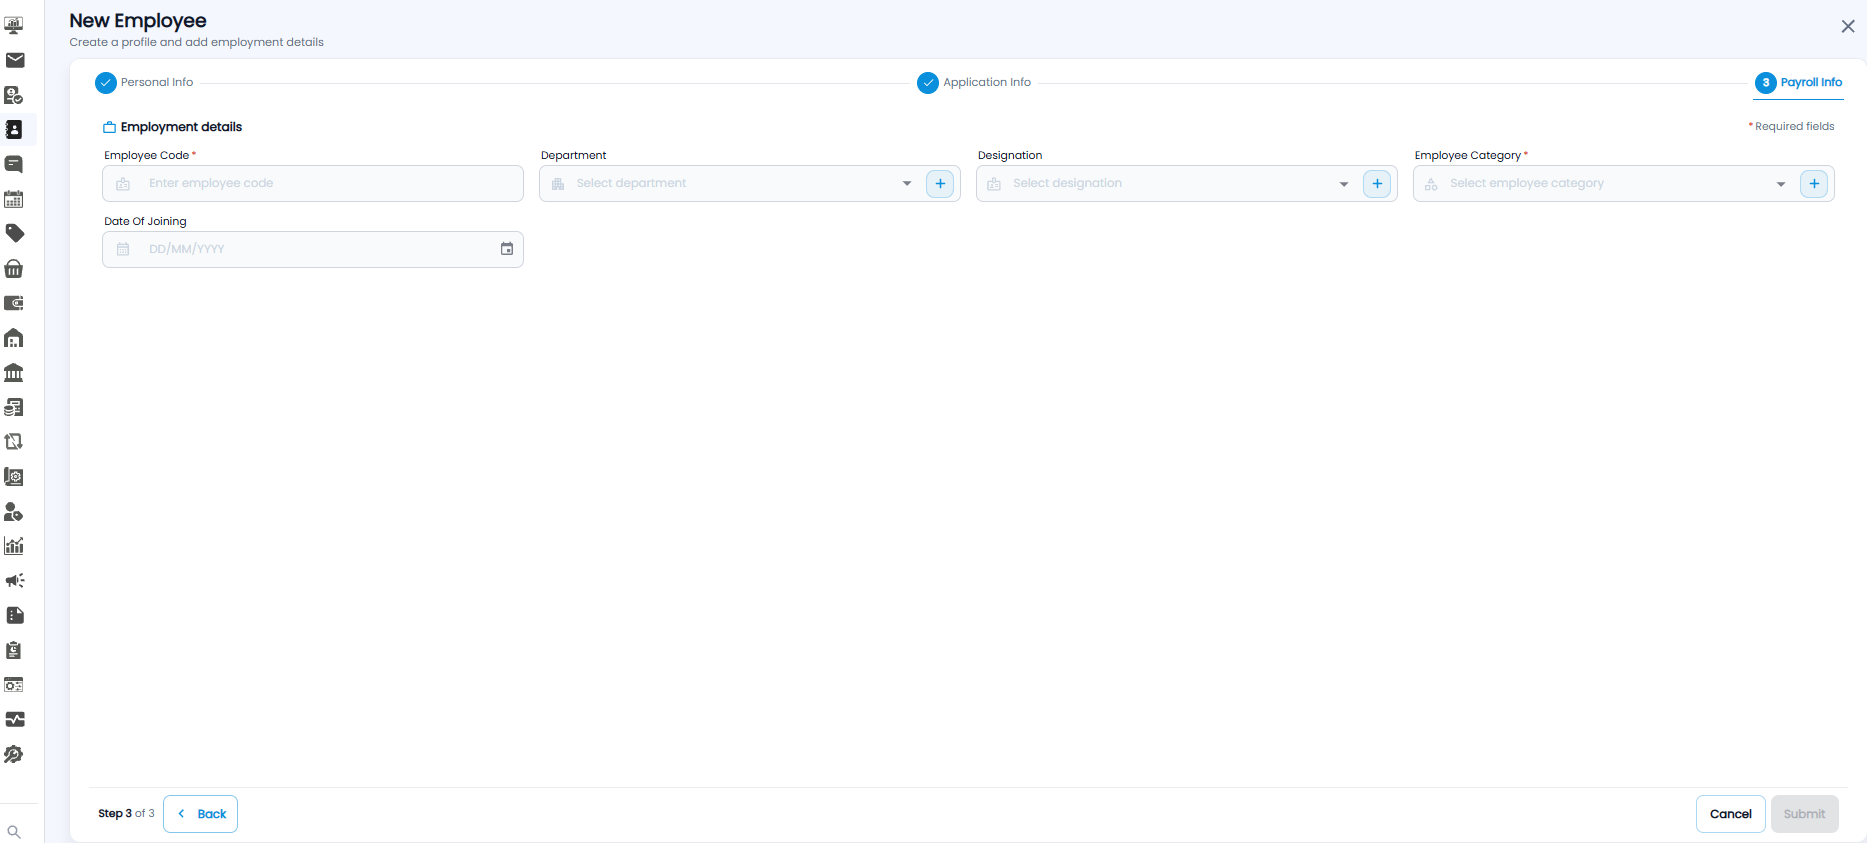
| Field | Required | Description |
|---|---|---|
| Employee Code | Yes | The employee's code |
| Department | No | Their department |
| Designation | No | Their job title |
| Employee Category | Yes | For example Confirmed or Part-time |
| Date Of Joining | No | When they joined |
If the department, designation, or category you need is not in the list, click the + next to it to add a new one.
Click Submit to save the employee. It stays greyed out until every required field is filled in. Click Cancel or the × at any step to leave without saving.