
Overview
The Contacts page holds everyone you do business with. Click Contacts in the sidebar to open it. The left panel has four tabs, each with a count of how many contacts it holds:
| Tab | What it holds |
|---|---|
| Customer | The people and companies you sell to (this article) |
| Vendor | The people and companies you buy from |
| Employee | Your own staff |
| Starred | The contacts you have marked with a star |
Use + Create Contact at the top of the left panel to add a contact to the tab you are on.
The Customer List
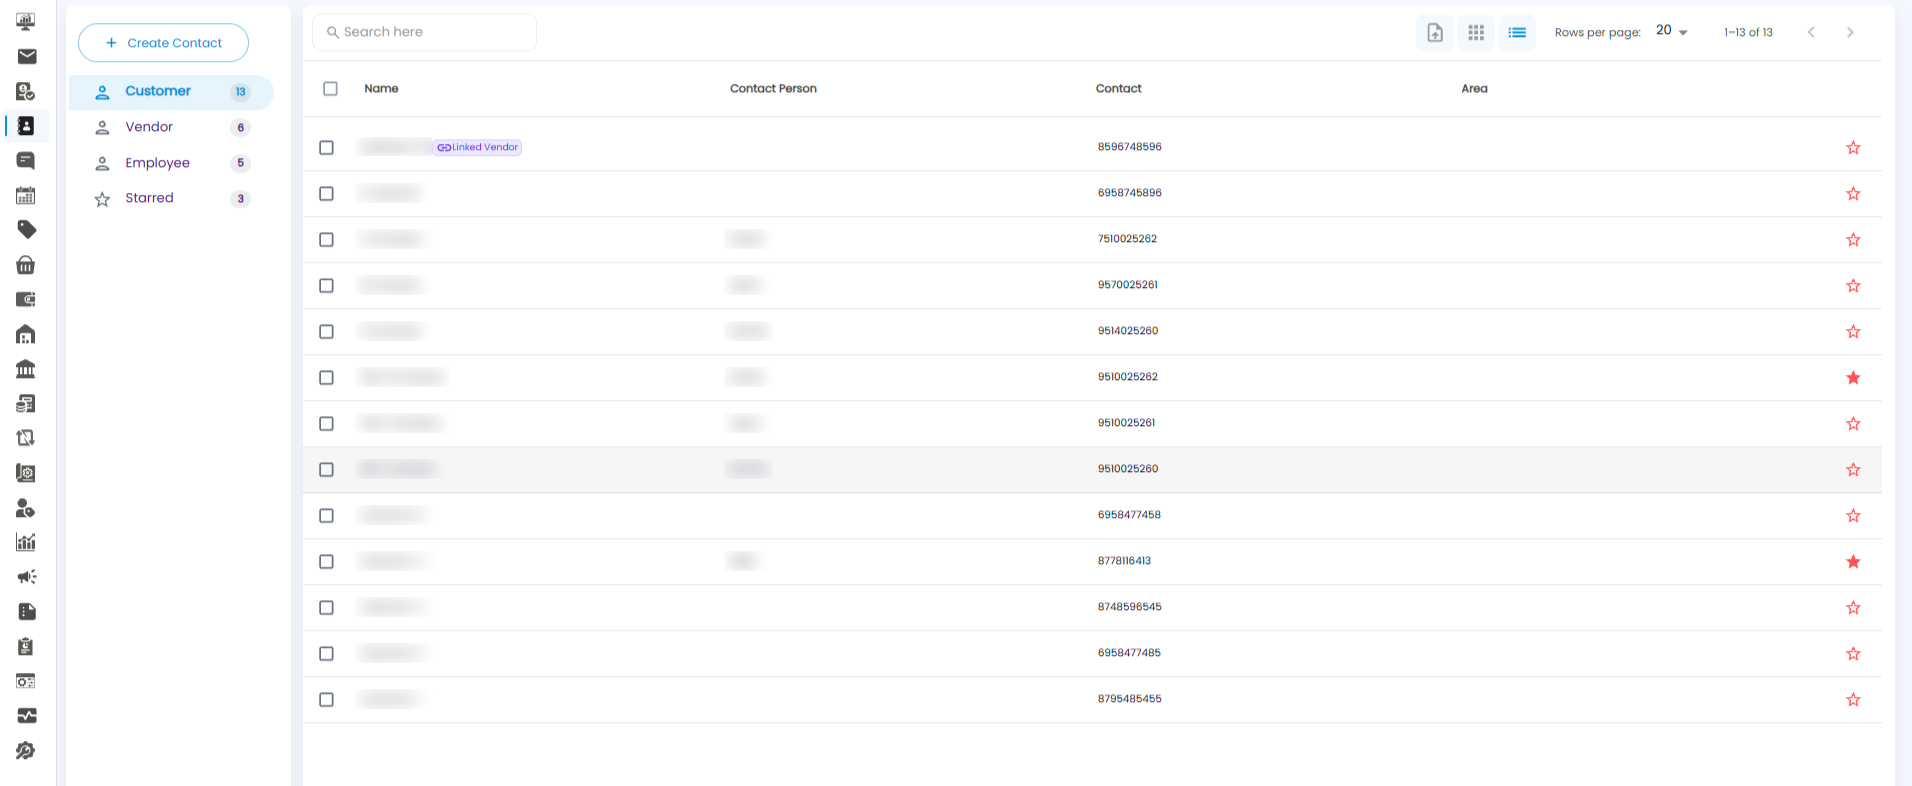
| Column | What it shows |
|---|---|
| Name | The customer's company name. A Linked Vendor badge means the same company is also set up as a vendor |
| Contact Person | The main person to talk to |
| Contact | Their phone number |
| Area | Where they are |
| Star | Click the star at the end of a row to add the customer to Starred; click it again to remove them |
Tick the boxes on the left to select several customers at once.
The Toolbar
- Search here — find a customer by name or number.
- Import (file icon) — add customers from a file.
- Grid and List icons — switch between a card view and a table view.
- Rows per page and the arrows — move through the list, 20 rows per page by default.
Adding a Customer
- Select the Customer tab
- Click + Create Contact
- The New Customer form opens — add the contact, billing, and credit details
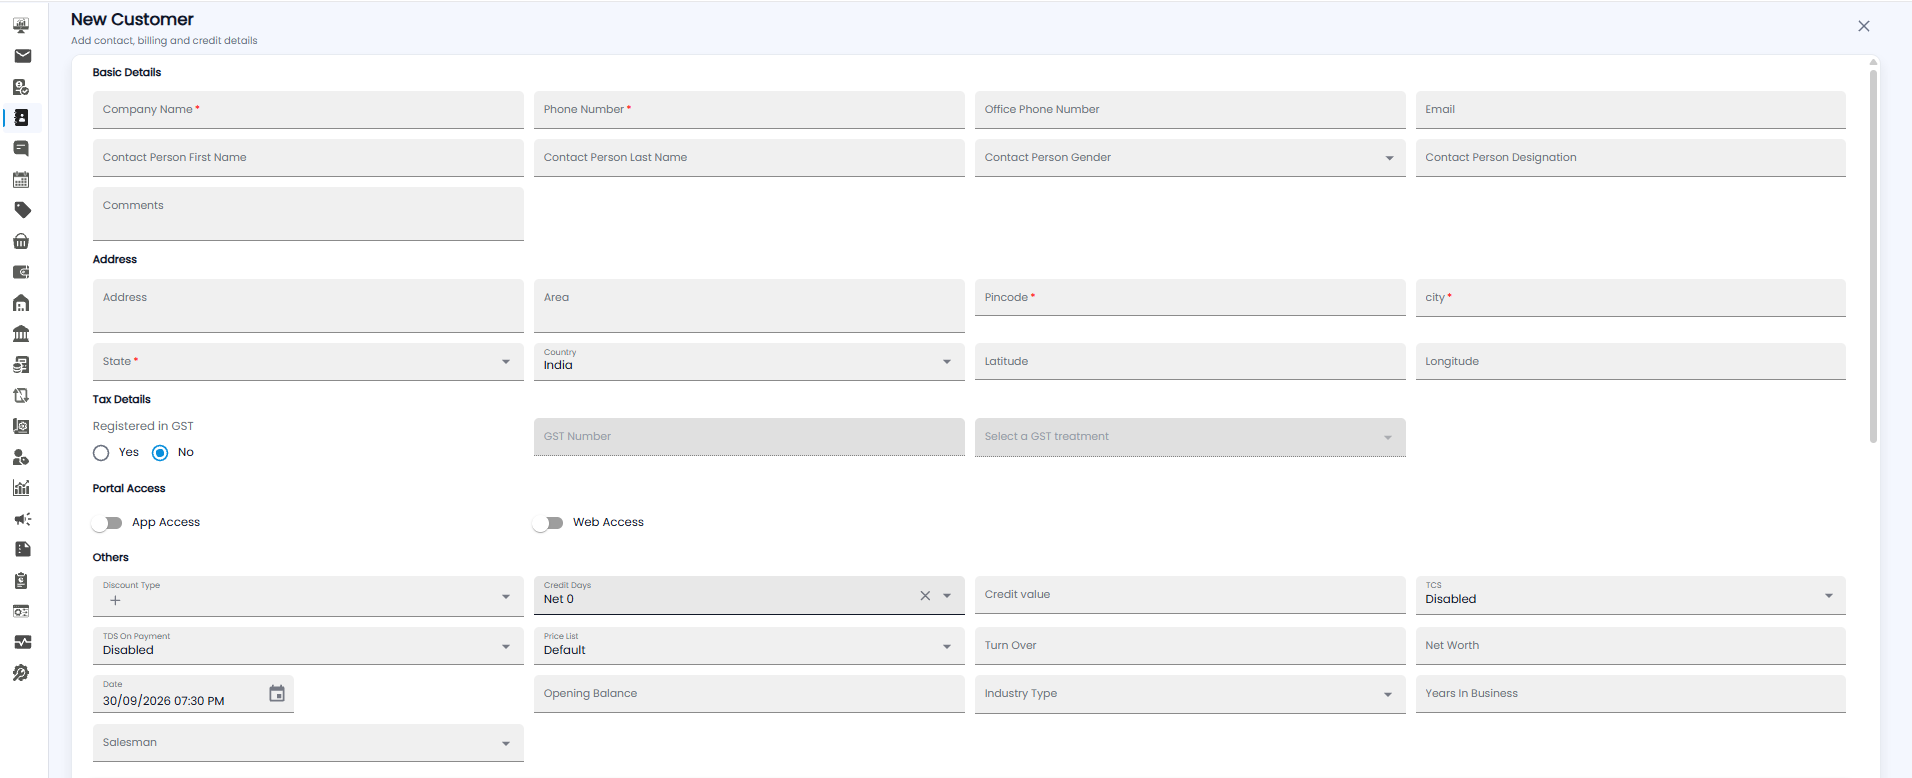
Basic Details
| Field | Required | Description |
|---|---|---|
| Company Name | Yes | The customer's name |
| Phone Number | Yes | The main phone number |
| Office Phone Number / Email | No | Other ways to reach them |
| Contact Person First Name / Last Name / Gender / Designation | No | The main person to talk to |
| Comments | No | Any notes about the customer |
Address
Address, Area, Pincode*, City*, State*, Country (India by default), Latitude, and Longitude. Fields marked * are required.
Tax Details
Choose whether the customer is Registered in GST (No by default). If you choose Yes, fill in the GST Number and pick a GST treatment.
Portal Access
Turn on App Access or Web Access to let the customer sign in to your customer portal on the app or the web.
Others
| Field | Description |
|---|---|
| Discount Type | The discount this customer gets |
| Credit Days | How many days they have to pay, for example Net 0 |
| Credit value | The most credit they are allowed |
| TCS / TDS On Payment | Whether tax is collected or deducted (Disabled by default) |
| Price List | Which price list applies to them (Default by default) |
| Turn Over / Net Worth / Industry Type / Years In Business | Background on the customer's business |
| Date / Opening Balance | The amount they already owed on the date you start using Tazk |
| Salesman | The salesman who looks after this customer |
Shipping, Bank, and Additional Contacts
Scroll down for three more sections. Each is a small table: click the + icon to add a row, use Search to find one, and the download icon to download the list.
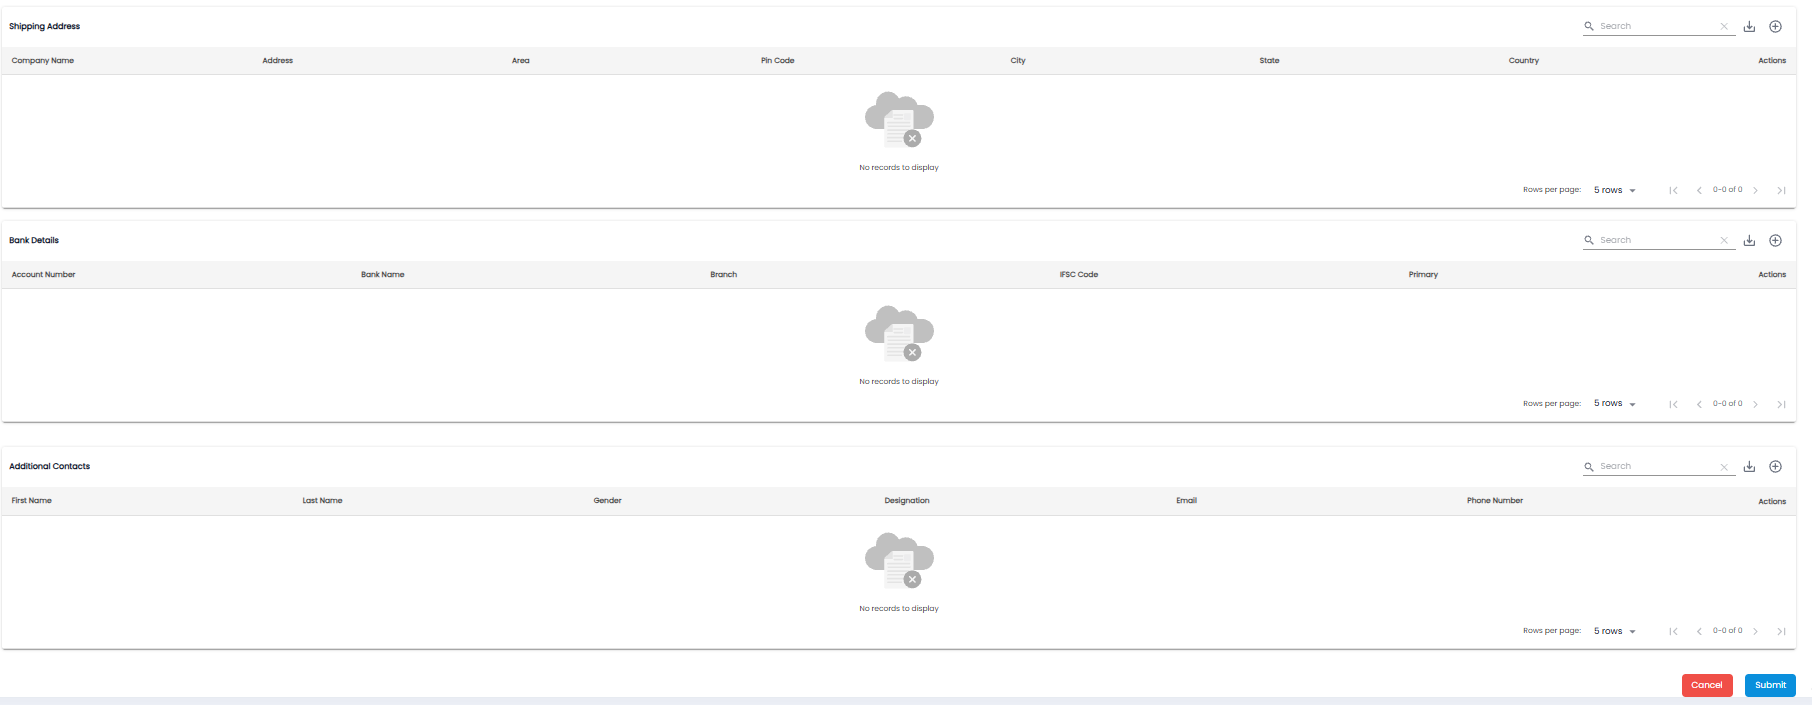
| Section | Columns |
|---|---|
| Shipping Address | Company Name, Address, Area, Pin Code, City, State, Country |
| Bank Details | Account Number, Bank Name, Branch, IFSC Code, Primary |
| Additional Contacts | First Name, Last Name, Gender, Designation, Email, Phone Number |
Saving the Customer
Click Submit to save the customer, or Cancel (or the × at the top right) to leave without saving.