
Overview
Vendors are the people and companies you buy from. Open Contacts from the sidebar and select the Vendor tab in the left panel. The count beside it shows how many vendors you have.
The Vendor List
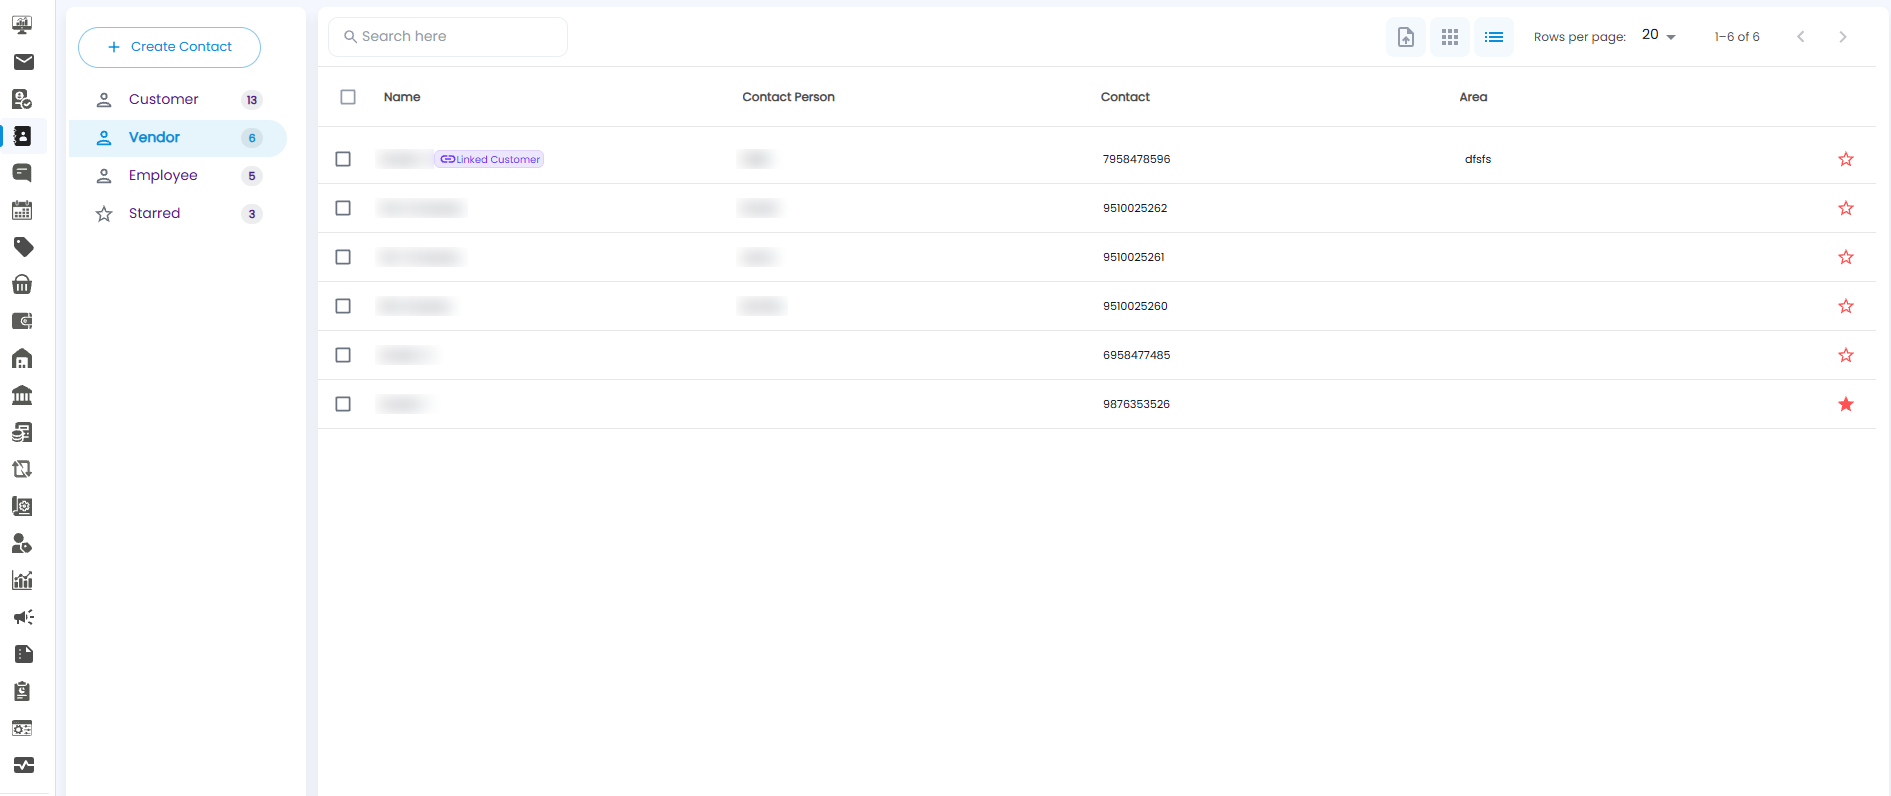
| Column | What it shows |
|---|---|
| Name | The vendor's company name. A Linked Customer badge means the same company is also set up as a customer |
| Contact Person | The main person to talk to |
| Contact | Their phone number |
| Area | Where they are |
| Star | Click to add the vendor to Starred |
The toolbar works the same as on the Customer tab: Search here, Import, the Grid / List views, and Rows per page.
Adding a Vendor
- Select the Vendor tab
- Click + Create Contact
- The New Vendor form opens — add the contact, tax, and payment details
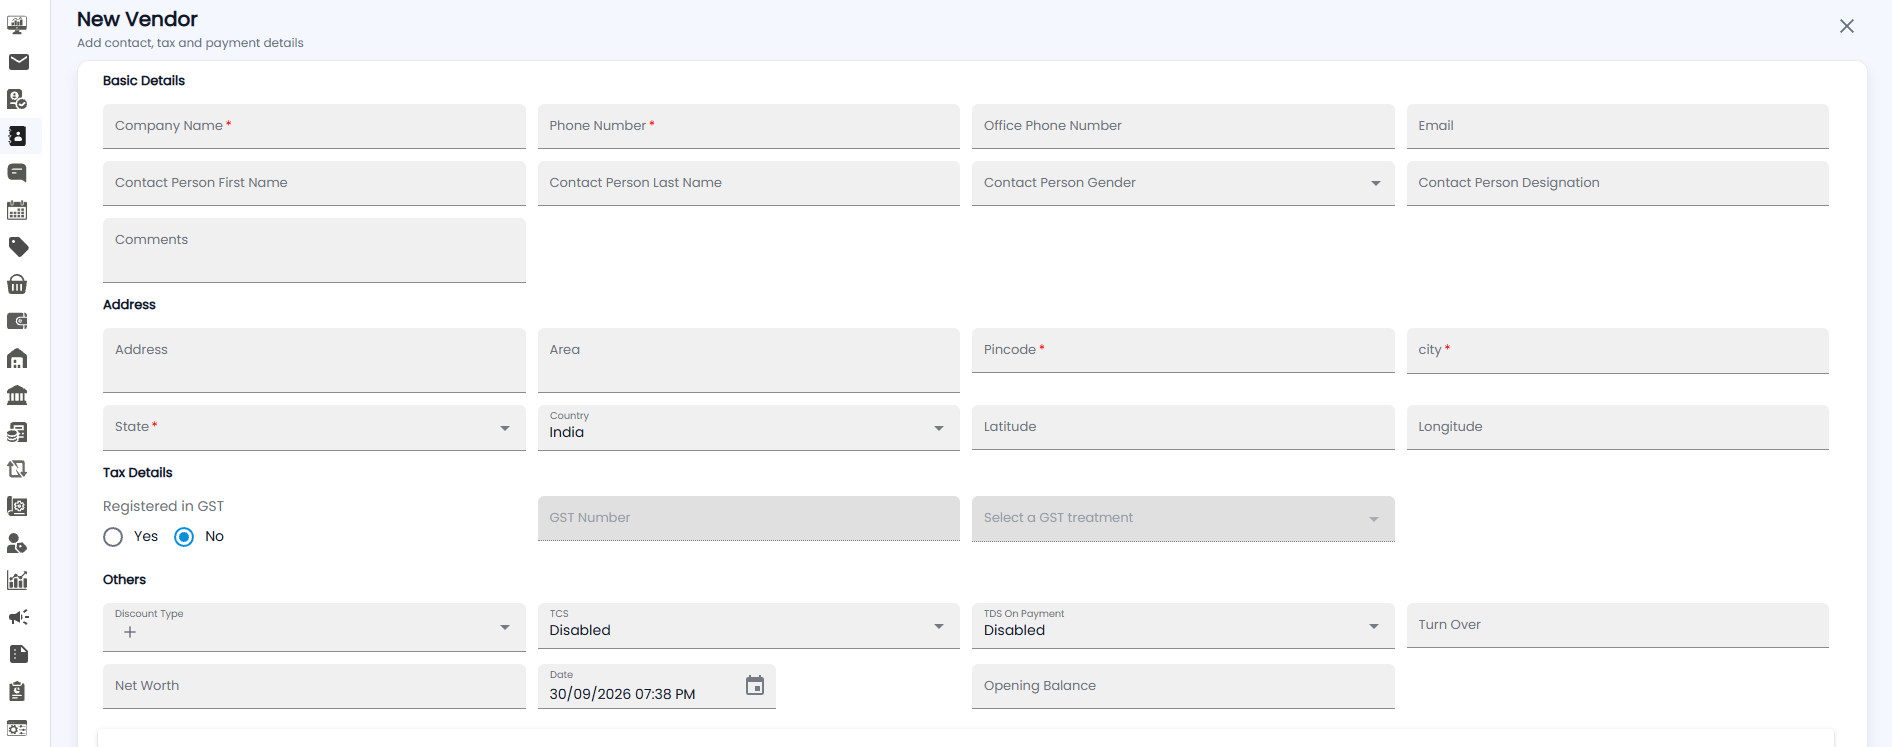
Basic Details, Address, and Tax Details
These work exactly as for a customer:
- Basic Details — Company Name* and Phone Number* are required; Office Phone Number, Email, the contact person's name, gender, and designation, and Comments are optional.
- Address — Pincode*, City*, and State* are required; Country is India by default.
- Tax Details — choose Registered in GST Yes or No. If Yes, fill in the GST Number and GST treatment.
Others
| Field | Description |
|---|---|
| Discount Type | The discount you get from this vendor |
| TCS / TDS On Payment | Whether tax is collected or deducted (Disabled by default) |
| Turn Over / Net Worth | Background on the vendor's business |
| Date / Opening Balance | The amount you already owed them on the date you start using Tazk |
Unlike a customer, a vendor has no Portal Access, credit, price list, or salesman settings.
Shipping, Bank, and Additional Contacts
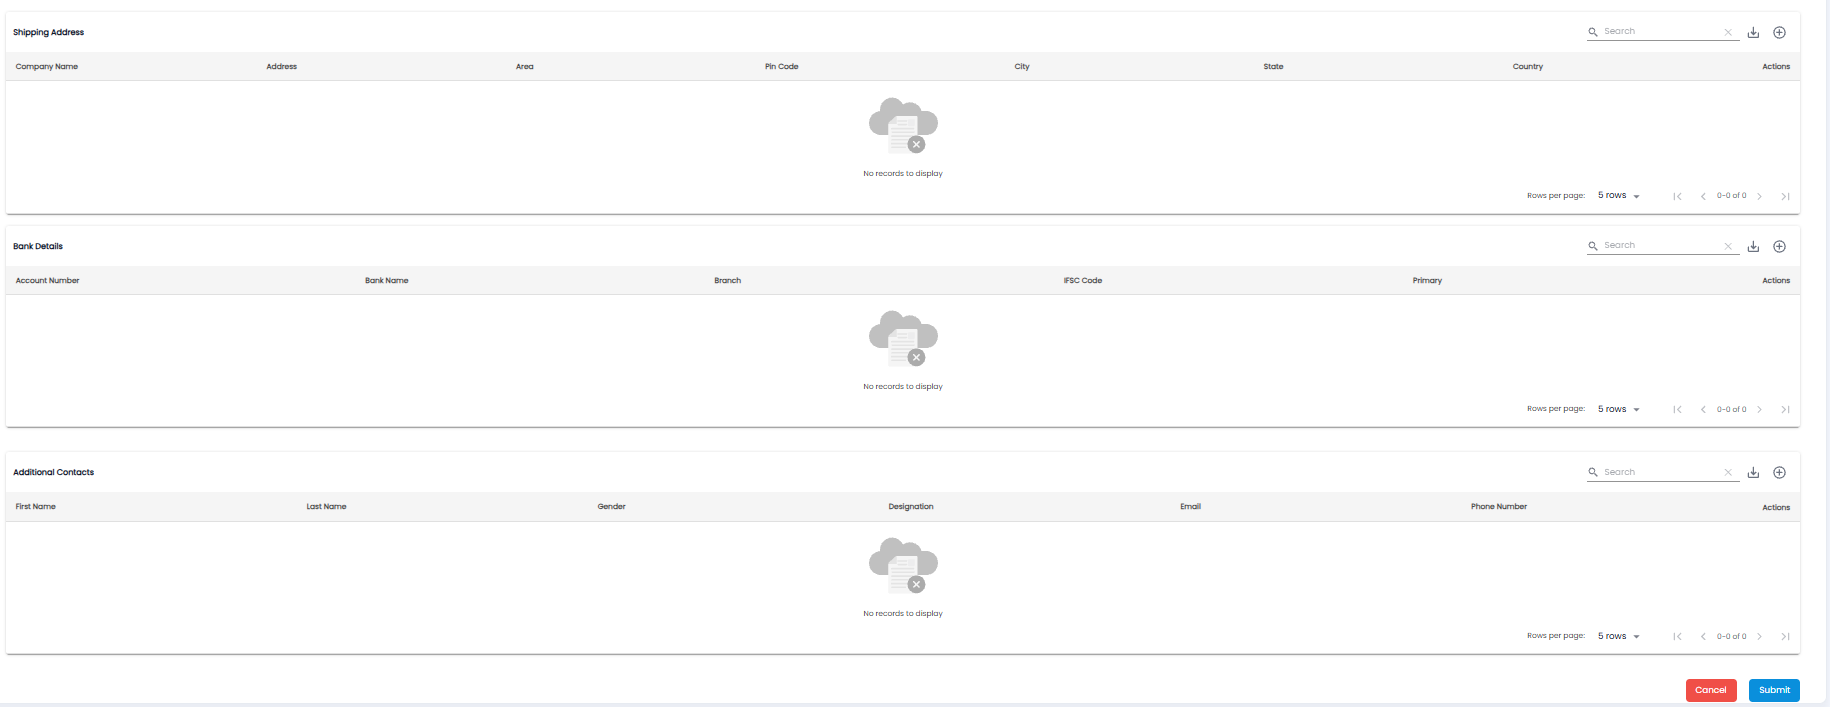
Scroll down to add the vendor's Shipping Address, Bank Details (for paying them), and Additional Contacts. Click the + icon on each table to add a row.
Saving the Vendor
Click Submit to save the vendor, or Cancel to leave without saving.
Tip: Add the vendor's bank details and mark one account as Primary, so payments go to the right account.