
How do purchase orders work in Tazk POS?
A purchase order (PO) is what you send a vendor before the goods arrive. Create it from Purchases → Purchase Orders with the vendor, location and products, then click Save & Send PO. When the stock arrives, click Receive Goods on the PO, enter the vendor's invoice number and the quantities received, and save — that creates a bill, adds the stock and records what you owe the vendor.
Where does a purchase order fit in the purchase flow?
Buying from a vendor in Tazk POS runs in four steps. You can skip the first one and enter a bill directly.
- Purchase order — what you asked the vendor for (this page).
- Bill — what actually arrived, with the vendor's invoice. Saving it adds the stock to your location. See Bills.
- Payable — the unpaid part of each bill, by age. See Payables.
- Payment — the money you pay the vendor against one or more bills. See Purchase Payments.
Goods you send back to the vendor go through a purchase return, which creates a Debit Notes entry.
What does the Purchase Orders page show?
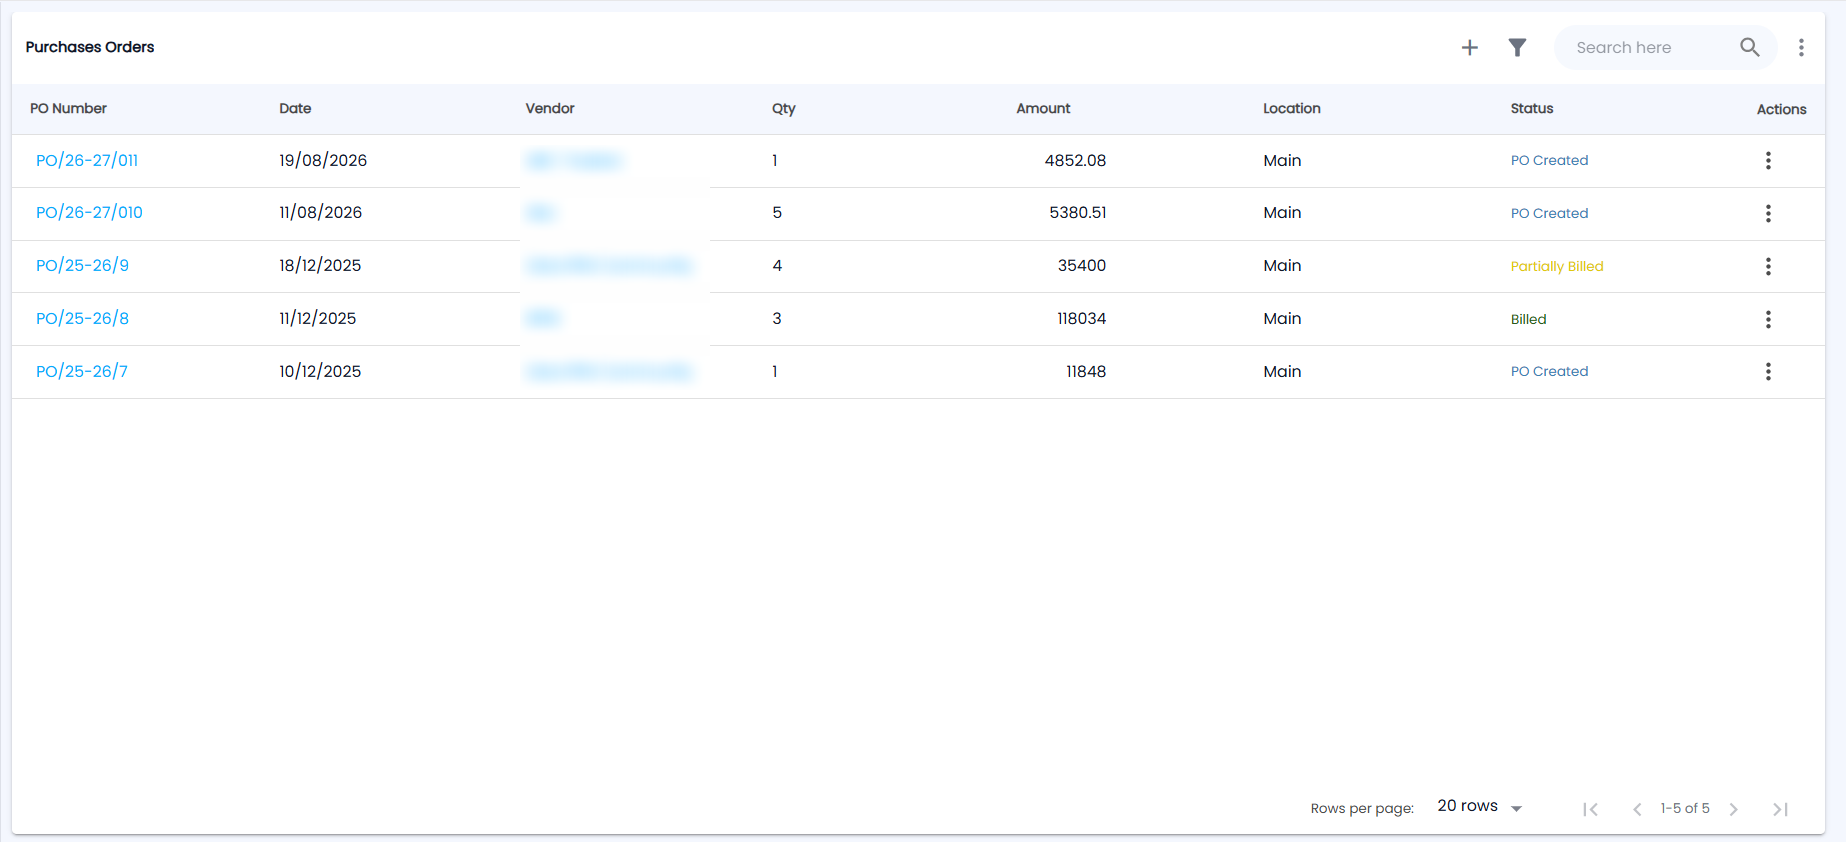
Go to Purchases → Purchase Orders. The page is titled Purchases Orders; the toolbar has +, the filter icon, Search here and a ⋮ menu, and the list shows 20 rows per page by default:
| Column | What it shows |
|---|---|
| PO Number | The PO’s number, for example PO/26-27/011. Click it to open the PO. |
| Date | The PO date |
| Vendor | The vendor the PO was raised to |
| Qty | Total quantity ordered |
| Amount | PO value |
| Location | The store or warehouse the goods are for |
| Status | PO Created (blue — nothing received yet), Partially Billed (yellow — some quantity received) or Billed (green — everything received) |
| Actions | The ⋮ menu for that PO |
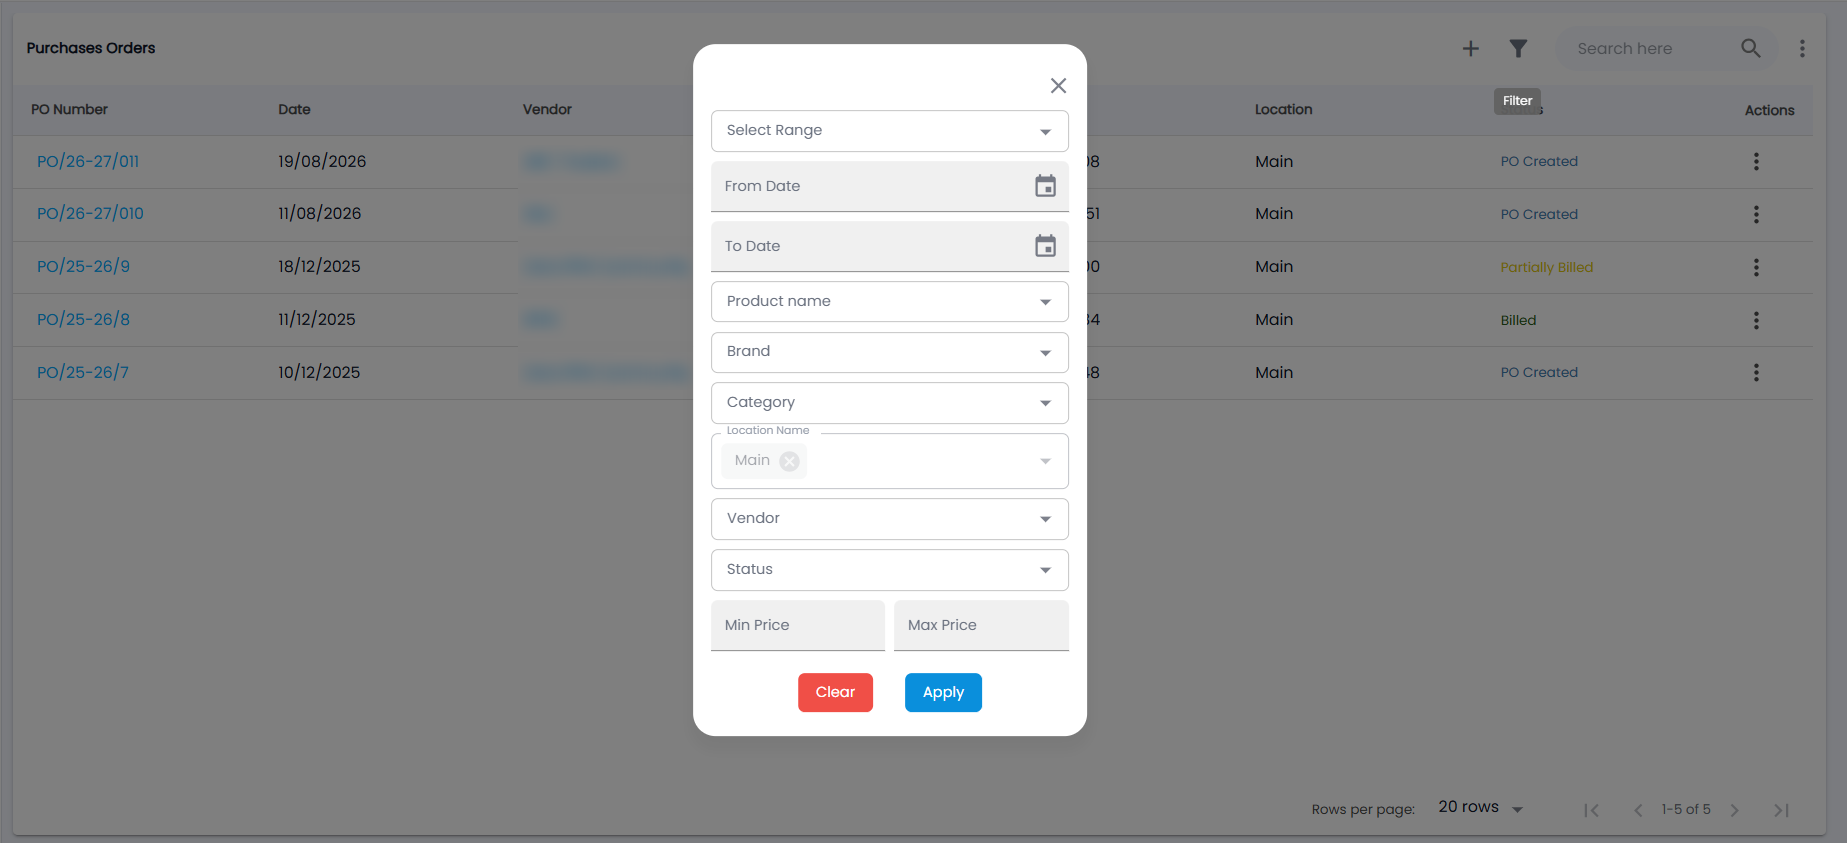
Use the search box, or click the filter icon: Select Range, From Date / To Date, Product name, Brand, Category, Location Name (your location is already chosen), Vendor, Status, and Min Price / Max Price; then Apply or Clear. The ⋮ menu in the toolbar (More actions) has Export CSV and Export PDF.
How do I create a purchase order?
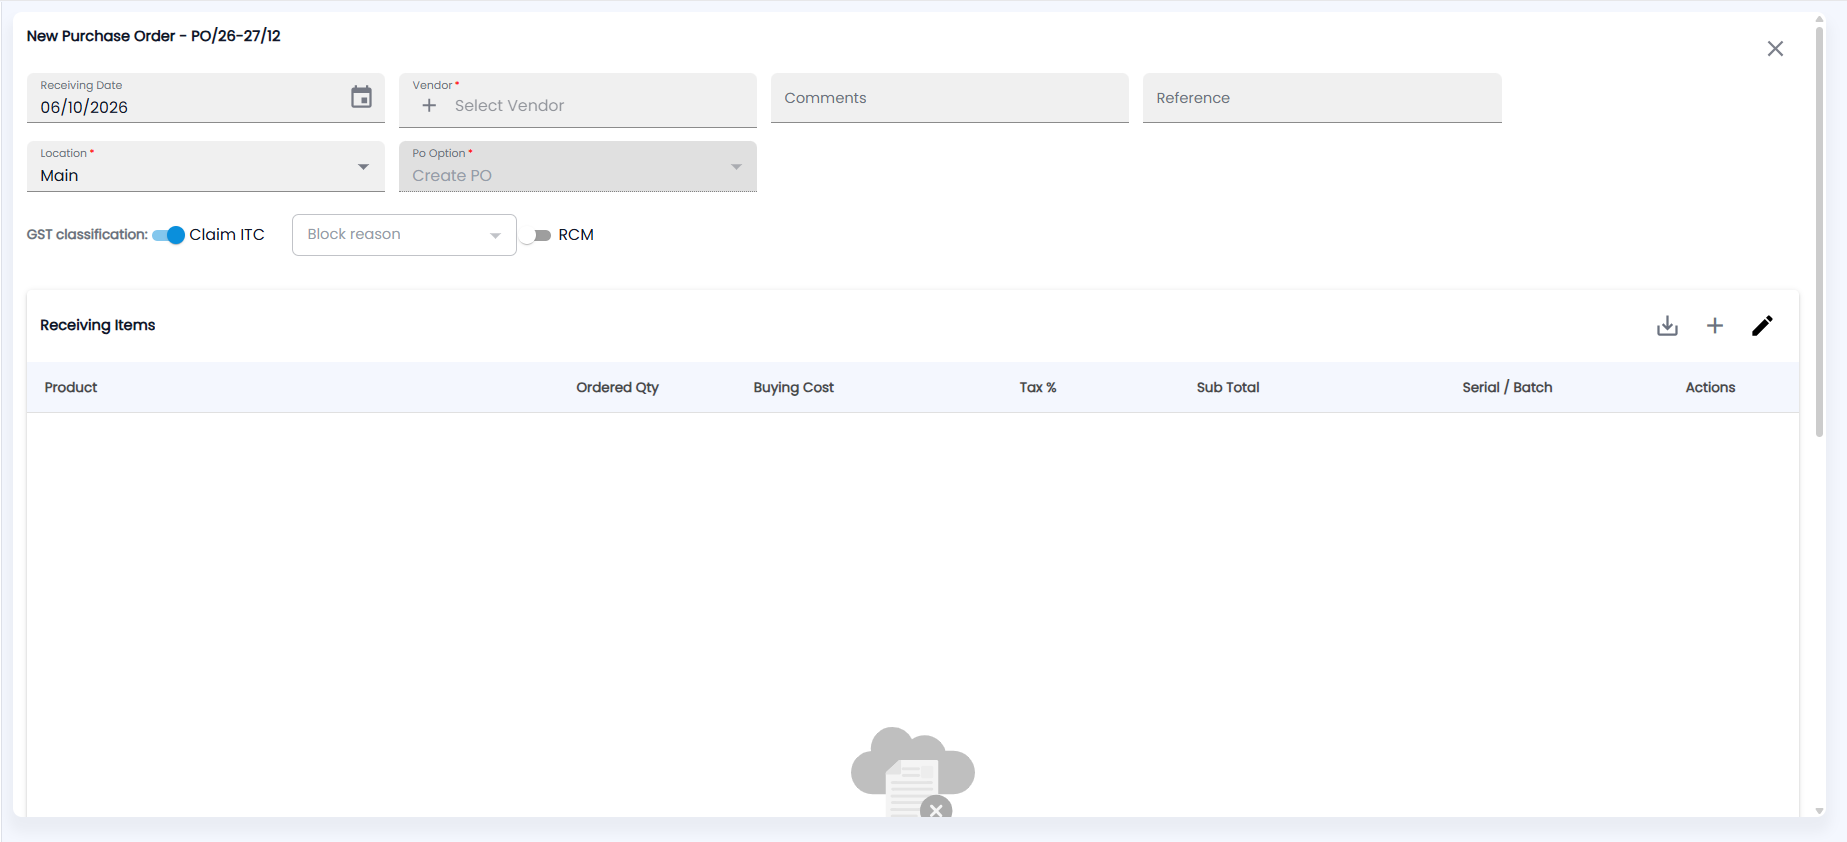
- Click the + icon. The form opens as New Purchase Order with the next PO number (for example PO/26-27/12); Po Option is set to Create PO.
- Check the Receiving Date (today by default) and choose the Vendor (required; + in the field adds a new vendor) and the Location (required) the goods will be delivered to. Add Comments and a Reference if needed.
- Set the GST classification: keep Claim ITC on to take input tax credit, or turn it off and choose a Block reason. Turn on RCM if reverse charge applies.
- Under Receiving Items, click + to add a product, or use the pencil to edit the lines. Each line has Product, Ordered Qty, Buying Cost, Tax %, Sub Total and Serial / Batch, with a delete action. The download icon above the items is for downloading item lines.
- Check the totals below the items. Depending on your settings the form can also ask for Billing GST, a vendor Vendor Price List, MRP, discount and TDS or TCS.
- Click Save & Send PO. The PO is saved and you can email it to the vendor.
On a saved PO, View & send PO opens the PDF again so you can send or download it.
How do I receive goods against a PO?
- On the PO’s row, open the ⋮ menu (or open the PO) and choose Receive Goods. It is not available once the PO is Billed.
- The Receiving Purchase Order form opens with the PO's lines. Enter the vendor's Invoice Number and Invoice Date, and the Receiving Date.
- For each line, enter the Received Qty. For serialised or batch items, enter the serial / batch numbers.
- Click Save.
Saving creates a bill on the Bills page, adds the received quantity to stock at the PO's location (see Stocks), and adds the bill amount to Payables. If you received less than you ordered, the PO becomes Partially Billed and you can receive the rest later.
What is on the PO detail view?
Click a row to open the PO. It shows the PO number, Ordered Qty, Billed Qty, Due Days, Due Amount and Total, the item list and a timeline. Use Previous / Next to move between POs. The Actions menu has DELETE (if you have the permission).