
What is an individual contact in Tazk POS?
An individual is a person who buys from you — a walk-in or retail customer — rather than a business. Open Contacts → Individual and click Create Contact; only the phone number, pincode, city and state are required. Open an individual to see their details, available store credit, loyalty points and a timeline of their invoices, and use the Transactions tab for their invoices and POS payments.
What does the Individual folder show?
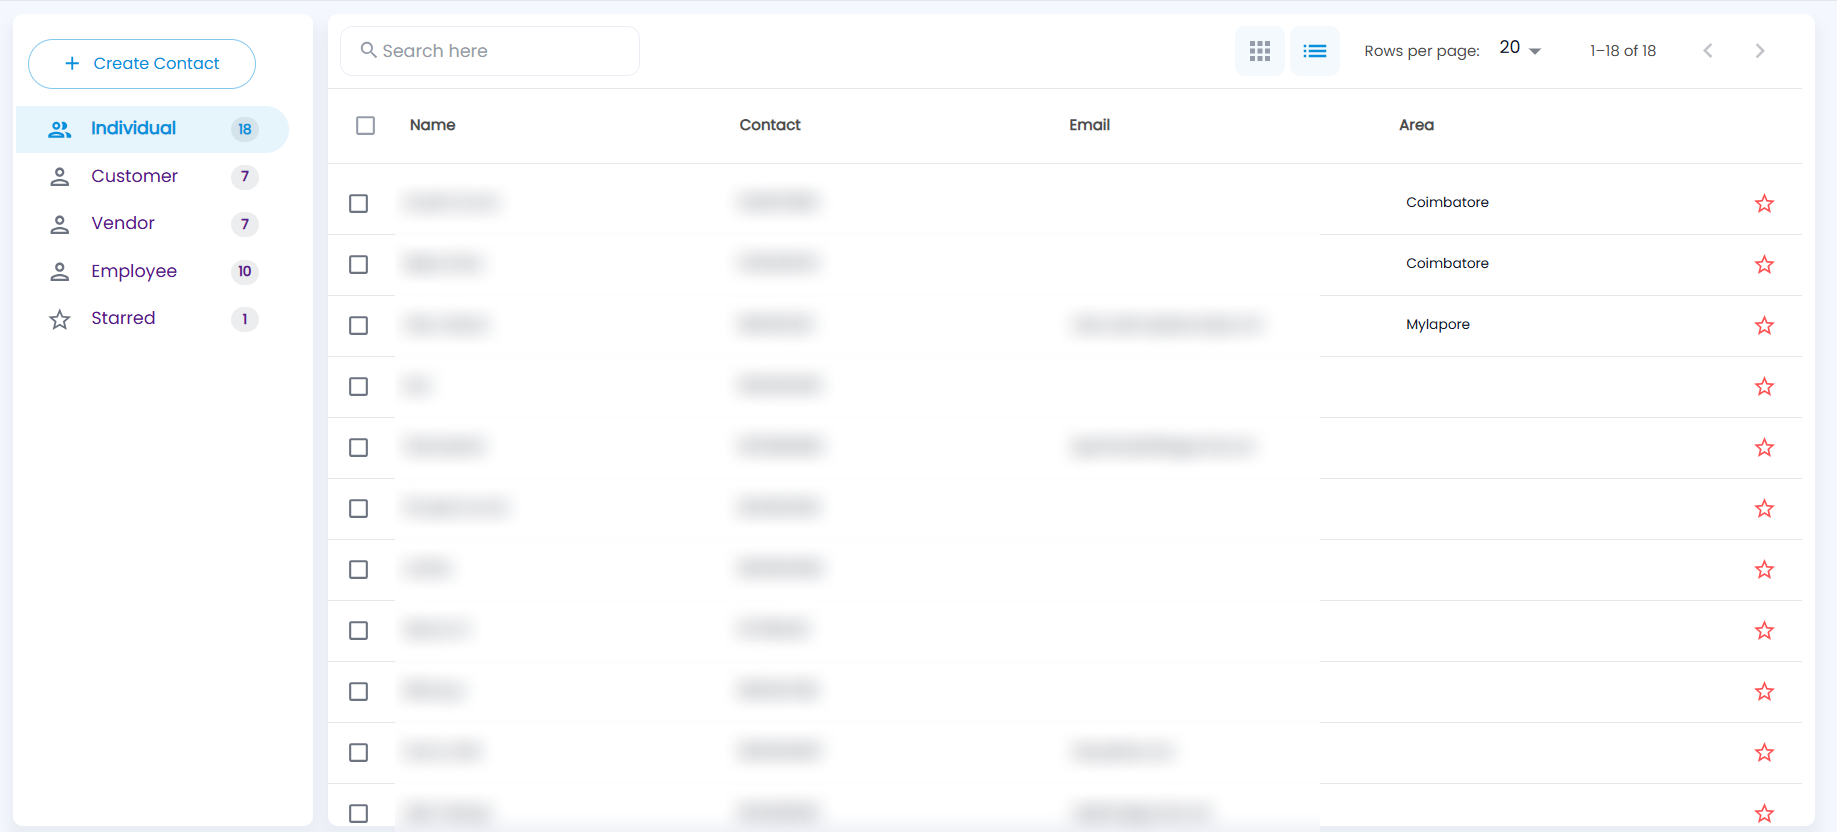
Click Contacts in the sidebar and choose Individual in the left panel. The number beside each folder is how many contacts it holds. The list shows:
| Column | Description |
|---|---|
| Name | The person’s name |
| Contact | Phone number |
| Email address, if entered | |
| Area | Area from the address |
| Star | Click it to star the contact — see Starred Contacts |
- Search here finds contacts by name, phone number (full or part), area, or exact email or GSTIN.
- Click a column heading to sort by it.
- The two icons at the top switch between Grid View (a card per contact, with email, area and phone) and List View.
- Rows per page can be 20, 50 or 100.
- Click a row to open the individual’s page.
How do I add an individual?
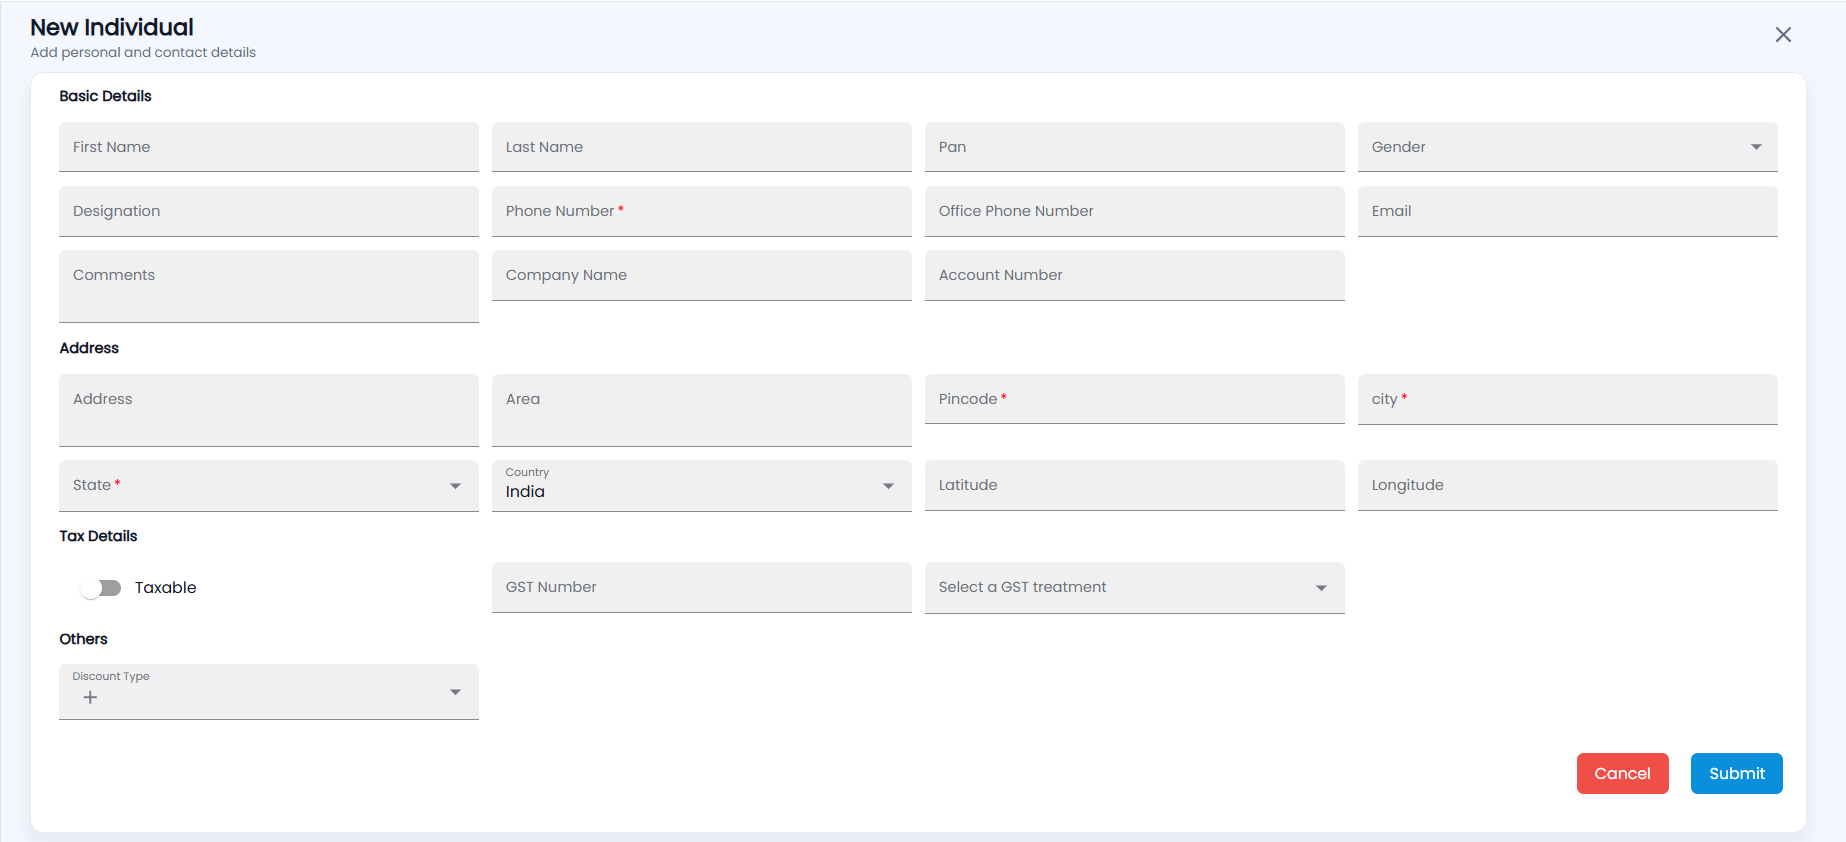
- With the Individual folder open, click Create Contact. The New Individual form opens.
- Basic Details — First Name, Last Name, Pan, Gender, Designation, Phone Number (required, 10 digits), Office Phone Number, Email, Comments, Company Name and Account Number.
- Address — Address, Area, Pincode (required, 6 digits), city and State (both required), Country (India by default), and optionally Latitude and Longitude. Entering a known pincode fills in the city and state for you.
- Tax Details — turn on Taxable if the person is GST-registered; the GST Number and Select a GST treatment then become required.
- Others — choose a Discount Type, or click + to create one (a discount name and percentage).
- Click Submit.
The phone number must be different from the office phone number, and no other individual may already have it (Phone Number Already Exists!). An invalid GST number is rejected.
What is on an individual’s page?
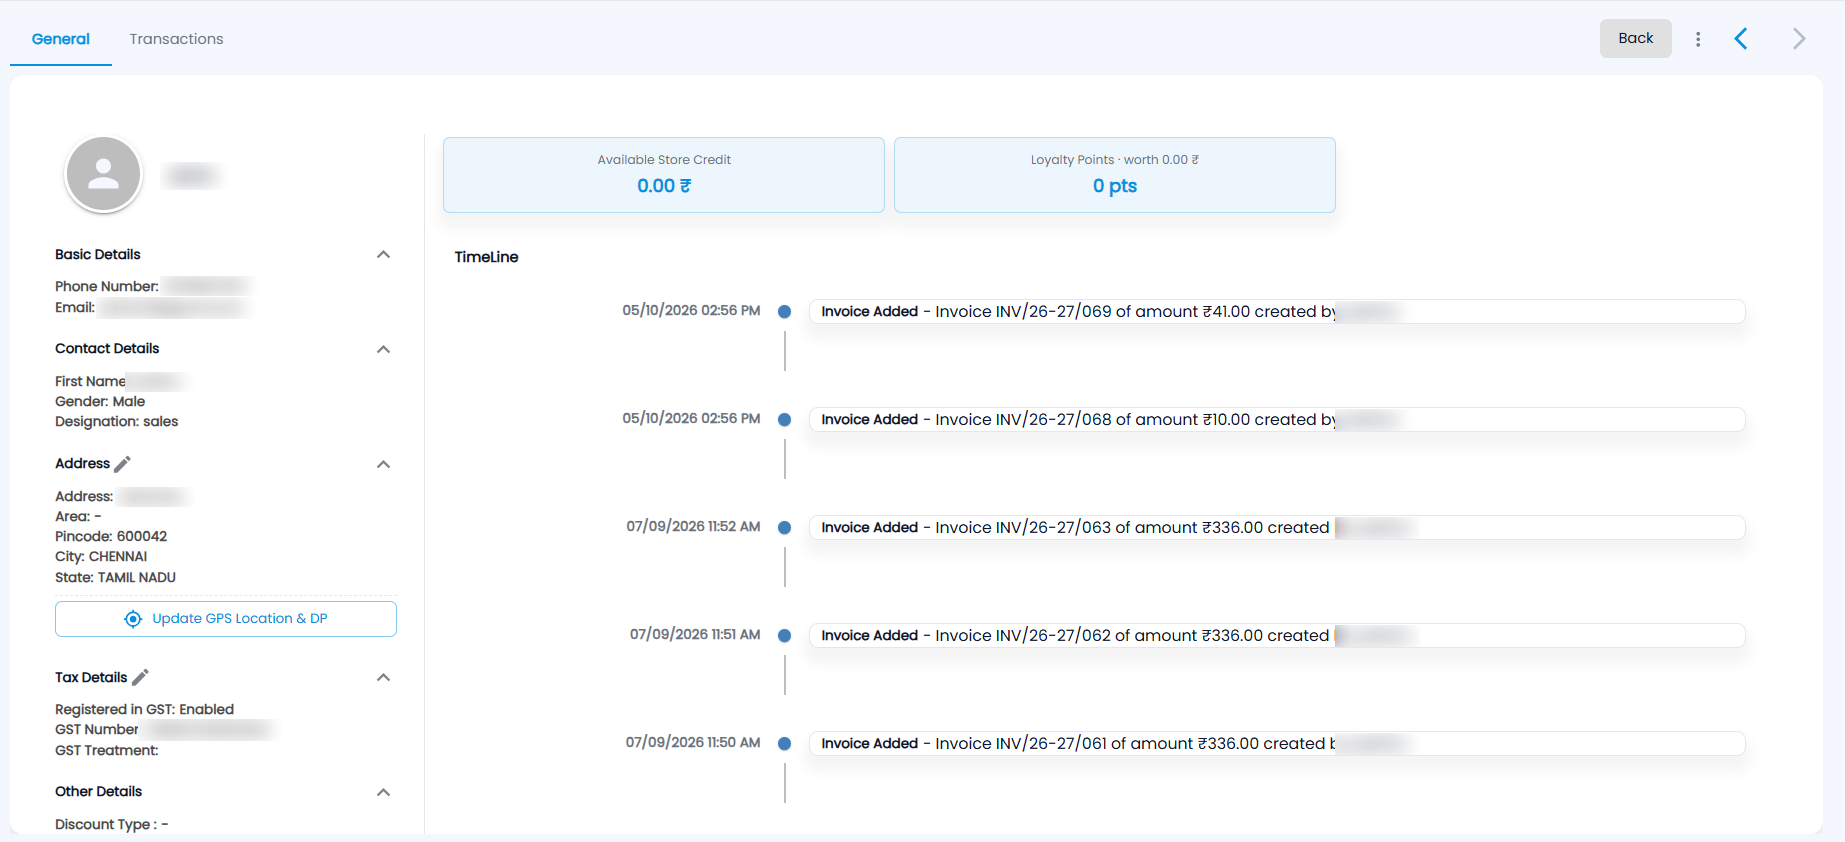
The page has two tabs, General and Transactions. At the top right, Back returns to the list, the arrows move to the previous or next contact, and the three-dot menu has EDIT.
On the General tab, the left side shows the person’s photo and name, then:
- Basic Details — phone number and email.
- Contact Details — first name, gender and designation.
- Address — click the pencil to edit the address, area, pincode, city and state.
- Update GPS Location & DP — see below.
- Tax Details — whether they are registered in GST, the GST number and treatment; click the pencil to change them.
- Other Details — the discount type.
The right side shows:
| Card | What it shows |
|---|---|
| Available Store Credit | Credit the person can spend on their next bill — for example credit given when a POS sale was cancelled |
| Loyalty Points | Their points balance and its value in ₹. Shown only if your loyalty programme is switched on; the card uses your programme’s name |
| TimeLine | Everything that happened to this contact, newest first — Invoice Added, Payment Added, Contact Created, Contact Updated, Address Updated, Tax Details Updated, Image Updated and more, with who did it and when |
What does Update GPS Location & DP do?
It saves where the customer is and a photo of their storefront, so field staff can find them. Click Update GPS Location & DP; the browser reads your location. Take or choose a storefront photo (up to 6 MB) — the photo is always required. If no location has been saved before, your location must be accurate to within 20 m; if it is not, move outside and try again. Click Save. The card then shows the photo, the coordinates, the accuracy and when it was captured, and the timeline records Image Updated.
The button is available to Administrators, Sales Managers, Salesmen, Field Sales Executives and Delivery Persons.
What is on the Transactions tab?
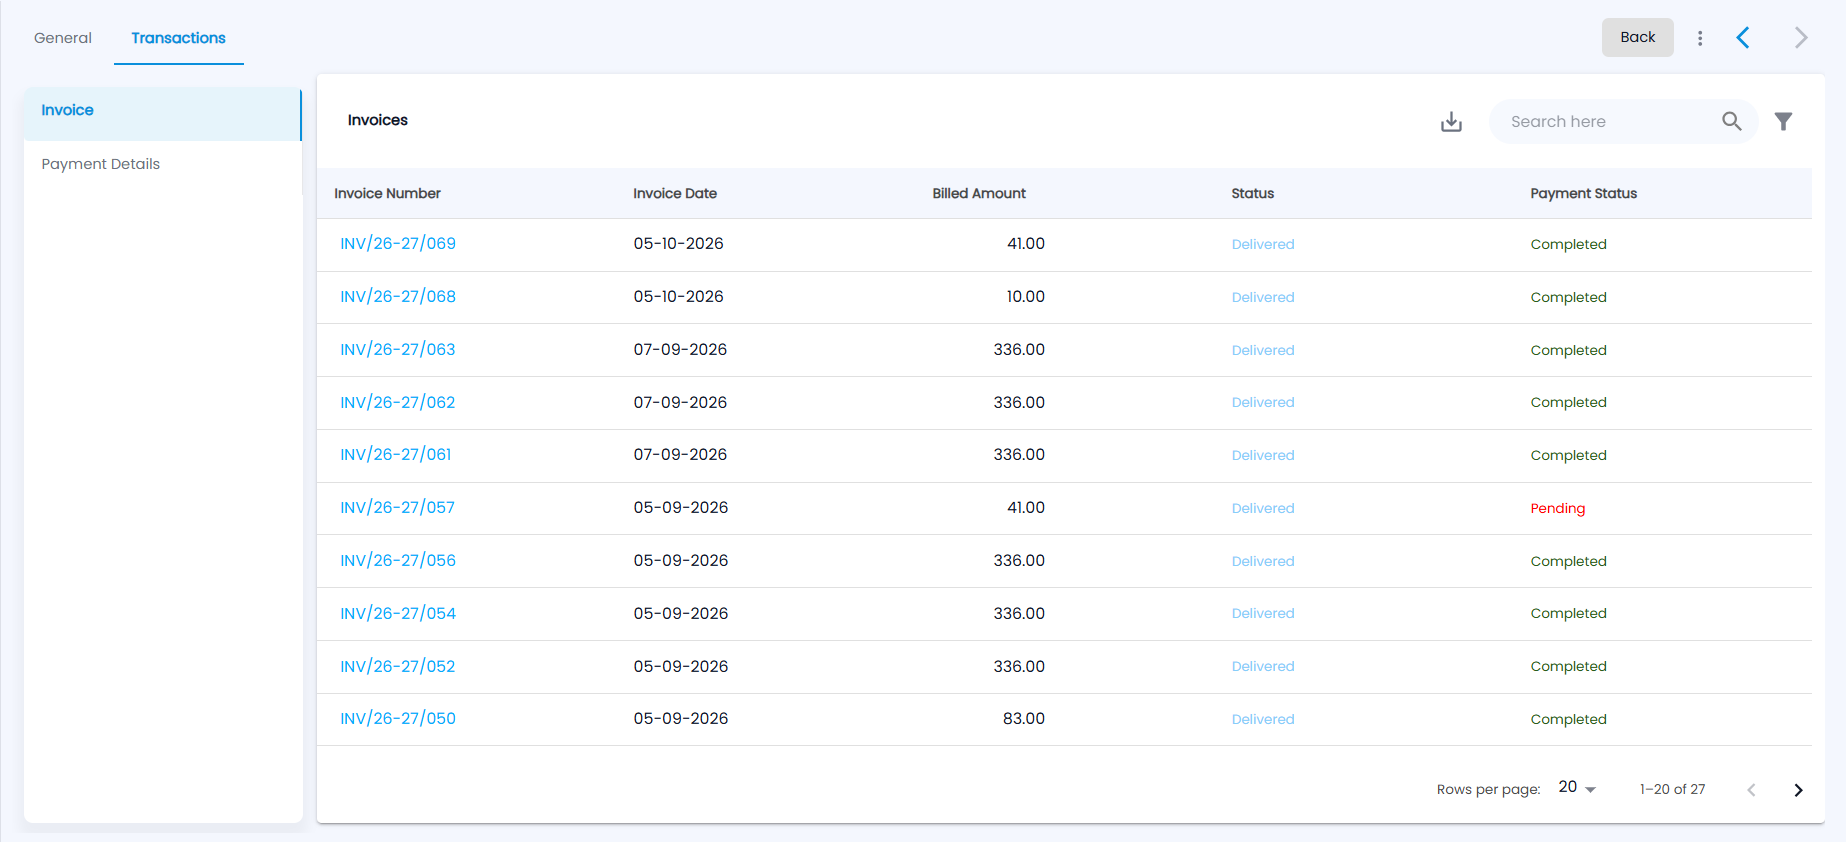
Choose Invoice or Payment Details on the left. Each list has a download icon, Search here and a filter.
- Invoice — every invoice for this person: Invoice Number, Invoice Date, Billed Amount, Status (for example Delivered) and Payment Status (Completed or Pending). Click an invoice number to open it. See Invoices.
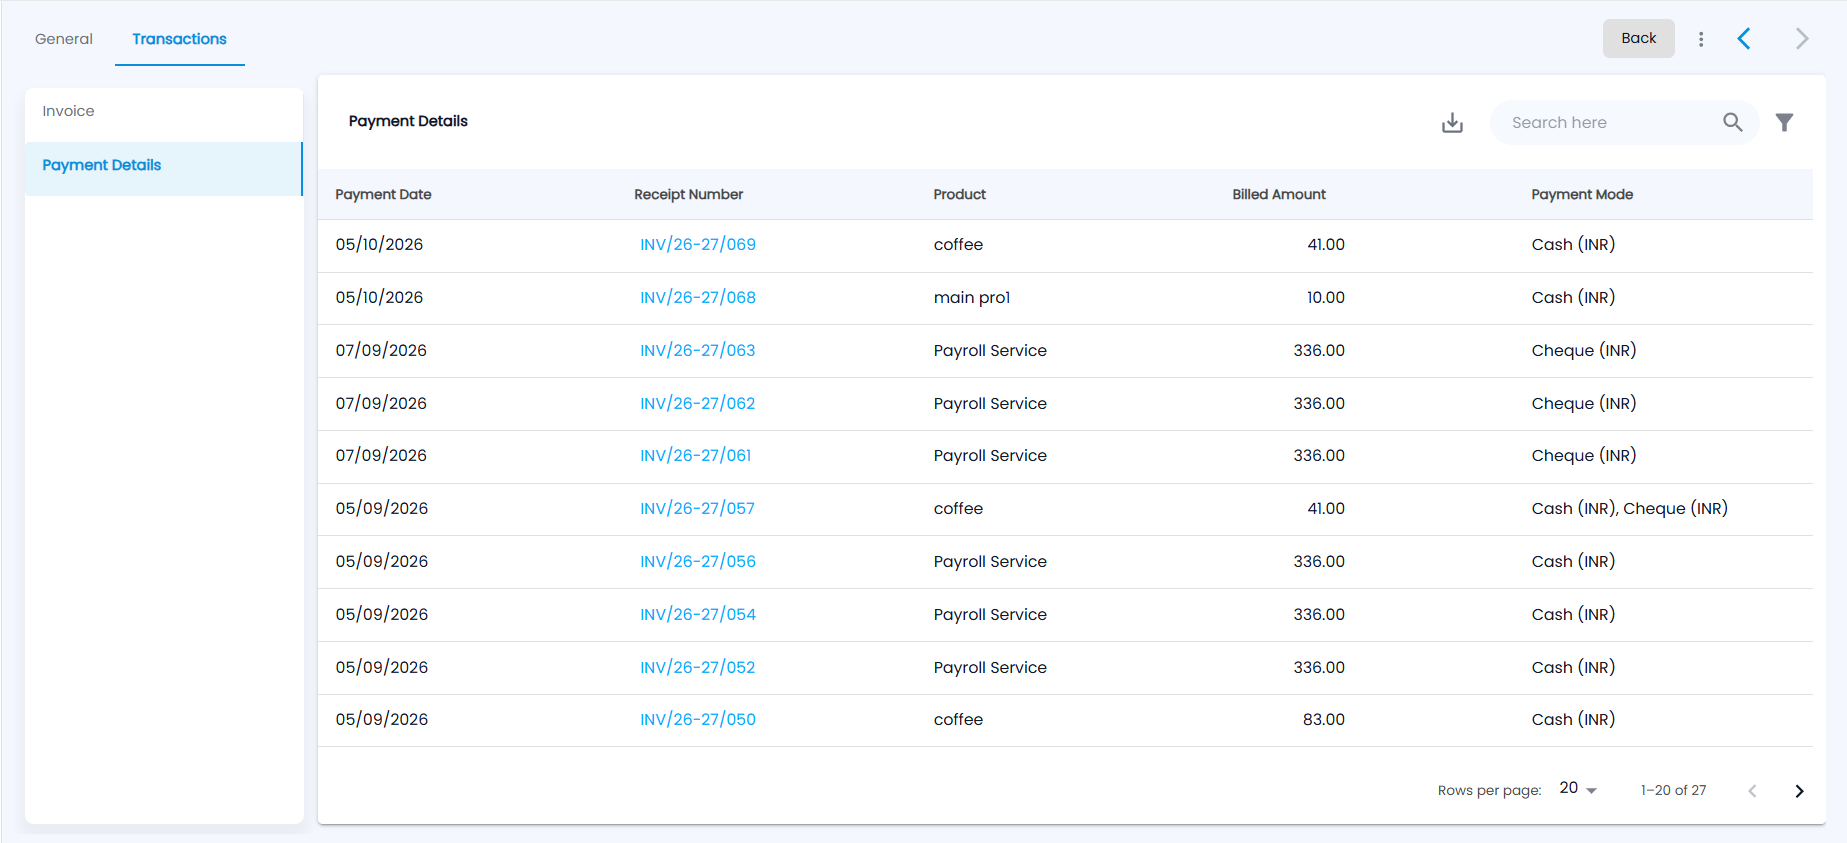
- Payment Details — their bills from the Sales Counter: Payment Date, Receipt Number (click it to open the bill), Product, Billed Amount and Payment Mode — for example Cash (INR), or Cash (INR), Cheque (INR) for a split payment. Cancelled bills are not listed. See Sales Counter.