
Overview
A print template sets the size of your label and what is printed on it — the code, the name, the price, your logo, and so on. Open templates from Codes > Print Templates.
The Template List
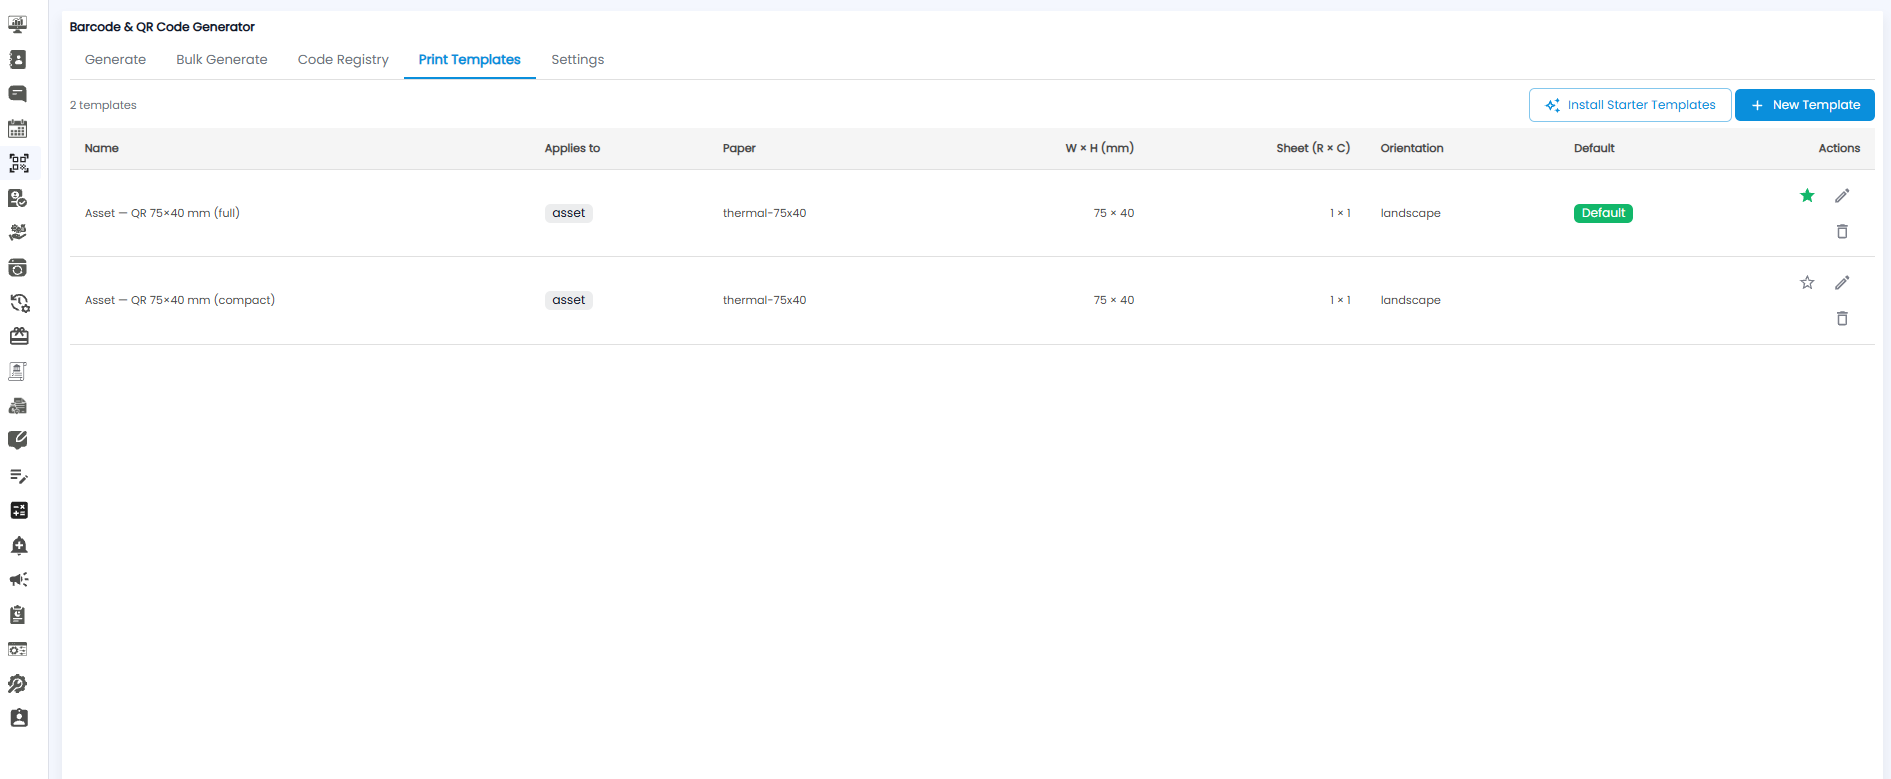
The count at the top left shows how many templates you have, for example 2 templates.
| Column | What it shows |
|---|---|
| Name | The template name, for example Asset — QR 75×40 mm (full) |
| Applies to | The kind of code it is for, for example asset |
| Paper | The paper preset, for example thermal-75x40 |
| W × H (mm) | The label width and height |
| Sheet (R × C) | How many labels fit on a sheet, in rows × columns |
| Orientation | Portrait or landscape |
| Default | Shows Default for the template used when none is picked |
In Actions, click the star to make a template the default, the pencil to edit it, or the bin to delete it.
- Install Starter Templates — adds ready-made templates you can use or edit.
- + New Template — design your own (see below).
Creating a Template
Click + New Template to open the designer.
Label Size and Layout
| Field | Required | Description |
|---|---|---|
| Template name | Yes | A name for the template |
| Applies to | No | The kind of code this template is for |
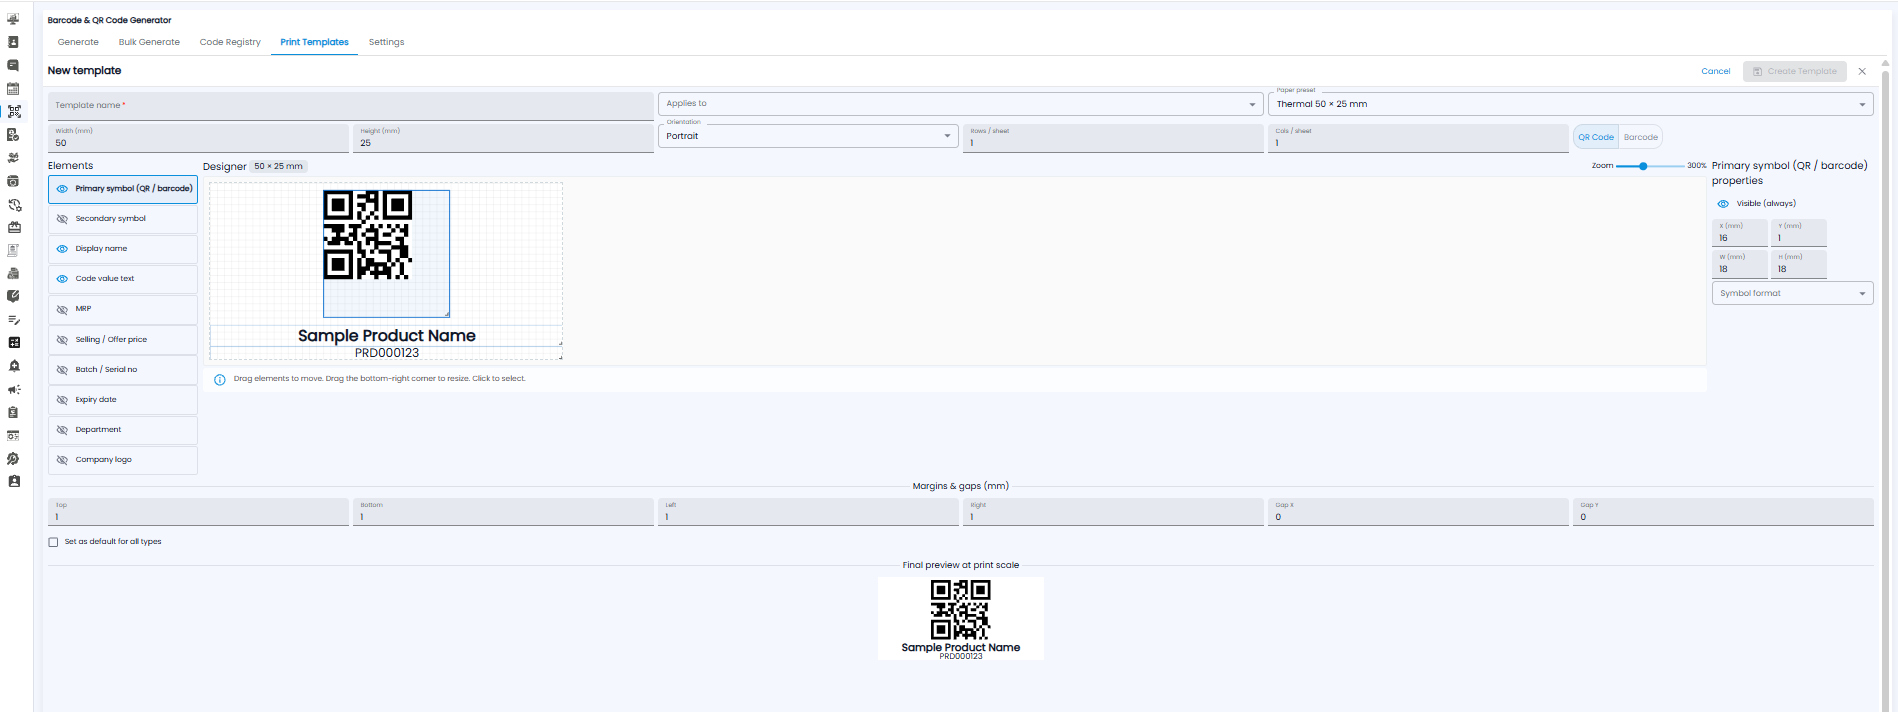
| Paper preset | No | A ready-made label size, for example Thermal 50 × 25 mm. It fills in the width and height for you |
| Width / Height (mm) | No | The label size |
| Orientation | No | Portrait or landscape |
| Rows / sheet and Cols / sheet | No | How many labels are printed on one sheet |
| QR Code / Barcode | No | Choose which kind of code the label shows |
Elements
The Elements list on the left holds everything that can go on the label. Click the eye icon next to an element to show or hide it:
- Primary symbol (QR / barcode)
- Secondary symbol
- Display name
- Code value text
- MRP
- Selling / Offer price
- Batch / Serial no
- Expiry date
- Department
- Company logo
The Designer
The Designer shows the label at its real size (for example 50 × 25 mm):
- Drag an element to move it
- Drag the bottom-right corner of an element to resize it
- Click an element to select it
- Use the Zoom slider to zoom in or out
When an element is selected, its properties appear on the right: whether it is visible, its position (X, Y) and size (W, H) in mm, and for the code symbol, its Symbol format.
Margins and Gaps
Set the Top, Bottom, Left, and Right margins, and the Gap X and Gap Y between labels on a sheet, all in mm.
Finishing the Template
- Check the Final preview at print scale at the bottom
- Tick Set as default for all types if this should be the template used everywhere
- Click Create Template at the top right. It stays greyed out until you enter a Template name
Click Cancel or the × to leave without saving.