
Overview
Click Codes in the sidebar to open the Barcode & QR Code Generator. It has five tabs:
| Tab | What it is for |
|---|---|
| Generate | Create one code at a time and print its label (this article) |
| Bulk Generate | Create many codes at once from a CSV or Excel file |
| Code Registry | Every code you have generated — search, print, and manage them |
| Print Templates | Design the labels your codes are printed on |
| Settings | How codes are numbered, per-type prefixes, printer defaults, and your logo |
The Generate Tab
The Generate tab opens first. Work through its three steps on the left; the Preview on the right shows the code as you go.
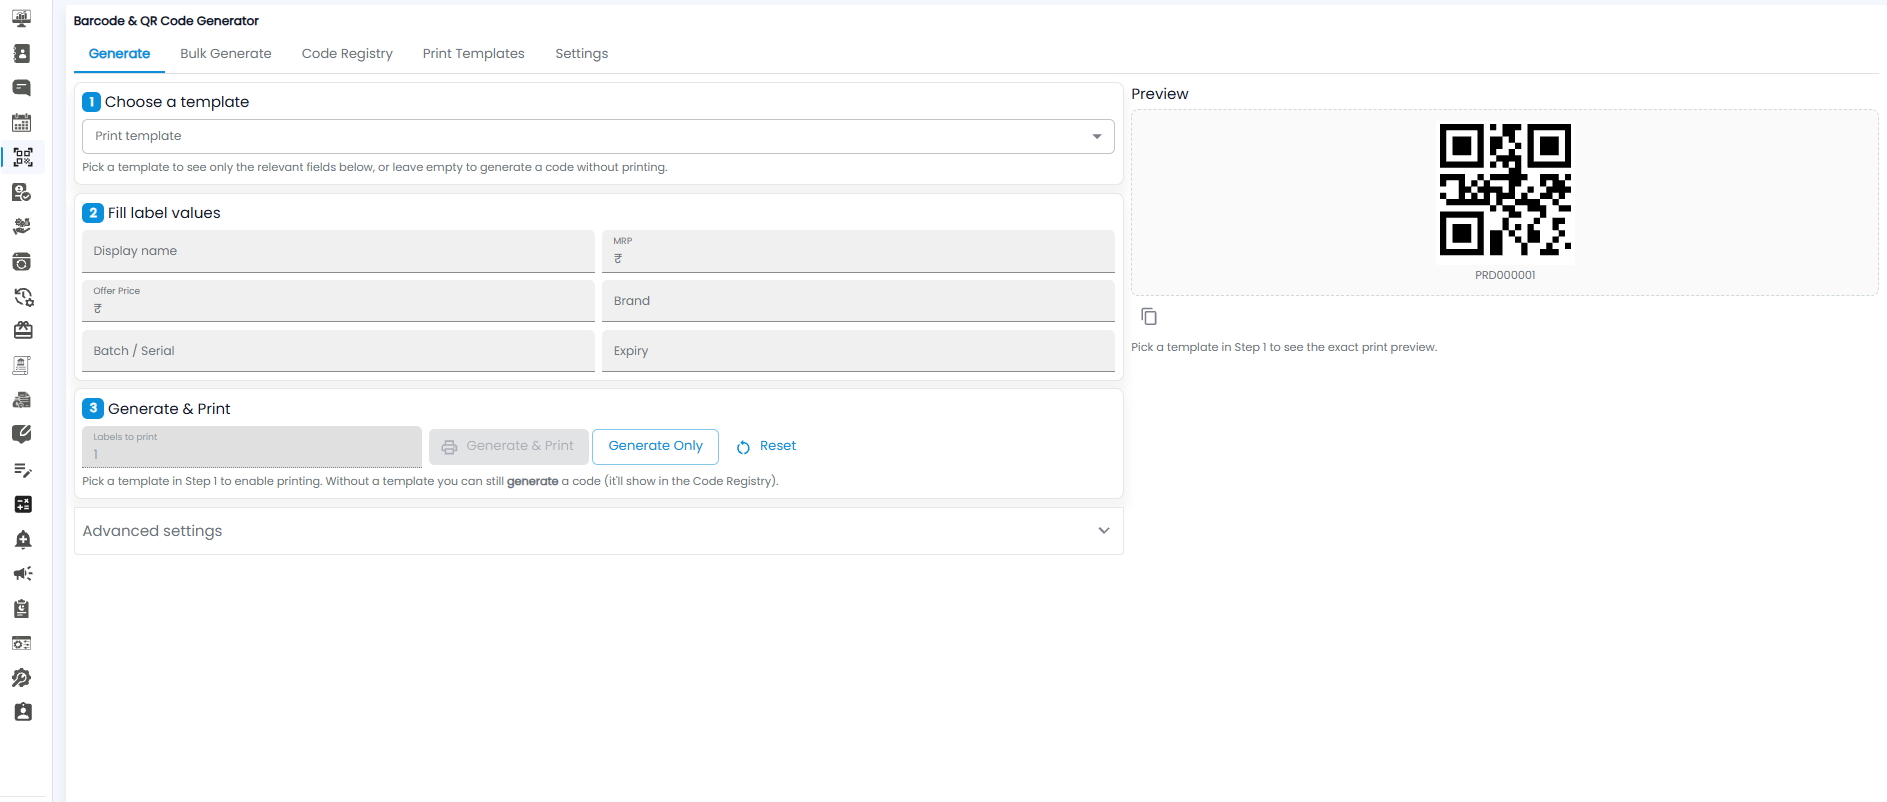
Step 1: Choose a Template
Pick a Print template from the dropdown. Once you pick one, only the label fields that template uses are shown below. Leave it empty if you only want to generate a code without printing it.
Step 2: Fill Label Values
Fill in the details you want on the label. All are optional:
- Display name — the name printed on the label
- MRP (₹) and Offer Price (₹)
- Brand
- Batch / Serial
- Expiry
Step 3: Generate & Print
| Button | What it does |
|---|---|
| Labels to print | How many copies of the label to print |
| Generate & Print | Creates the code and prints it. Needs a template from Step 1 |
| Generate Only | Creates the code without printing it |
| Reset | Clears the form so you can start again |
Every code you generate — printed or not — appears in the Code Registry tab.
Advanced Settings
Click Advanced settings at the bottom to open more options for the code.
Preview
The Preview shows the code and its value underneath, for example PRD000001. Click the copy icon below it to copy the code value. Pick a template in Step 1 to see exactly how the printed label will look.