
The Defects Menu
Click Defects in the sidebar to expand it. It has four sub-menus, each covered by its own article:
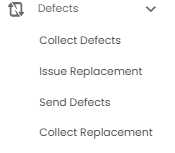
Together they follow a defective item from your customer to your vendor and back:
| Step | Sub-menu | What happens | Number |
|---|---|---|---|
| 1 | Collect Defects | A customer returns a defective item to you (this article) | DEF/… |
| 2 | Issue Replacement | You give the customer a replacement | CDEF/… |
| 3 | Send Defects | You send the defective item to your vendor | SDEF/… |
| 4 | Collect Replacement | The vendor sends you a replacement | VDEF/… |
The Collected Defect List
Open Defects > Collect Defects. The page is titled Collected Defect.
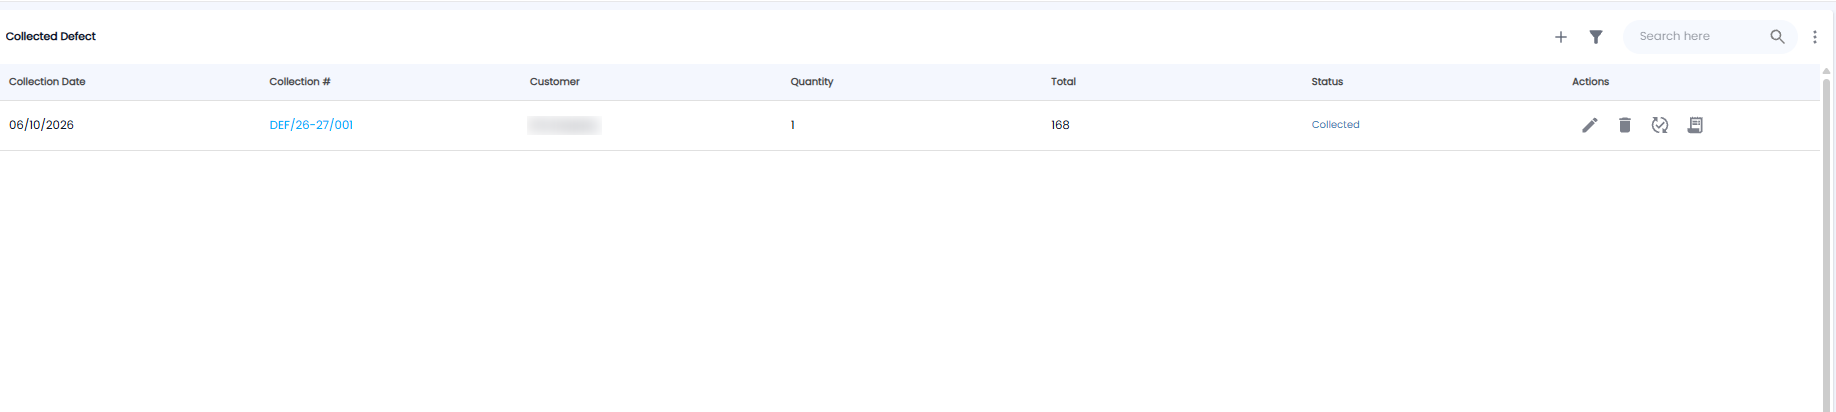
| Column | What it shows |
|---|---|
| Collection Date | When the item was collected |
| Collection # | For example DEF/26-27/001. Click it to open the collection |
| Customer | Who returned it |
| Quantity / Total | How many items, and their value |
| Status | For example Collected |
| Actions | Edit (pencil), delete (bin), the circular-arrows icon for the replacement, and the document icon |
Use + to record a collection, the filter icon to narrow the list, Search here to find one, and ⋮ for more options.
Recording a Defect Collection
Click +. The form opens with the next number, for example Defect Collection - DEF/26-27/002.
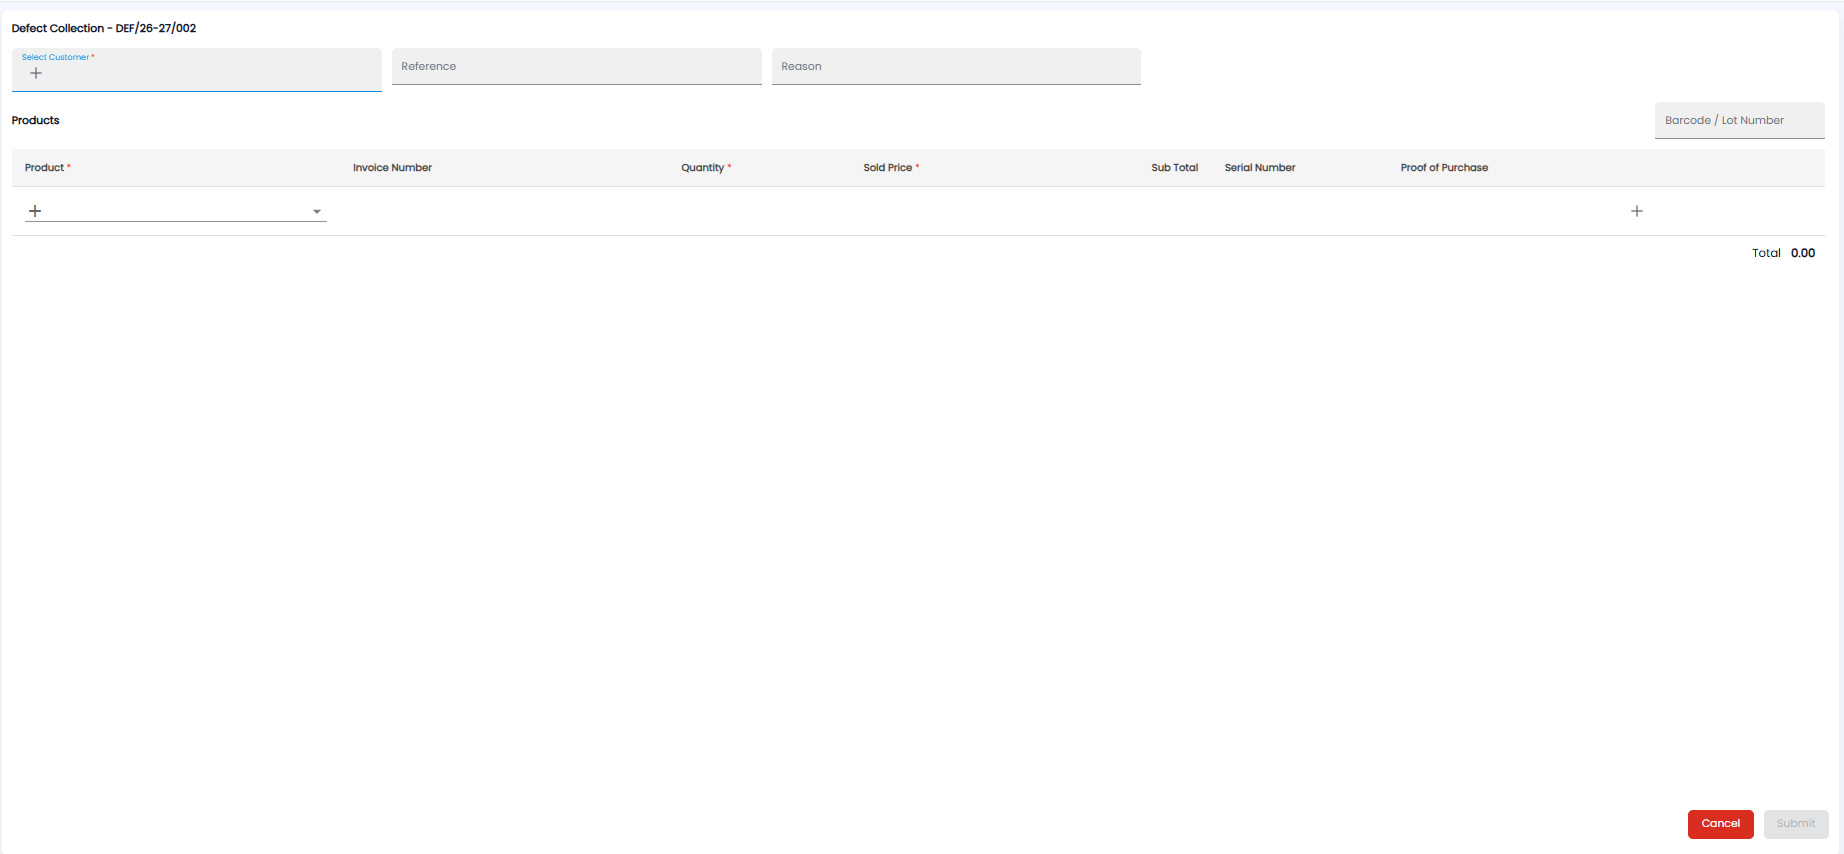
- Pick the customer under Select Customer*. Click + to add a new customer
- Add a Reference, and the Reason the item is defective
- Add the items under Products — scan or type a Barcode / Lot Number, or pick the Product* in the row. Click + at the end of the row to add another
- For each item, fill in the Invoice Number it was sold on, the Quantity*, the Sold Price*, the Serial Number, and the Proof of Purchase. The Sub Total and Total are worked out for you
- Click Submit. It stays greyed out until the required fields are filled in. Click Cancel to leave without saving
Tip: Scan the serial number rather than typing it — you can then check on Inventory > Lot Traceability that the unit was really sold by you.