
Overview
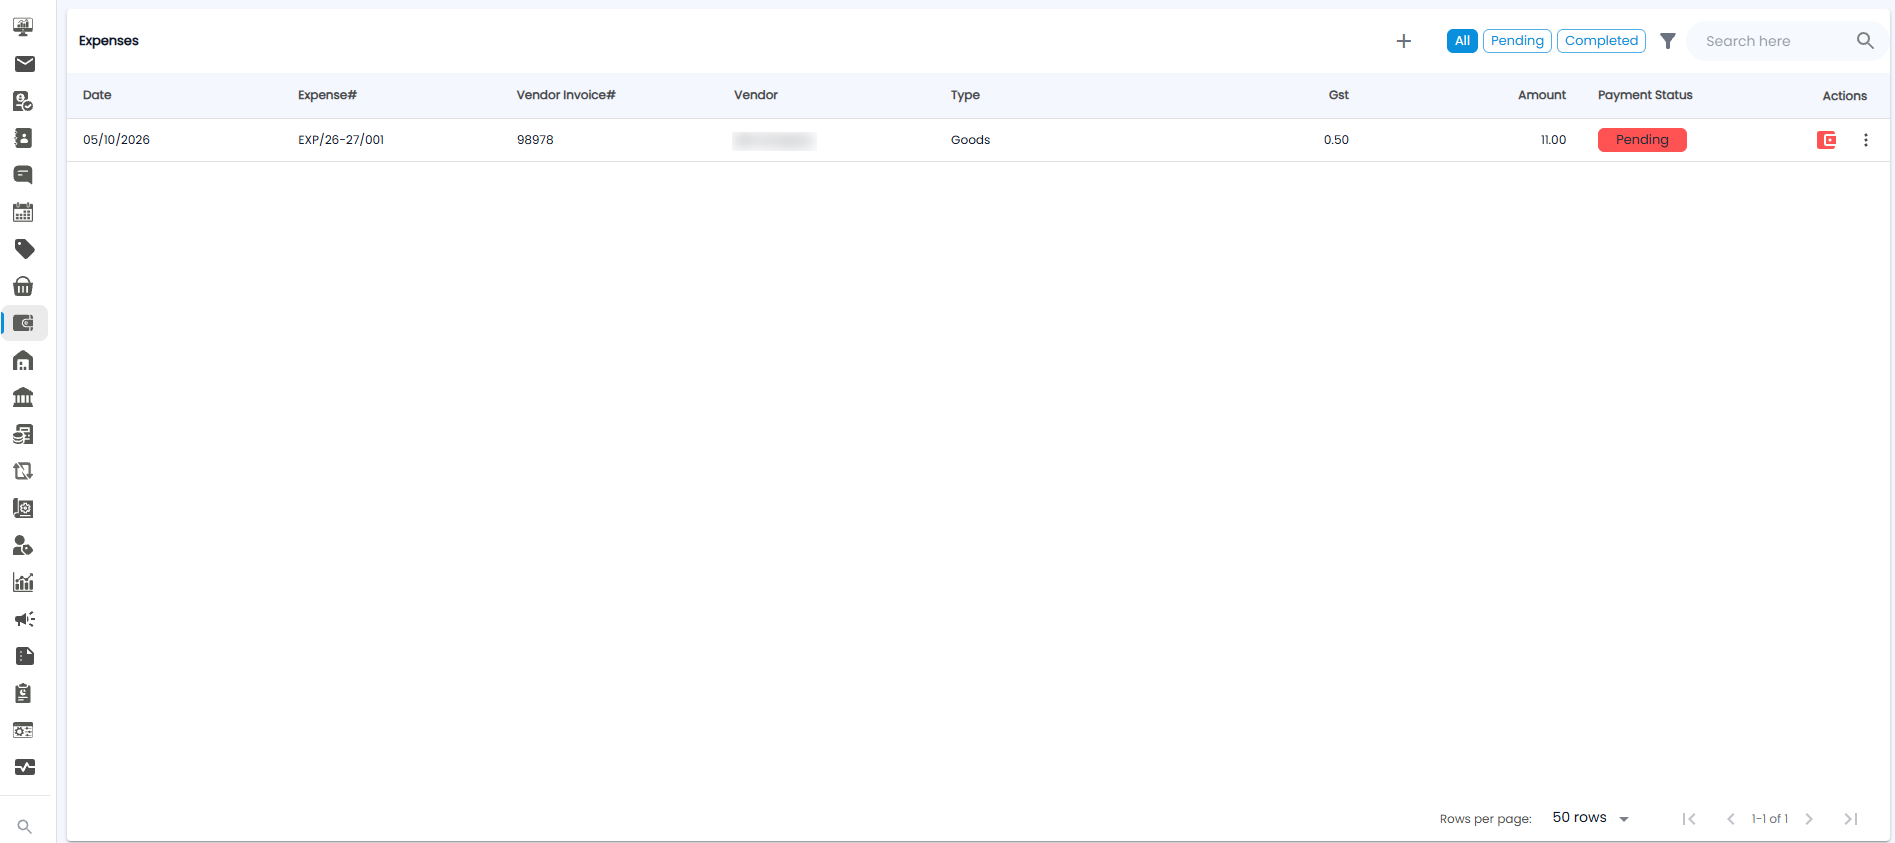
An expense records a vendor bill that is not a stock purchase — rent, services, repairs, or a capital item. Open Payments > Expenses.
The Expenses List
Use All, Pending, and Completed at the top to filter the list, the filter icon to narrow it, and Search here to find one.
| Column | What it shows |
|---|---|
| Date | The date of the expense |
| Expense# | Your expense number, for example EXP/26-27/001 |
| Vendor Invoice# / Vendor | The number on the vendor's bill, and who billed you |
| Type | Goods or Service |
| Gst / Amount | The GST on the bill, and the bill amount |
| Payment Status | Pending (red) until it is paid, then Completed |
| Actions | The red payment icon pays the expense (see Paying an Expense); ⋮ gives more actions |
The list shows 50 rows per page; use the arrows at the bottom to move between pages.
Recording an Expense
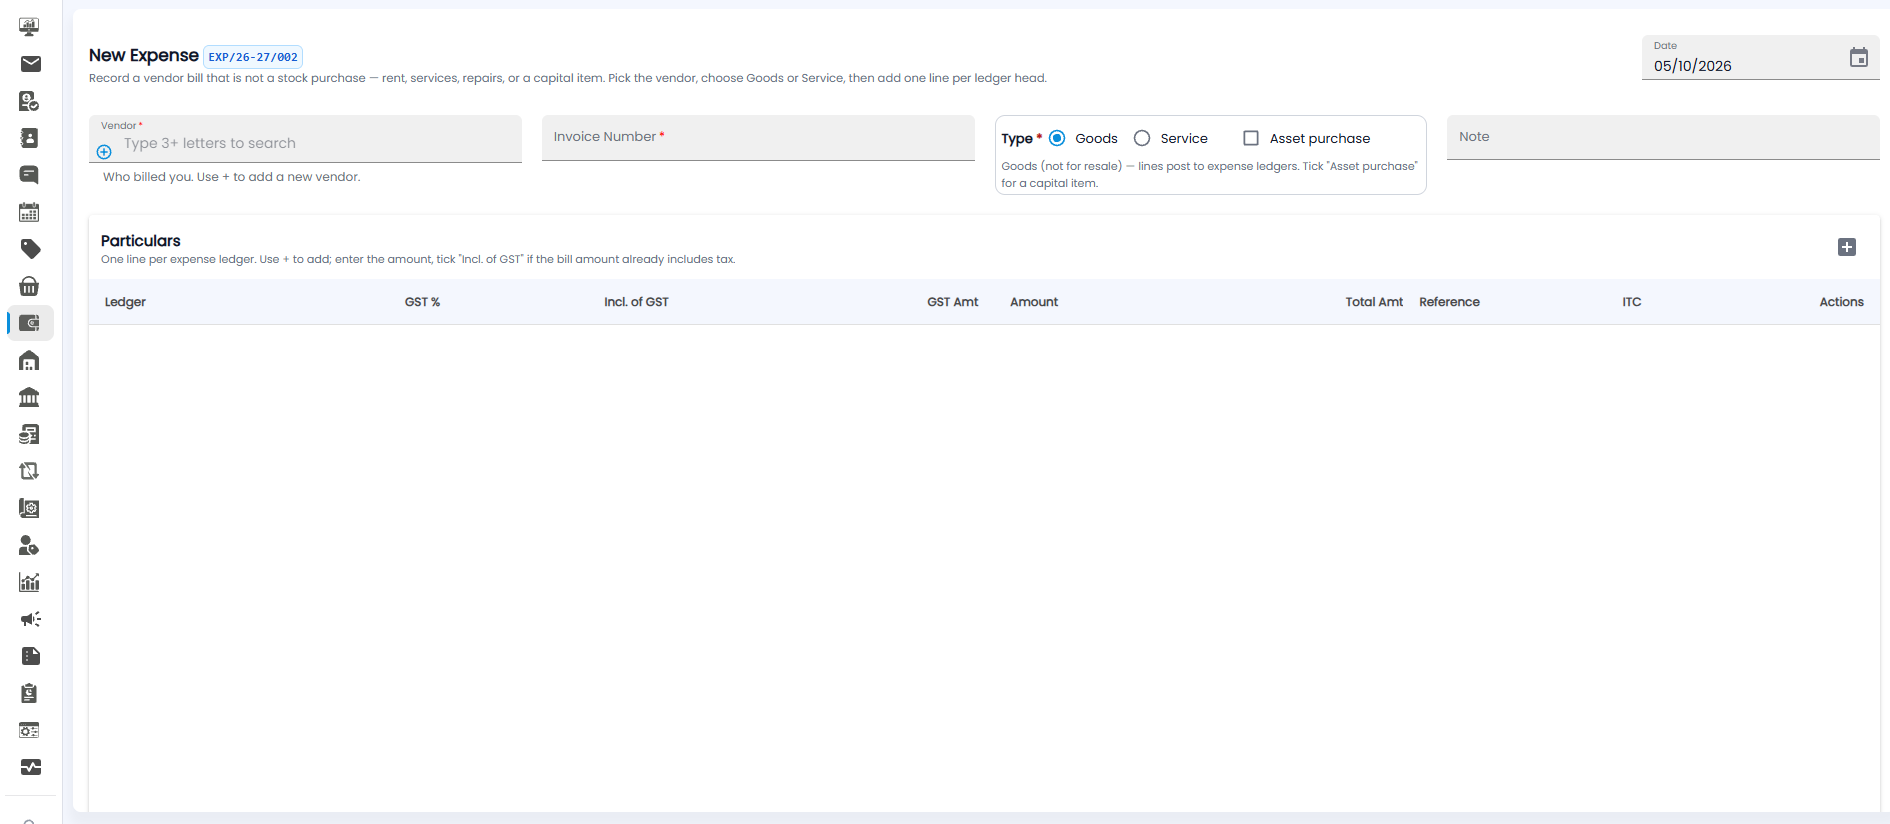
Click +. The New Expense form opens with the next expense number, for example EXP/26-27/002, and today's Date at the top right.
| Field | Required | Description |
|---|---|---|
| Vendor | Yes | Who billed you. Type at least 3 letters to search, or click + to add a new vendor |
| Invoice Number | Yes | The number on the vendor's bill |
| Type | Yes | Goods (not for resale) or Service. The lines post to expense ledgers. Tick Asset purchase for a capital item |
| Note | No | Any notes |
Particulars
Add one line per expense ledger. Click + at the top right of the Particulars table to add a line, then fill in:
| Column | Description |
|---|---|
| Ledger | The expense ledger, for example rent or repairs |
| GST % | The GST rate on the line |
| Incl. of GST | Tick it if the amount you enter already includes tax |
| GST Amt / Total Amt | Worked out from the amount and GST rate |
| Amount | The line amount |
| Reference | Any reference for the line |
| ITC | Whether you claim the input tax credit on the line |
| Actions | Remove the line |
Paying an Expense
On the Expenses list, click the red payment icon on a Pending expense. The Payment Voucher opens with the vendor already filled in.
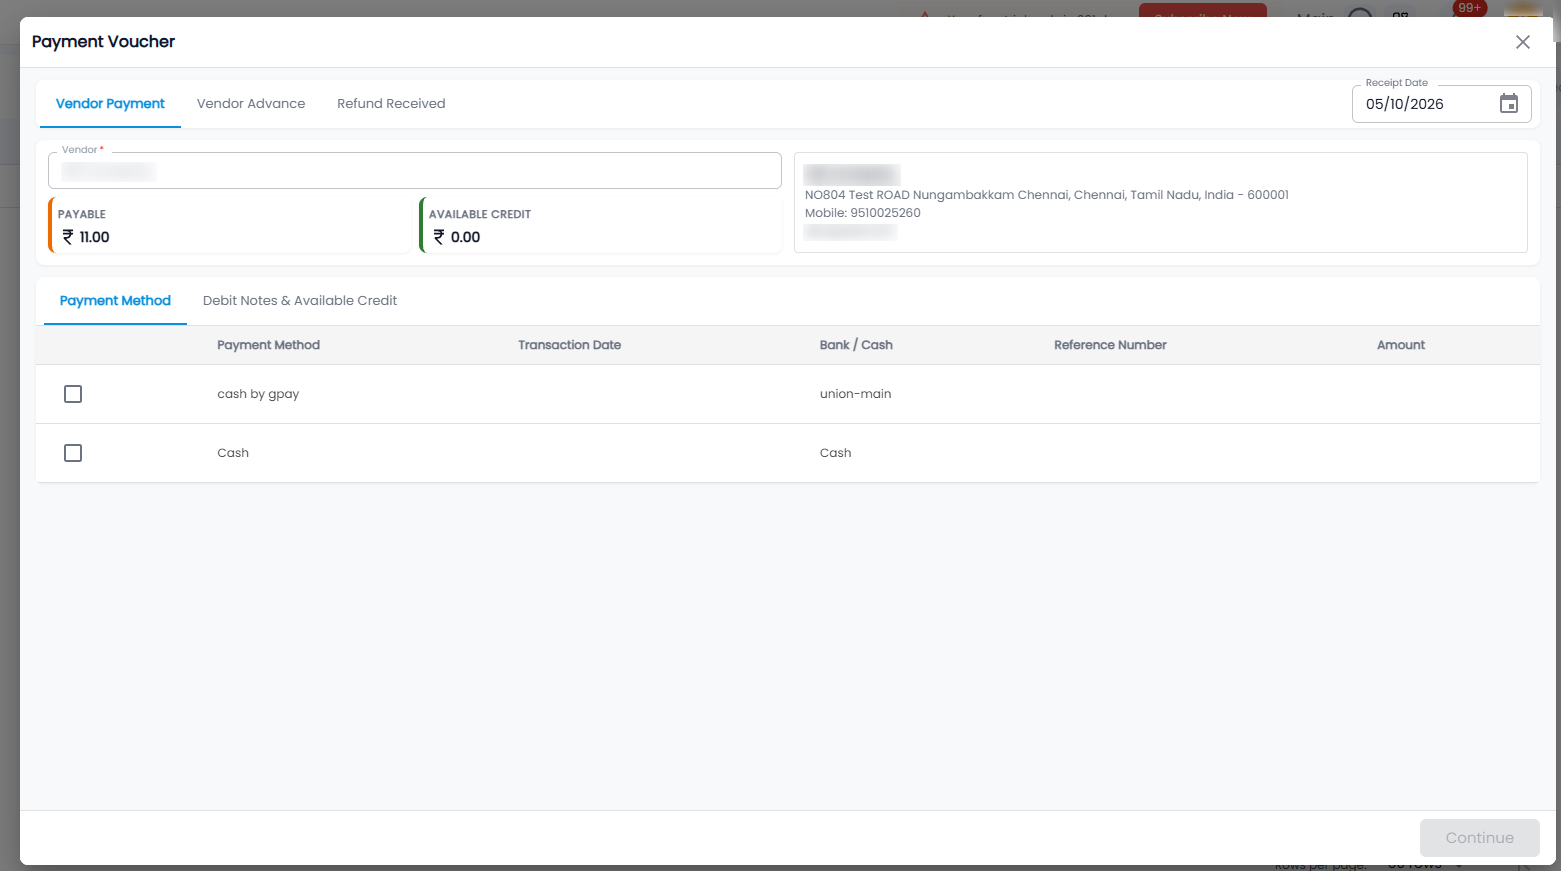
- Stay on the Vendor Payment tab. (Vendor Advance and Refund Received are also here, as on Purchases > Payments)
- Check the Receipt Date at the top right (today by default)
- Check the vendor's Payable (what you owe, including this expense) and Available Credit. Their address, mobile, and email appear on the right
- On the Payment Method tab, tick how you paid — for example cash by gpay from union-main, or Cash — and fill in the Transaction Date, Reference Number, and Amount
- On the Debit Notes & Available Credit tab, use any credit you already have with the vendor
- Click Continue. It stays greyed out until a payment method is filled in
Once the expense is fully paid, its Payment Status changes to Completed.