
How do I book a repair in Tazk POS?
Open Services → New Service and click +. On the job card, pick the customer, choose the service type (Walkin, Pick & Drop or Re-entry), fill in the product details and the reported issues, add before photos and click Save. Then work the card: assign an engineer, add an estimate and parts, change the status as the repair moves on, collect payment and print the jobsheet.
What does the Service list show?
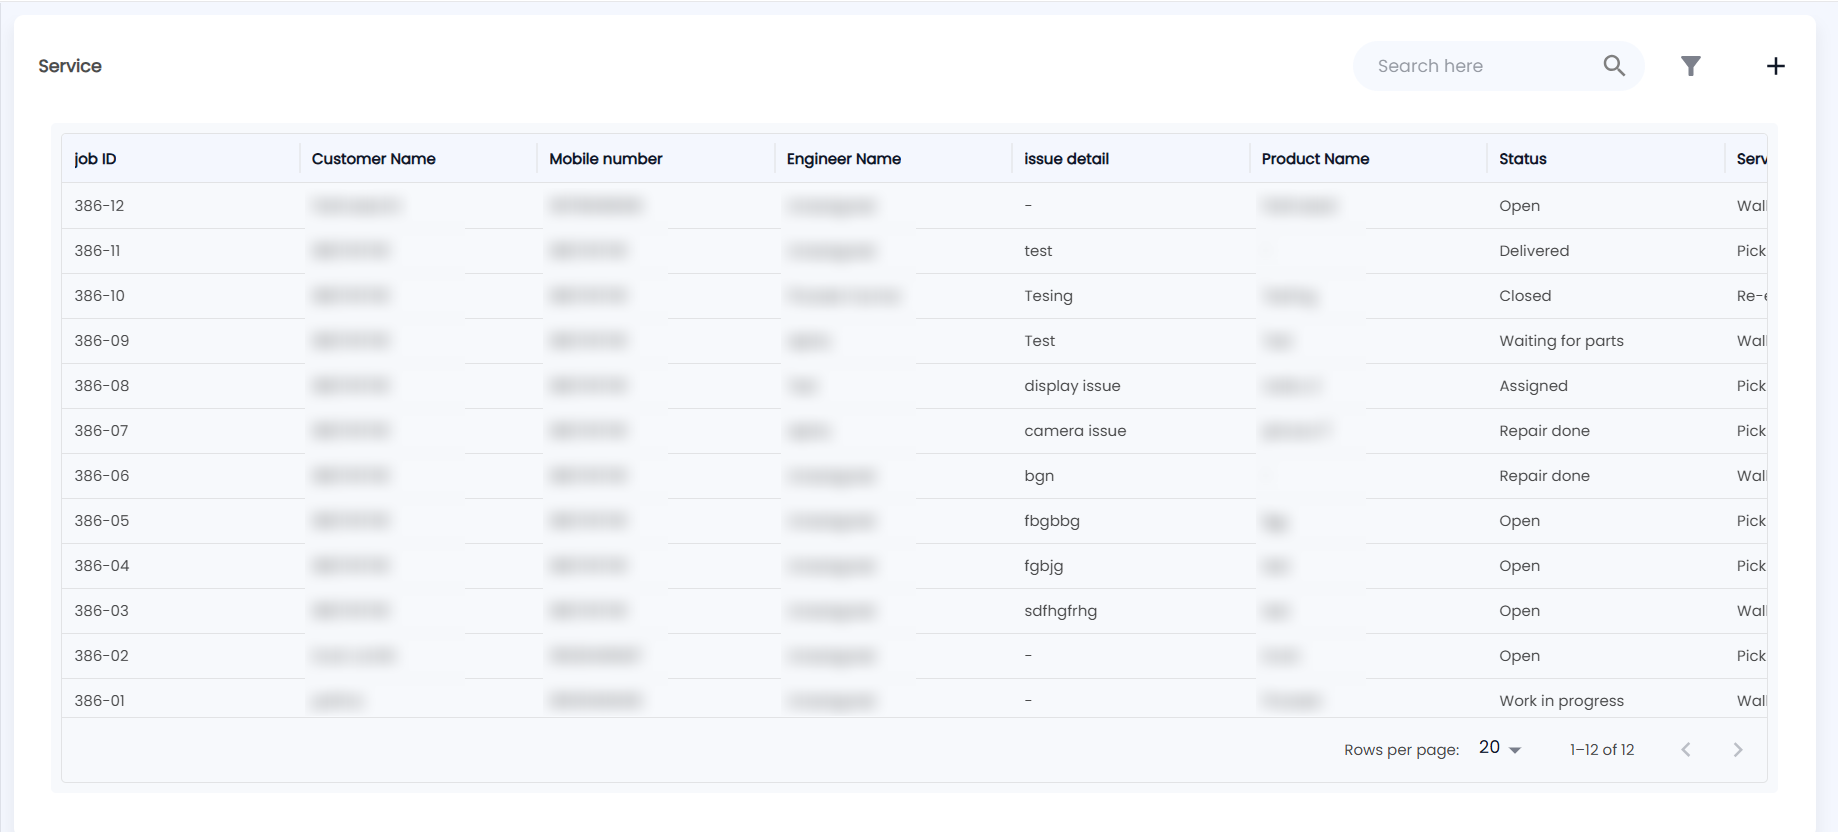
Open Services → New Service. The Service list shows every job card, with Search here, the filter icon and + at the top:
| Column | Description |
|---|---|
| job ID | The job card number, for example 386-12 |
| Customer Name / Mobile number | Who the repair is for |
| Engineer Name | Assigned engineer, or Unassigned |
| issue detail / Product Name | What is being repaired and why |
| Status | Open, Assigned, Work in progress, Waiting for parts, Repair done, Delivered or Closed |
| Service Type | Walkin, Pick & Drop or Re-entry |
| Source | Counter (booked here) or Online (requested from your webstore) |
| Actions | Open job card |
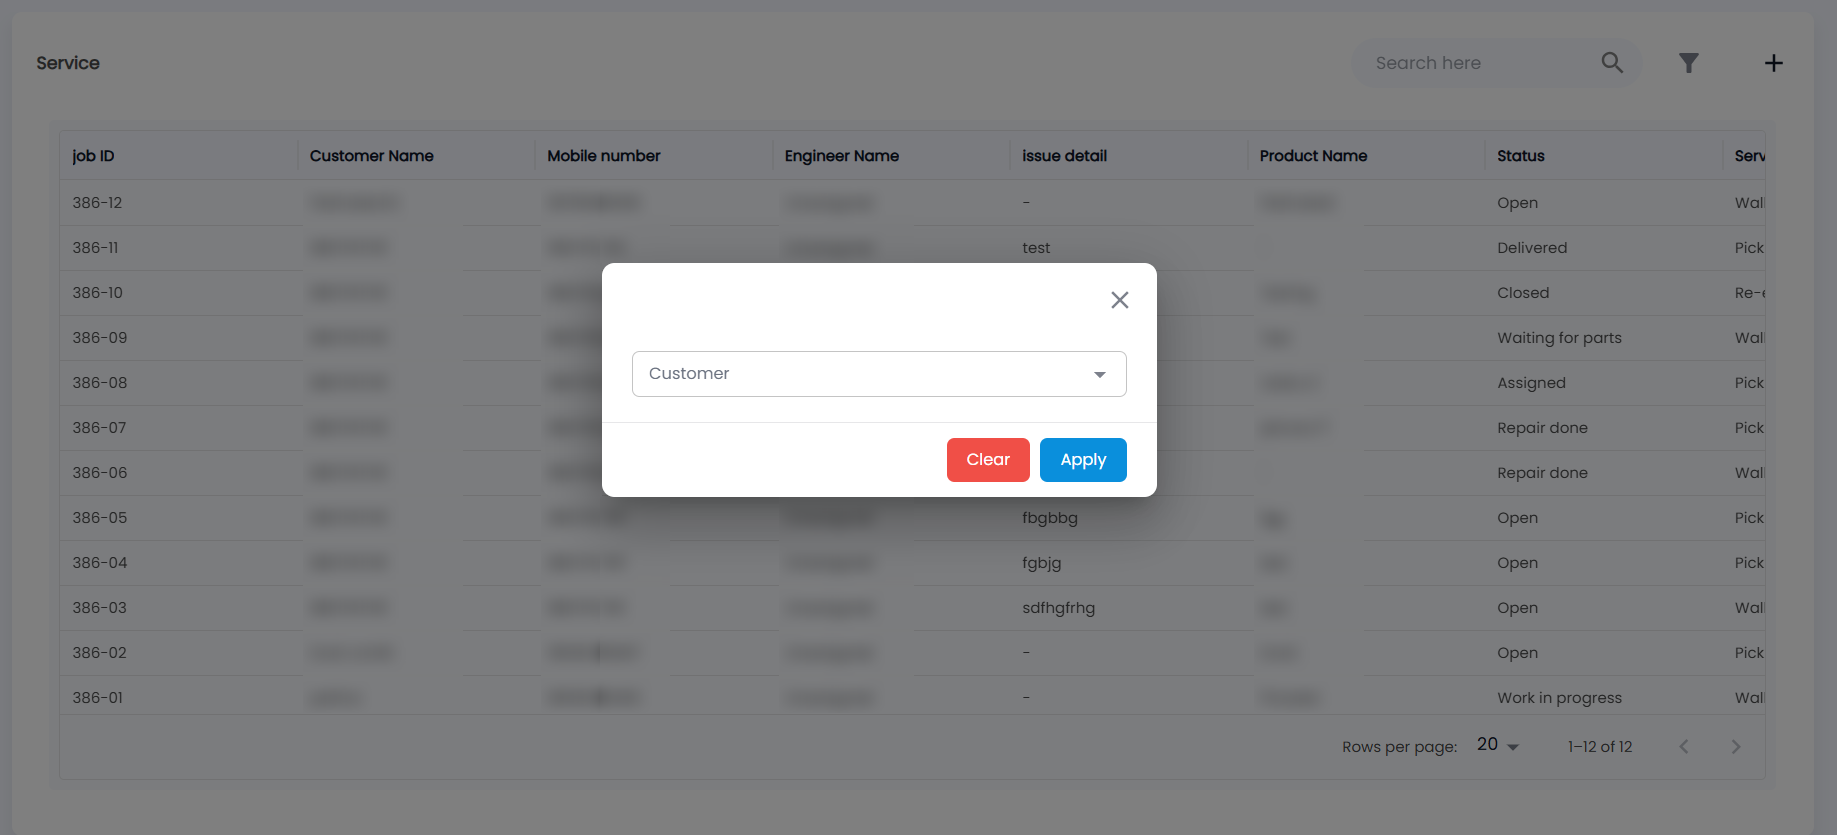
Search the list, or click the filter icon and choose a Customer, then Apply (or Clear). The list is wide — scroll right for Service Type, Source and Actions. Click a row (if your role can edit) to open the job card.
How do I create a job card?
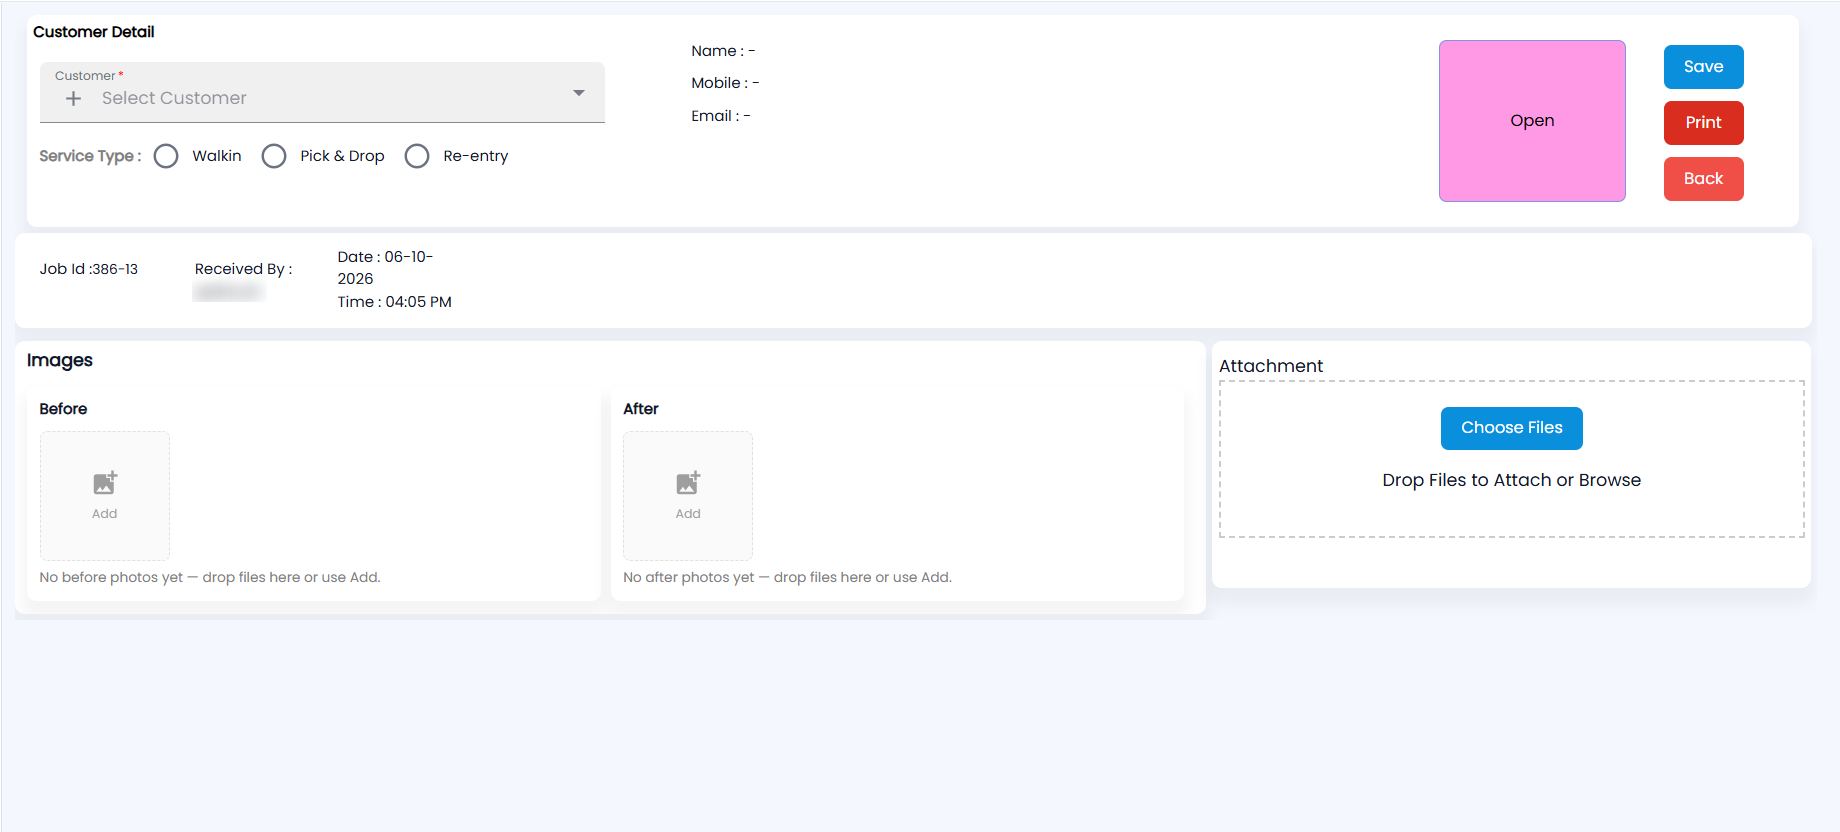
- Click + on the Service list (shown if your role can create). A new job card opens with its Job Id (for example 386-13), Received By (you), and the Date and Time. The status box at the top right reads Open.
- Under Customer Detail, pick the Customer (required), or click + to create a new one. Their Name, Mobile and Email appear beside it.
- Choose the Service Type: Walkin, Pick & Drop or Re-entry. Re-entry shows the customer's previous service date.
- Once the customer is chosen, fill in the product: Brand, Model, Serial, Date Of Purchase, warranty, Product Condition and an Important Note, plus any extra fields your company has added.
- Add the issues (Type, Issue, Remarks).
- Add photos under Images — Before now, After once repaired; drop files on the box or click Add. Attach other files under Attachment with Choose Files, or drop them there.
- Click Save. Print opens the jobsheet and Back returns to the list.
How do I work a job card?
Open the job card. The action bar shows the status, the reported fault, the engineer's remarks, the engineer and the target delivery, with these buttons:
| Button | What it does |
|---|---|
| Change status | Pick the New status from the moves allowed from the current one, with optional remarks. A closed card shows Closed instead. |
| Assign engineer / Reassign engineer | Put an engineer on the job |
| Add estimate / Update quote | Set the Approx estimate, Advance taken and Target delivery |
| Pick & Drop | For Pick & Drop jobs: move the pickup status, and record the pickup agent, agent phone, slot date and slot (Morning, Afternoon or Evening) and the pickup location |
Add parts and labour with Product, Quantity and Unit Price, then Add. The parts table shows Product, Model, HSN, GST, Qty, Unit Price and Amount. Online requests also show a pickup panel with the pickup address, slot, agent and the collected and returned times. Saved job cards also have Customer Interaction (log what was discussed) and a Timeline.
How do I collect payment and close the job?
The Billing panel shows ESTIMATE, COLLECTED, BALANCE and PAYMENTS, with a list of payments taken. Click Collect payment to take an advance, a part payment or the balance — see Service Payment for the steps. When the work is done and billed, use Close Jobcard and confirm to set the status to Closed.
How do I print the jobsheet?
Click Print. The Jobsheet preview shows the jobsheet number, care centre, customer, product, problem and service details, billing summary, payments and terms. Choose A5 or A4 and click Print, or New Jobsheet to start the next card.