
How do I find and manage employees in Tazk Payroll?
Click Contacts in the sidebar to open the Employee Directory. Cards at the top count total employees, new joiners this month, employees on notice and departments. The table lists every employee with their code, department, reporting manager, category, joining date, role and status. Search, filter or sort it, import employees from Excel, and click a row to open the employee's page with their loans, leave, salary, attendance and timeline.
Accessing the Employee List
Click Contacts in the sidebar. The Employee Directory opens ("Manage and explore your organization's workforce"), with Employee selected in the left panel and the employee count beside it.

What do the cards at the top show?
| Card | What it counts |
|---|---|
| Total Employees | All employees |
| New Joiners | Employees who joined this month — click the card to list only them |
| On Notice | Employees with a relieving date ahead — click the card to list only them |
| Departments | Departments across the organization |
While a card filter is on, its caption reads "Filtering — click to clear". The cards are shown to Administrators, HR Managers, Managers and Front Desk users.
List Columns
| Column | Description |
|---|---|
| Code | Unique employee code |
| Employee | Photo or initials, name and designation. A map-pin button (View location) appears when the employee has a latitude and longitude. |
| Department | The employee's department |
| Reporting Manager | Who they report to ("—" if not set) |
| Category | Employee category — for example Confirmed, Probationers, Temporary |
| Date of Joining | For example 07 Jan 2026 |
| Role | User role — Employee, Manager, etc. |
| Status | Active, Probation (until the probation end date), On Notice (serving notice) or Relieved. Hover for the date. |
| Actions | Follow / UnFollow — see below |
Toolbar Features
- + Create Contact (left panel) — opens the New Employee form. See Creating a New Employee.
- Search by name, code, or designation — results update as you type.
- Import — add employees in bulk from an Excel file. See below.
- Filters — choose one or more Locations, Departments, Roles and Categories, then Apply. Clear resets them. The button shows how many filters are on.
- Sort — click a column heading to sort; click again to reverse.
- Rows per page — 20, 50 or 100, with first / previous / next / last page buttons.
What does the green button in the Actions column do?
It is Follow. Following an employee sends you their attendance notifications — absent, present, late login, early check-out and early check-in. Once you follow someone the icon changes and the button becomes UnFollow. It is shown to Administrators, HR Managers and Managers, and not on your own row.
How do I import employees in bulk from Excel?
Use Import to add many employees at once from an Excel file instead of creating them one by one. It is available to Administrators, HR Managers and Managers who can create employees.
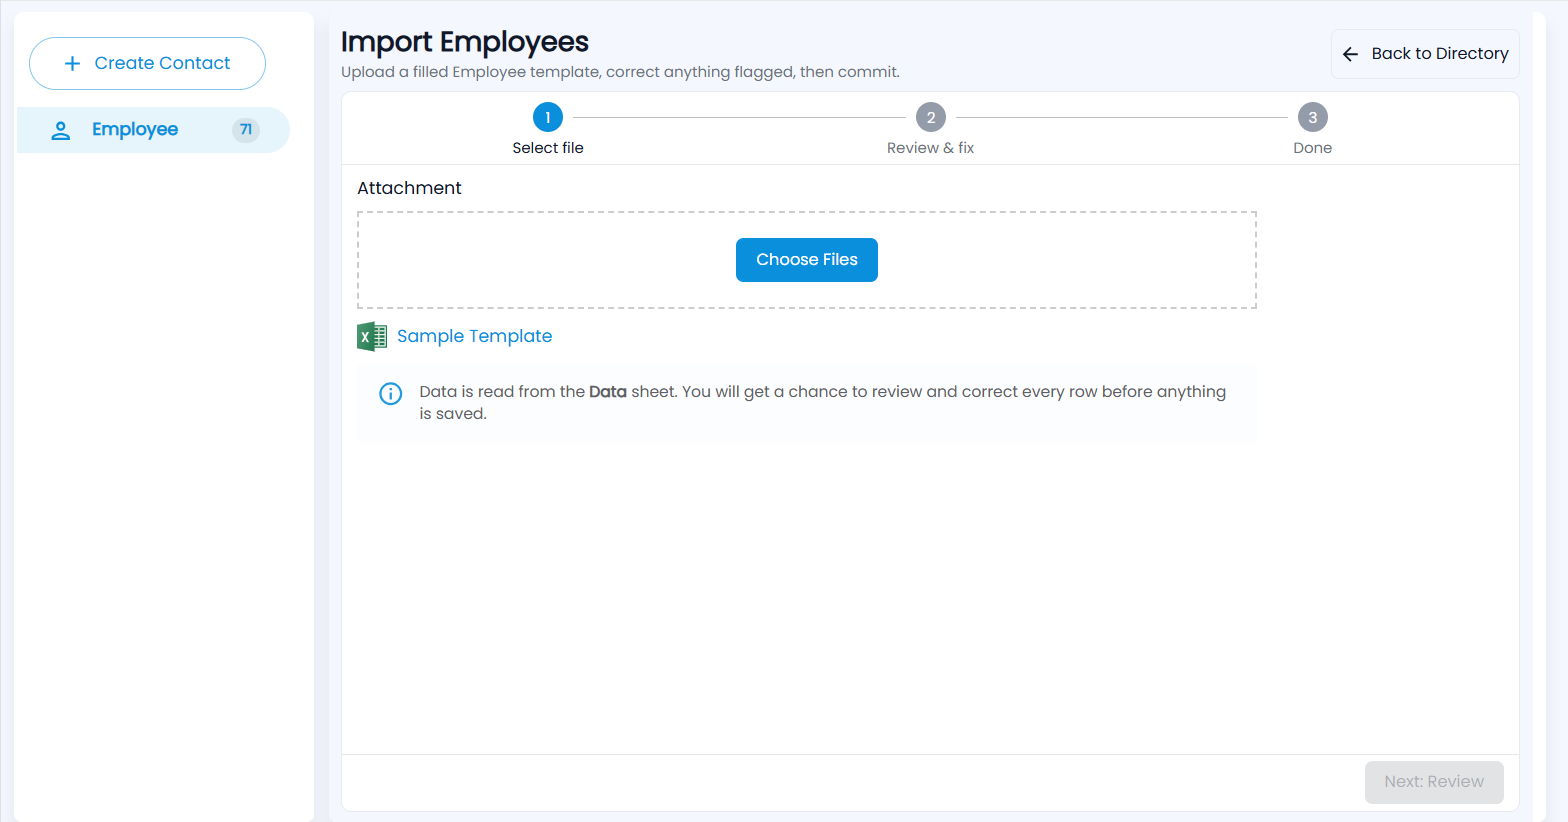
Click Import on the Employee Directory. The Import Employees page opens ("Upload a filled Employee template, correct anything flagged, then commit") with three steps — Select file, Review & fix and Done. Back to Directory returns to the list at any time.
Step 1: Select file
- Click Sample Template to download the Excel template. Fill in the Data sheet, one employee per row; the Details sheet explains each column.
- Click Choose Files and pick your filled file (.xlsx only). Data is read from the Data sheet.
- Click Next: Review.
| Column | Required | Rule |
|---|---|---|
| Employee Code | Yes | Up to 20 characters, unique |
| Join Date | Yes | DD-MM-YYYY, YYYY-MM-DD or an Excel date |
| First Name / Last Name | First name | — |
| Gender | Yes | Male or Female |
| Primary Contact | Yes | 10-digit mobile number |
| Yes | Unique | |
| Date Of Birth | Yes | At least 18 years old, and before the join date |
| Full Address, Zip Code, City, State, Country | Zip code, state, country | — |
| Username | Yes | No spaces, starting with your company prefix — for example abc.john; unique |
| Password | Yes | 8+ characters with upper case, lower case, a number and a special character (#?!@$%^&*-) |
| Designation, Department | No | New names are created on upload |
| Category | Yes for Payroll | New names are created on upload |
| Location, User Role | Yes | Must already exist in Tazk |
If a required column is missing, the file is rejected with a message naming the column — download the Sample Template again and copy your data into it.
Step 2: Review & fix
- Every row is checked against the rules above and against existing employees. Counters show Total rows, Valid and Rows with errors.
- Click any highlighted cell to correct it right there — nothing is saved until every error is fixed.
- Departments, designations and categories that do not exist yet are marked New and listed under Will be created on upload.
- Choose a different file starts again with another file.
- Click Upload N employee(s). It stays disabled until all errors are fixed and your subscription has room for that many employees — hover over it to see why.
Step 3: Done
Import complete shows how many employees, departments, designations and categories were added. Click Back to Directory to see them in the list.
What is on an employee's page?
Click an employee's row to open their page.
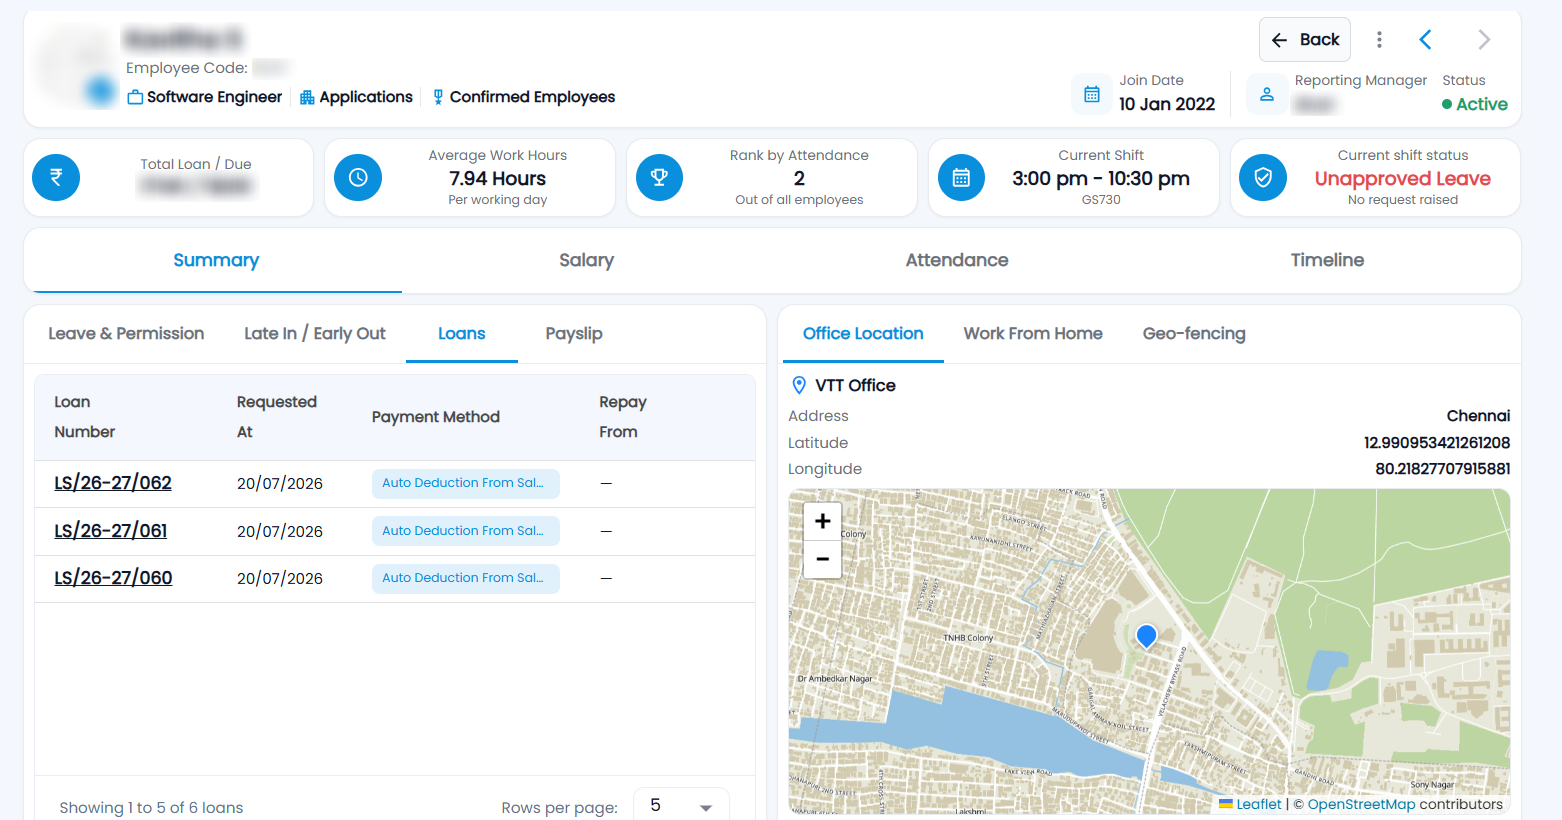
- Header — photo (the pencil badge uploads a new one), name, employee code, designation, department and category; join date, reporting manager and status. Back, the ⋮ menu and previous / next arrows are on the right.
- Cards — Total Loan / Due, Average Work Hours (per working day), Rank by Attendance (out of all employees), Current Shift and Current shift status — for example Clocked In, Late In, On Leave, Holiday, Week Off, Not clocked in, or Unapproved Leave when they are absent with no approved request.
Summary tab
- Leave & Permission — type, status, date, reason and who approved.
- Late In / Early Out — date, shift, check-in and how late, check-out and how early.
- Loans — approved loans with loan number, requested date, payment method, repay from, amount, outstanding, deducted, tenure and status. Click a loan number for its ledger.
- Payslip — each month's earned gross, deductions and net pay, with View Payslip and Download Payslip.
- Office Location — the assigned office with address, latitude, longitude, a map and Open in Maps.
- Work From Home — the employee's work-from-home locations.
- Geo-fencing — the places they may mark attendance from, each with a radius in metres. Use + to add one (location name, latitude, longitude, radius), or edit and delete.
Salary tab
Salary Structure — structure name, salary template, effective from, gross salary, monthly and annual CTC, net pay, and the earnings and deductions. Previous Month — the last processed month's salary assigned, earned gross, LOP and other deductions, extra pay, OT pay and net pay.
Attendance tab
The month's working days, present, paid leave, LOP, OT, late in and early out; today's shift details (shift, schedule, first in, last out, worked); and a month calendar marking holidays, present days, weekly offs and LOP.
Timeline tab
Everything that happened to the employee — date and time, activity, who did it and status. Search, filter by event type and date, and sort newest or oldest first.
Employment, device and login details
Below the tabs: Employment Details; Device Info (registered device, last active, last login) with Deregister; Address; and User Info with Reset Password and the Enable App Access switch.
How do I edit, relieve or delete an employee?
Open the employee's page and click ⋮:
- EDIT — opens the Edit Employee form (the same four steps as creating one).
- RELIEVE — choose the relieving date (not before the joining date) and the reason — Resignation, Termination, Retirement, Absconding or Contract End — and click Submit.
- DELETE — type the employee's user name to confirm, then click Delete this user.