
Overview
The Approvals page is where you raise requests that need someone else's sign-off, and track what happens to them. Click Approvals in the sidebar to open it.
There are three kinds of request, each on its own tab at the top of the left panel:
| Tab | Use it to |
|---|---|
| Claims | Claim money back against a bill. |
| Renewals | Request a renewal for an asset, such as its insurance or warranty. |
| Callback | Report a problem with an asset and ask for it to be looked at or replaced. |

The Request List
Each tab has the same layout:
- Request count — the number of requests on this tab, for example 0 requests.
- Status filters — click All, Pending, Approved, Rejected, or Cancelled to show only requests with that status. The number on each shows how many there are.
- Filter icon — narrows the list further.
- + button — opens the New Request form.
Click a request in the list to see its details in the right panel. Until you pick one, the panel says Select a … request to see details.
Verifier and Approver
Every New Request form shows, at the top, who will handle your request:
- Verifier — the person who checks the request.
- Approver — the person who approves or rejects it.
If either shows No Verifier or No Approver, nobody has been set up for that role yet. Ask your administrator to set one up.
Adding a Claims Request
- Navigate to Approvals in the sidebar
- Select the Claims tab
- Click the + button
- Fill in the claims form
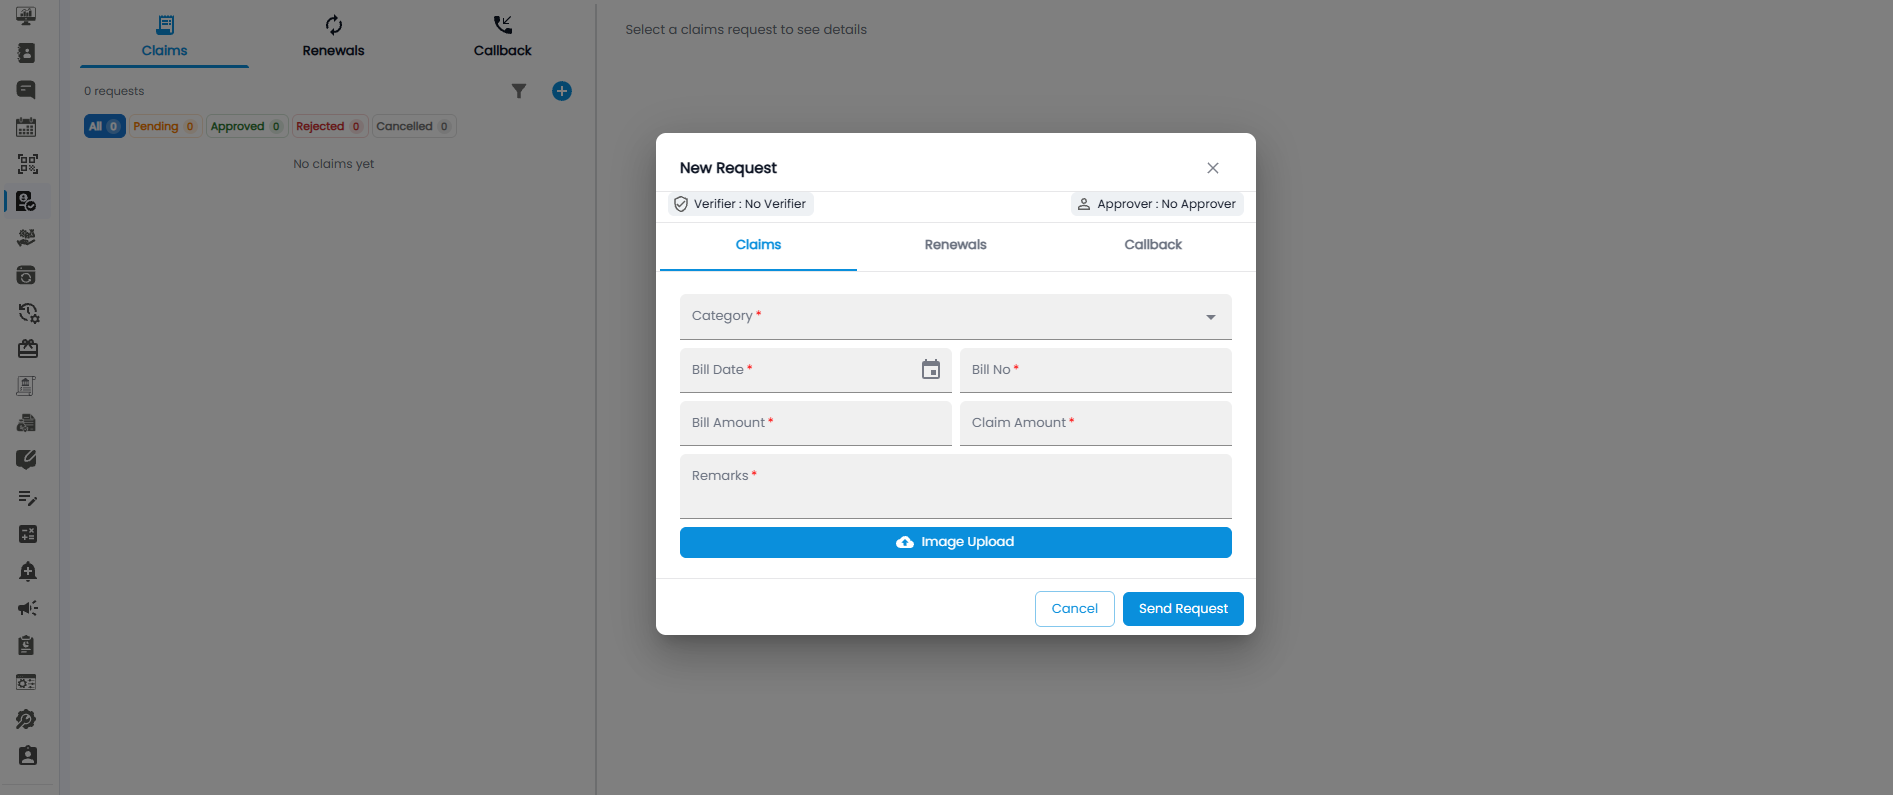
Form Fields
| Field | Required | Description |
|---|---|---|
| Category | Yes | The kind of claim. Pick one from the dropdown. |
| Bill Date | Yes | The date on the bill. Click the calendar icon to pick it. |
| Bill No | Yes | The number printed on the bill. |
| Bill Amount | Yes | The total amount on the bill. |
| Claim Amount | Yes | The amount you are claiming. |
| Remarks | Yes | A short explanation of the claim. |
| Image Upload | No | Attach a photo or scan of the bill. |
Adding a Renewals Request
- Navigate to Approvals in the sidebar
- Select the Renewals tab
- Click the + button
- Fill in the renewals form
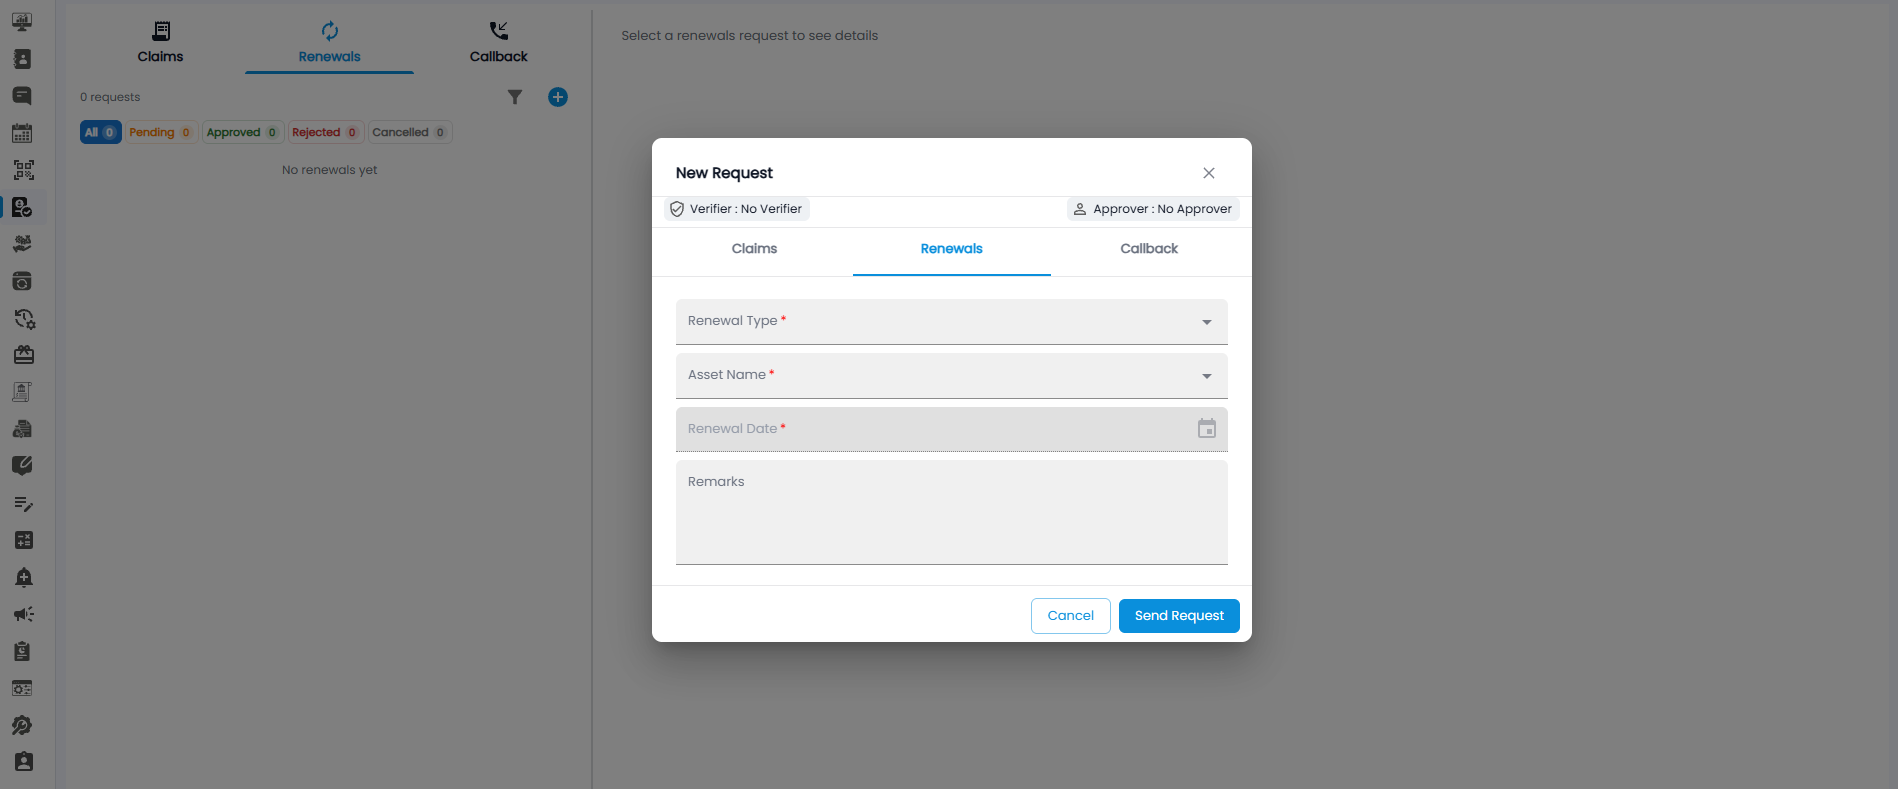
Form Fields
| Field | Required | Description |
|---|---|---|
| Renewal Type | Yes | The kind of renewal, such as insurance or warranty. Pick one from the dropdown. |
| Asset Name | Yes | The asset the renewal is for. |
| Renewal Date | Yes | The renewal date. Click the calendar icon to pick it. |
| Remarks | No | Any extra detail for the verifier and approver. |
Adding a Callback Request
- Navigate to Approvals in the sidebar
- Select the Callback tab
- Click the + button
- Fill in the callback form
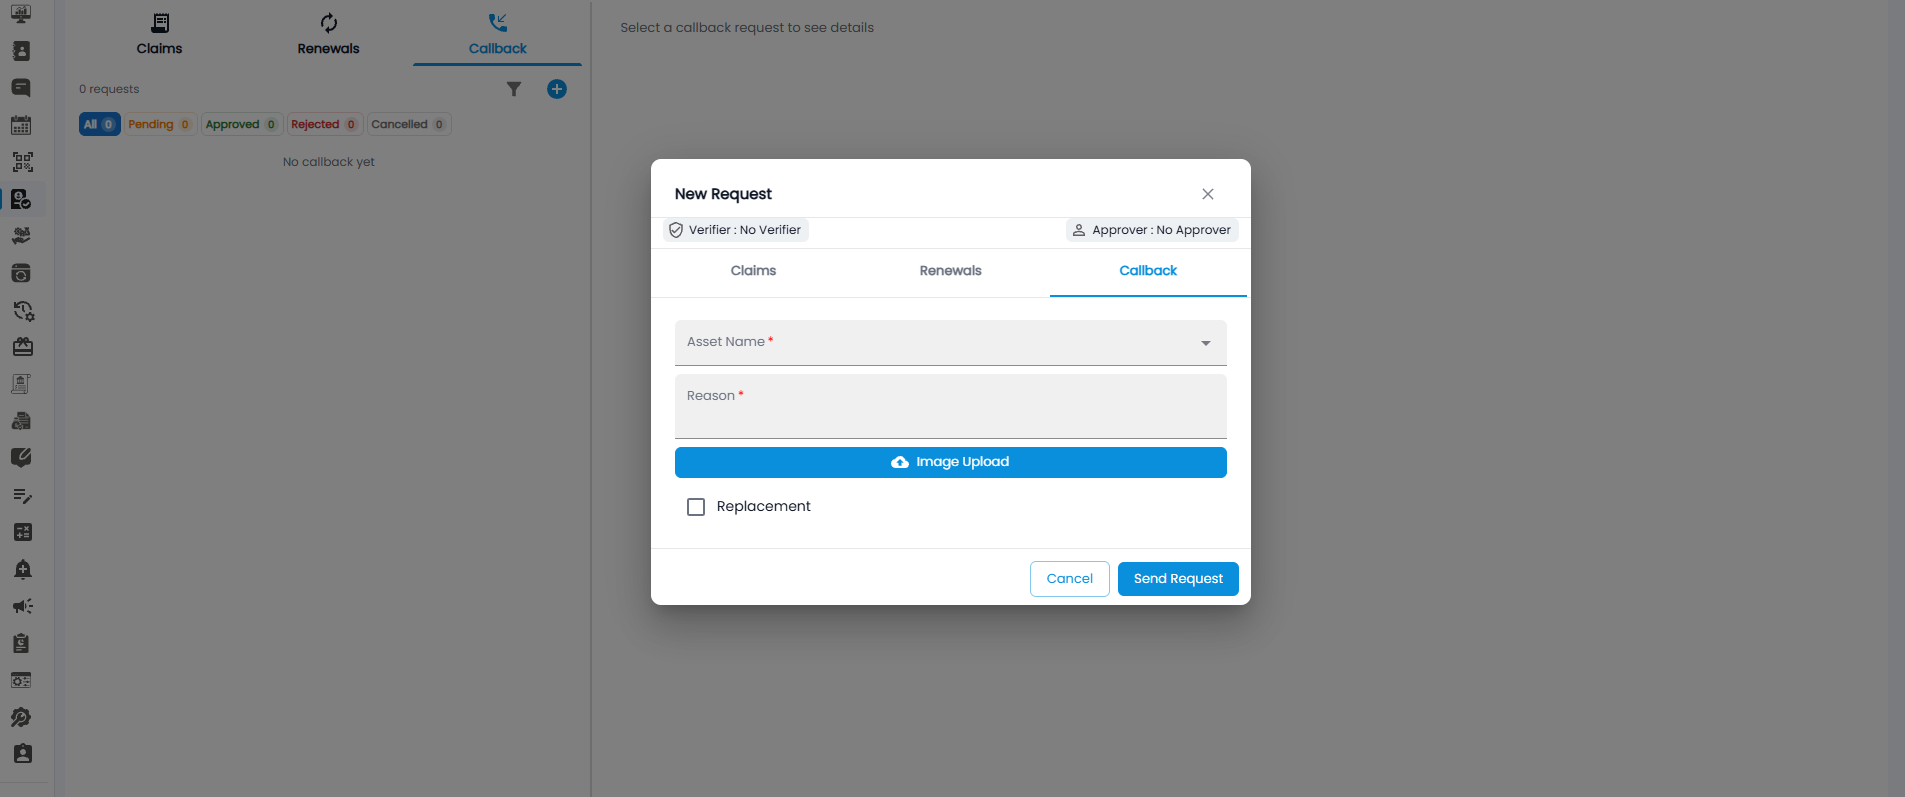
Form Fields
| Field | Required | Description |
|---|---|---|
| Asset Name | Yes | The asset you are raising the callback for. |
| Reason | Yes | What is wrong with the asset. |
| Image Upload | No | Attach a photo that shows the problem. |
| Replacement | No | Tick this box if you want the asset replaced. |
Submitting the Request
- Fill in all required fields, marked with a red asterisk (*)
- Upload an image if the form has Image Upload (optional but recommended)
- Click Send Request
Click Cancel or the × in the top-right corner to close the form without sending. You can also switch between the Claims, Renewals, and Callback tabs inside the form without closing it.